Sigma Online User Manual
Importing Data Manually
- Kim Blake
- Tom Anderton
Introduction
The Importing activity allows you to import data into the database with various file formats. This data can be for Channels, Site information, Meter Readings or Associated Data. The importing can be manually done as and when required (see below), or the importing can be scheduled to load at a desired frequency picking up data from an email account, FTP or FTPS. To schedule imports, click here for more information.
You can choose to import data immediately, or schedule it to regularly import automatically.
To schedule imports to run automatically on a recurring basis, click here.
This section will show you how to import data immediately.
Importing data
- Click on Importing

- Click

Adding an Importer
If the Importer isn't in the Favourites list, you need to add it in.
- Click
 to open the search wizard
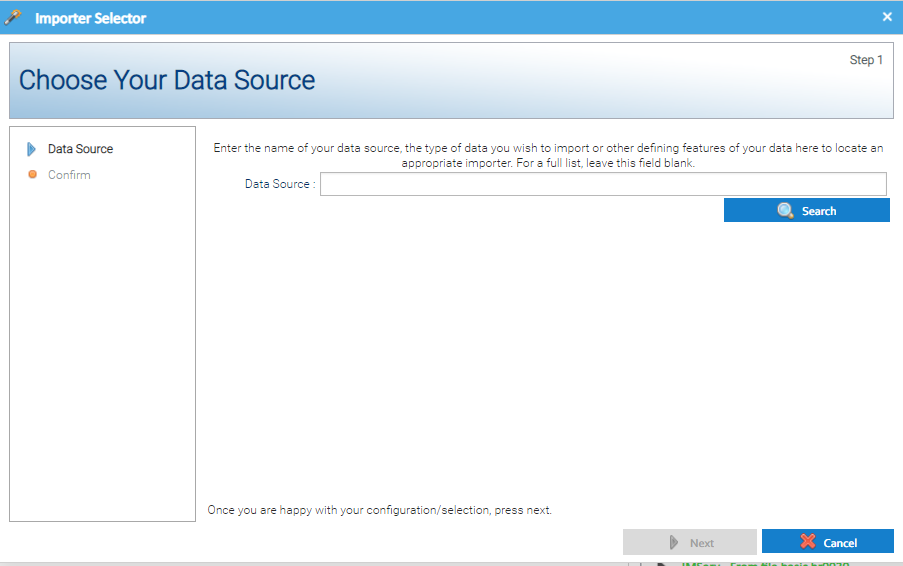
- Enter the name of your data source (e.g. "IMServ" or "SIPe") and search to find an appropriate importing option (buffer), select it and click OK
- Click Next to confirm your choice
- Click Finish
- Click

- Click

The Importer will now show in the Favourites list and ready to be used.
Note: You will not need to do this the next time you import, as the Importer will already be in the Favourites list.
Importing the Data
Once the Importer has been added to the Favourites list:
From the Importing Activity:
- Click
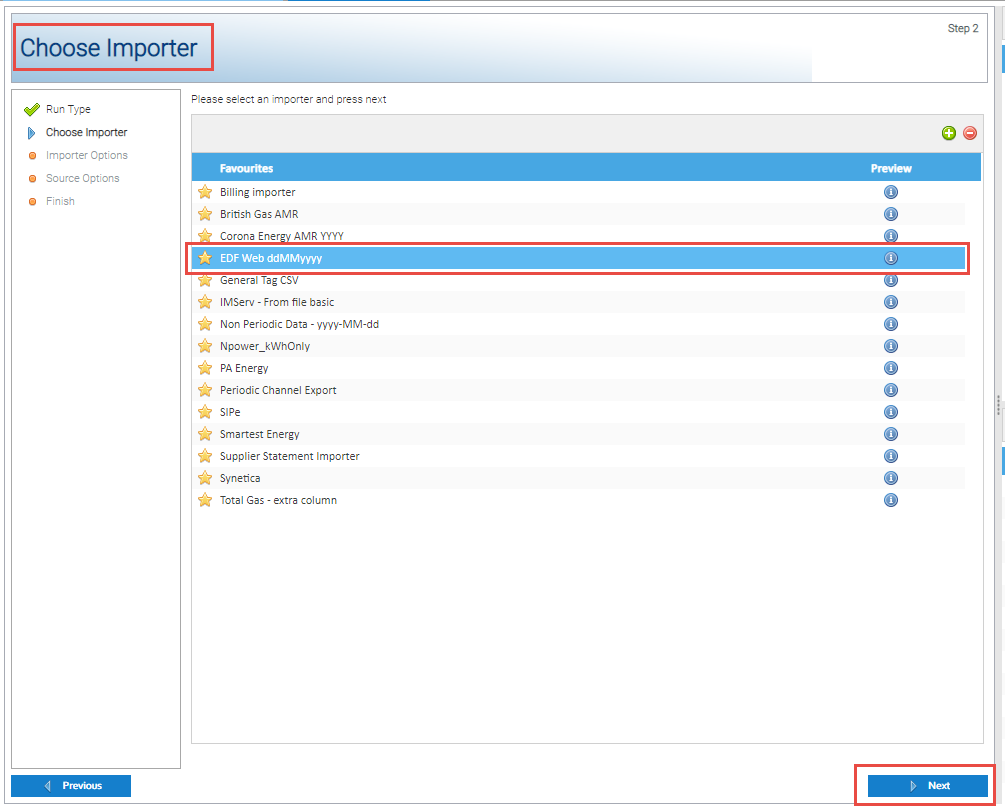
- Highlight the Importer you want to use
- Click
 to move to the Importer Options
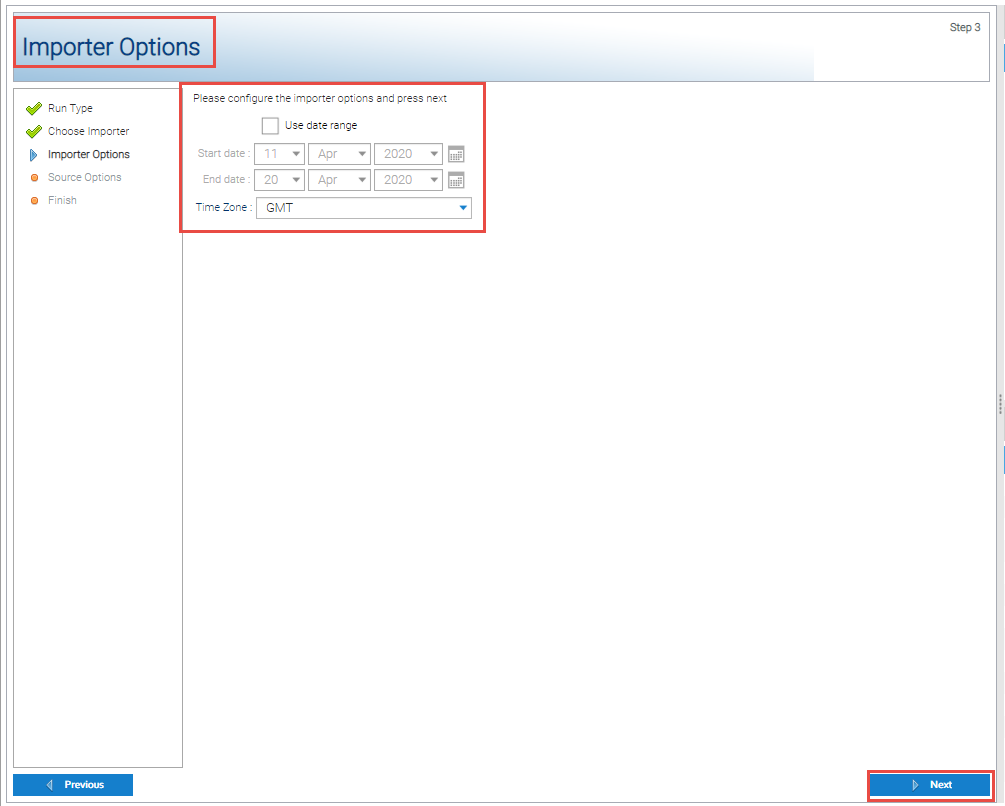
- Amend the import options as necessary:
- Use date range - generally, no change is required
- Time Zone - Best practice is either GMT or Europe/London, depending on whether your data includes the clock change data or not (ie 1 hour extra in October, 1 hour less in March)
- It is recommended that you use the same Time Zone as the Channels you are importing data into, ie
- If you data does NOT include the clock change data, use GMT
- if your data DOES include the clock change data, use Europe/London
- It is recommended that you use the same Time Zone as the Channels you are importing data into, ie
- Click to move to the Source Options
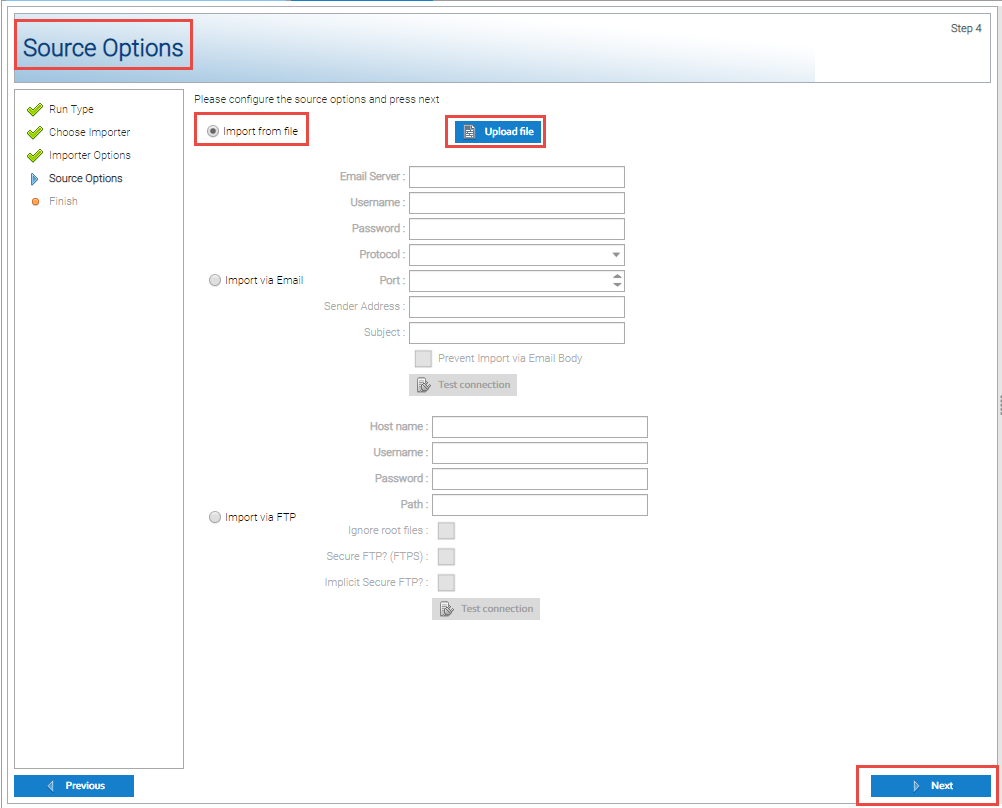
This is where you specify where the file for importing should be retrieved from.
The options are:
- Import from file - the file is stored on the local computer and can be uploaded via the screen
- Import via Email - the file is attached to an email in a mailbox
- Import via FTP - the file is located on an FTP server
To manually import the data:
- Click
 and browse to find the file you want to import
 - Click
 to move to finish the import
Note: Once you have uploaded the file, the Upload file option changes to Change file (if required)

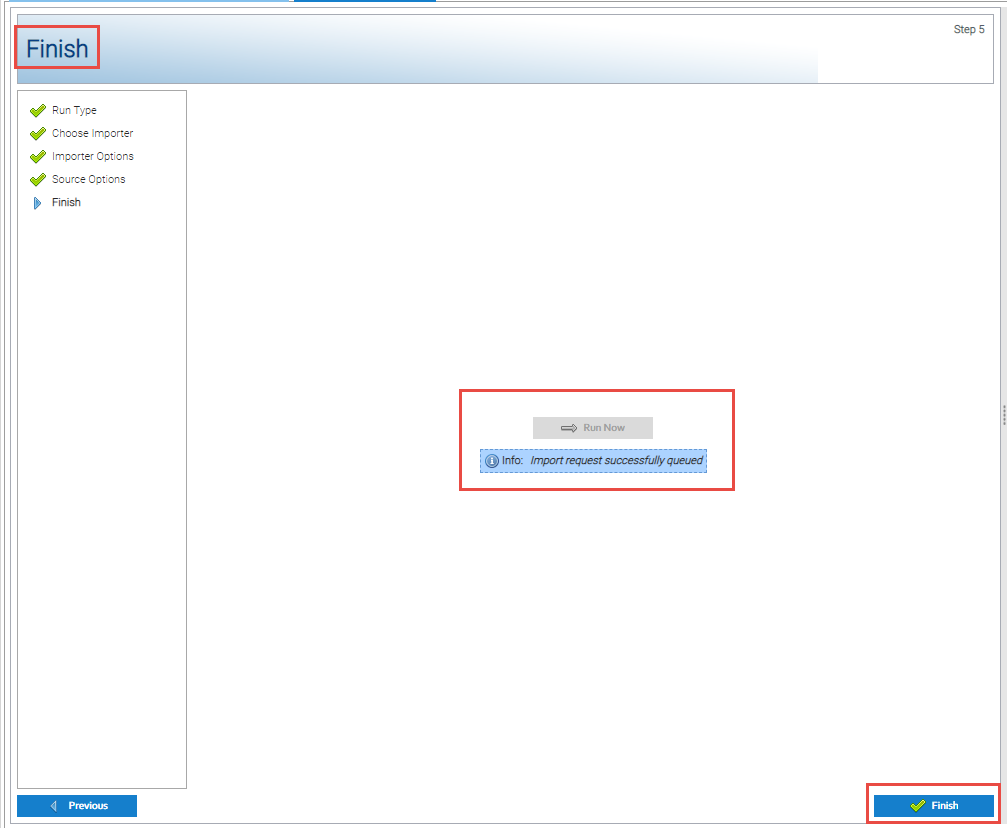
- Click and a prompt will show to say the import request has successfully queued
- Click
 to allow you to carry out another import
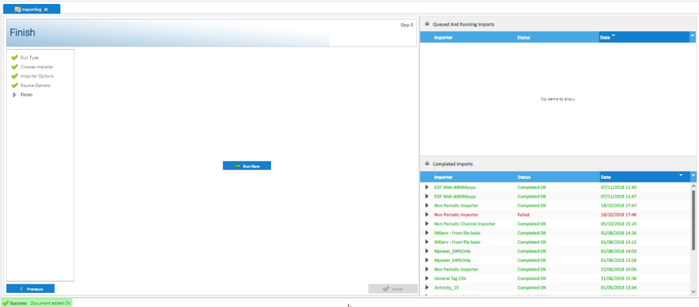
The file will show in the Queued And Running Imports area (depending how long the import takes, sometimes it doesn't show) Click here for more details on the Run History section, including viewing run details and downloading log files.Viewing the importing progress
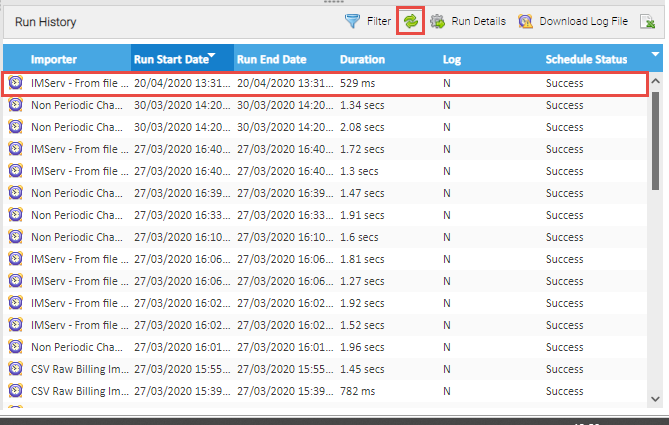
Refreshing the Run History
Scheduling Imports using Email or FTP
Click here for details how to Schedule Imports using Email or FTP
Related content
@ Copyright TEAM - Energy Auditing Agency Limited Registered Number 1916768 Website: www.teamenergy.com Telephone: +44 (0)1908 690018