Sigma Online User Manual
Accounts Link - Payment Files
- Graham Paul
- Kim Blake
- Tom Anderton
Video: Accounts Link
Through a customised interface, Sigma can integrate with any financial system including: Agresso, JD Edwards, PeopleSoft, SAP, Oracle, Sage and QuickBooks for billing data transfer. If your system isn't in the list, we can create interfaces to any system, even proprietary applications.
Once the file has been created, it can either be downloaded or exported to FTP. For more information on how to set up the FTP Connection, click on the link.
**Click here for a pre recorded training session for additional help and guidance - Using the Accounting System Interface for Billing Data transfer (Accounts Link) which includes how to understand the Activity, and how to run and export Payment Files
Introduction
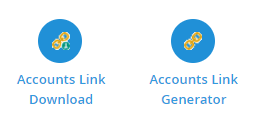
This Activity is split into two perspectives; Accounts Link Generator and Accounts Link Download.
Accounts Link Generator allows you to create a file which is compatible with your Accounts system and Accounts Link Download allows you to browse through and download previously created Accounts Link files.
Selecting the Criteria
- Open Accounts Link Generator
There are three tabs which allow you to choose the appropriate settings for your download. The tabs are Basic, Location and Bill Type. For example, you may want to download a file for a recently added EDI Batch
Basic Tab
Use the Basic tab to define the date range of the report.
- All since last export - allows you to download all since the last export and shows the last export date in brackets
- Use date range - tick from date and/or to dates and enter the dates required
- Show excluded - tick to show bills excluded from the Accounts Link, ie they have not been ticked to be included
- Show exported - tick to show bills previously exported through the Accounts Link

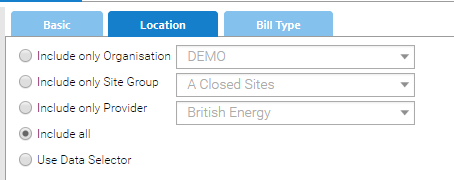
Location Tab
Use the Location tab to choose which bills are to be exported.
- Include only Organisation - tick and then choose the Organisation you want to include
- Include only Site Group - tick and then choose the Site Group you want to include
- Include only Provider - tick and then choose the Provider you want to incude
- Include all - this is the default setting and include all bills that have been entered within the date range defined on the Basic tab
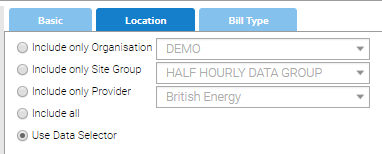
- Use Data Selector -this enables you to choose specific Site Groups, Sites, and/or Accounts etc from the Data Selector. If you are highlighting Sites then it will find all the bills underneath the Sites that have been entered within the specified date range. You can also select your Bulk Bill Batch (ie EDI File)
Bill Type tab
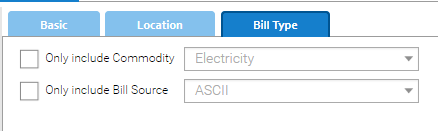
Use the Bill Type tab to narrow down the types of bills you are exporting. For example, you may only want your manual bills.
- Only include Commodity - tick and then choose from the dropdown if you only want bills for a certain commodity
- Only include Bill Source - tick and then tick from the list all the Bill Sources you want to include (you can include more than one)
Refreshing the data
Once you have chosen your settings using the above tabs, you will see a list of bills that have been included.
- Click
 and the screen will refresh to show the bills based on your chosen criteria
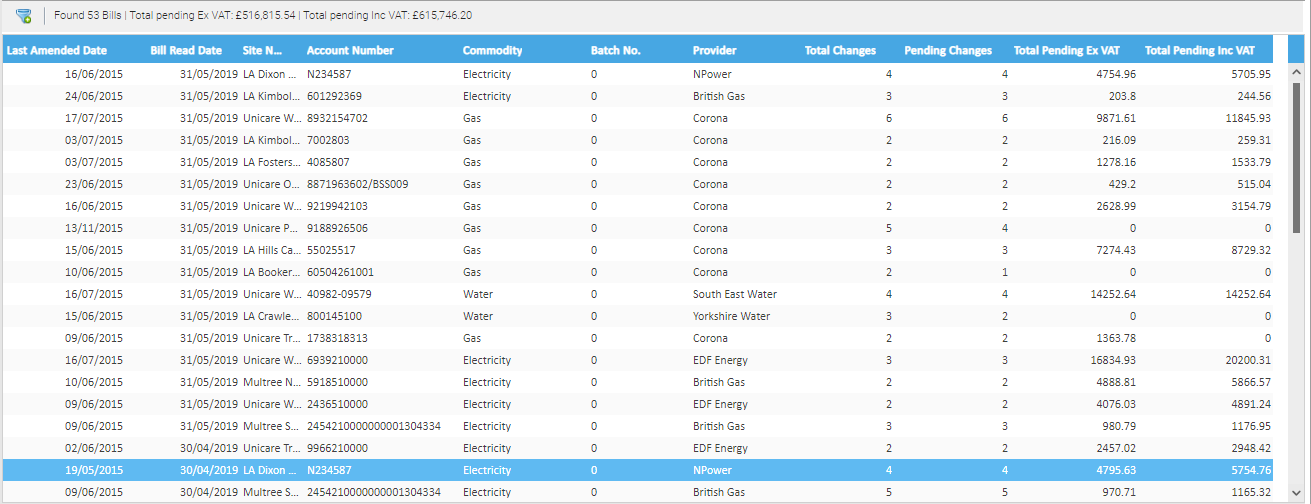
Checking the data
Below are some useful checks that can be done to ensure that the data is correct and the file exports exactly what is required.
Checking the Provider is listed
Check that each line shows a Provider. If not you can amend the data.
- Scroll down the Provider column to check each bill has a Provider entered
- If one doesn't, go to the Supply Point for the Account and update the Provider
 Click filter again
Note: It can take 10 minutes for the table refresh
Checking the Cost Centre exists / is correct
If your Accounts Payable system requires a Cost Centre, check this is showing.
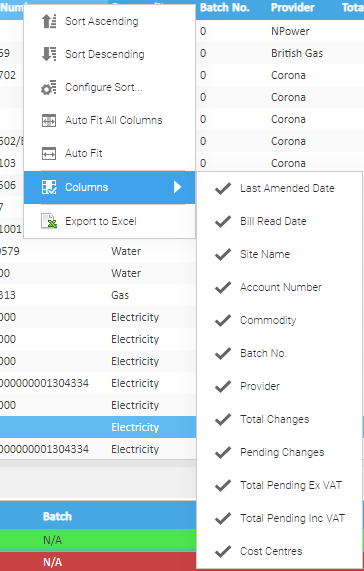
If the column doesn't show:
- Click on the Column Header
- Click Columns
- Tick Cost Centres
Zero value bills
Any bills that are showing as a zero value will not be included in the Accounts Link Export
- Click to refresh the data
Note: It can take 10 minutes for the table refresh
Checking there is only one change to the bill
You cannot have more than one change on a bill or it will not be processed through the Accounts Link
- Scroll down the Total Changes column to check that they all show as 1 change.
If any show as 2 or more, the bill needs to be deleted and reentered and then click the Filter again to check it now shows as 1 change
If it is a large file, it is easiest to check in Excel:
- Click on the Column Header
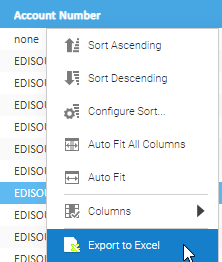
- Click Export to Excel
Excluding Bills
Bills can be excluded individually or in bulk.
Excluding single bills
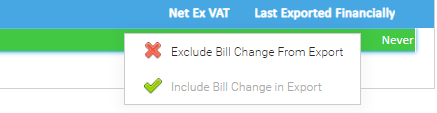
To exclude it from the export:
- Right click on the line > Exclude Bill Change From Export
Excluding Accounts in bulk
If you want to exclude a lot of invoices, it is best to export the data to Excel and then search for just the ones you want to export
- Click on the Column Header and then click on Export to Excel
- Filter the Excel spreadsheet to show the ones you want to include, and copy the Account numbers
From the Accounts Link Generator activity:
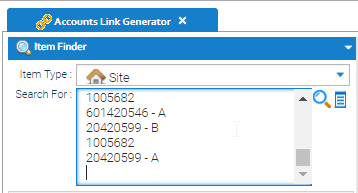
- Choose Item Finder from the Data Selector
- Choose Account
- Click on Show/Hide multi item search
- Paste the Account numbers in the the search field
- Click on the magnifying glass to see all the Accounts you want to include
- Highlight the Accounts in the Data Selector
- On the Location tab, tick Use Data Selector
- Click
 to see just the bills for the Accounts you have selected
Viewing who entered the Bill
- Click on a bill within the table so that it displays in the below
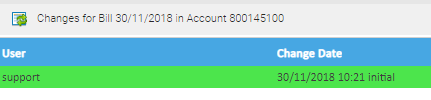
The User column will show who entered the bill
Column Options
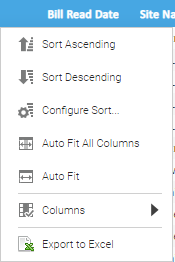
- Click on the downward arrow on the Column Header
- Sort Ascending - changes the order to ascending
- Sort Descending - changes the order to descending
- Configure Sort - enhances the sorting
- Columns - allows you to add/hide columns
- Auto Fit - auto fits the columns to the width of the screen
- Columns - allows you to add/hide columns
- Export to Excel - exports the table to Excel
Running the Summary Report
Once you are happy with the bills to be exported you can Run Summary Report which will to confirm your export options:
It is not essential to run the Summary Report; instead you can just run your Accounts Link and 'Export Bills'. Again you will be provided with a setup window to confirm your export options and taken to the Accounts Link Download section when it has run.
- Click

- Amend to show the same as the data you entered on the Basic and Location tabs. For example, select Use Data Selector and choose Use date range
- Select OK and the summary will run
- Click on either the Excel or Adobe icon to download
It is not essential to run the Summary Report. Instead you can choose 'Export Bills' which will run the export (next section).
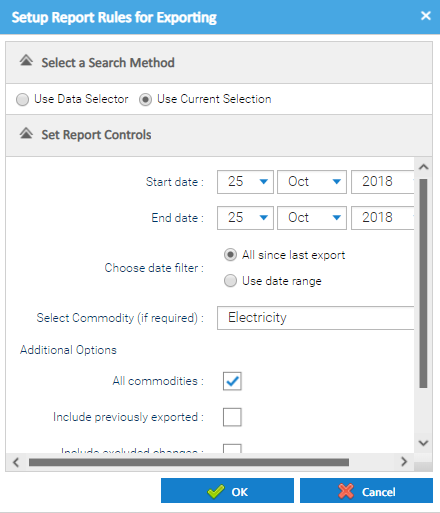
Exporting the Bills
This will create the file in the Accounts Link Download Activity for you to download later.
- Click

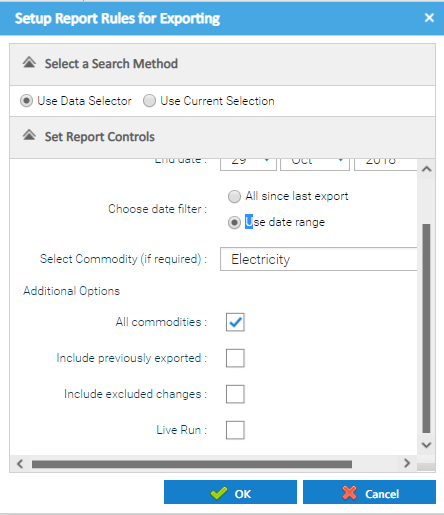
- Amend to show the same as the data you entered on the Basic and Location tabs. For example, select Use Data Selector and choose Use date range
- Tick Live Run if you want to show that the bill has been exported
- Click OK
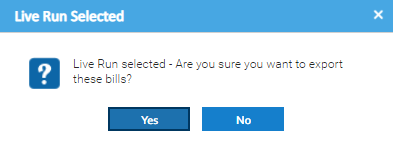
- Click Yes to confirm Live Run has been selected. The following will show:
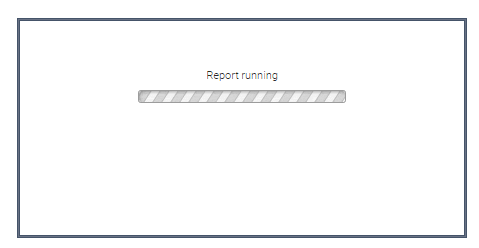
When the file has downloaded, click on either the Excel or Adobe icon to download
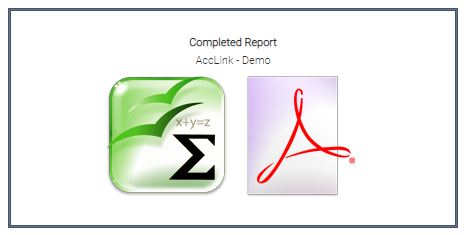
This is not the actual file that is compatible with your Accounts Payable System. Move to the next section to see how to download the file.
Viewing/Downloading the export
This is the actual file that you will send to your Accounts Payable Department.
- Open the Accounts Link Download Activity
- Click on the files on the left to see your download. For example, click 2019 (year) > 1 (January) > 3 (3rd January 2019)
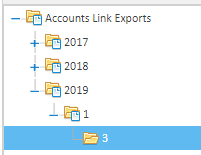
The file will now show on the right hand side of the screen.
Downloading a file
- Right click on the file to be downloaded
- Click Open
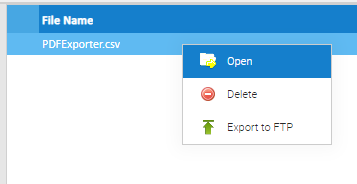
Once the file has opened, save to your own PC to forward to Accounts Payable.
Exporting a file to FTP
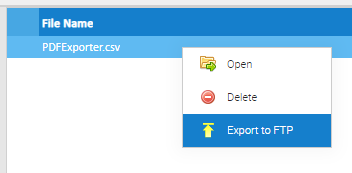
- Right click on the file to be exported
- Click Export to FTP
Duplicate Files
If you attempt to export a file(s) that has already been exported, a prompt will appear:
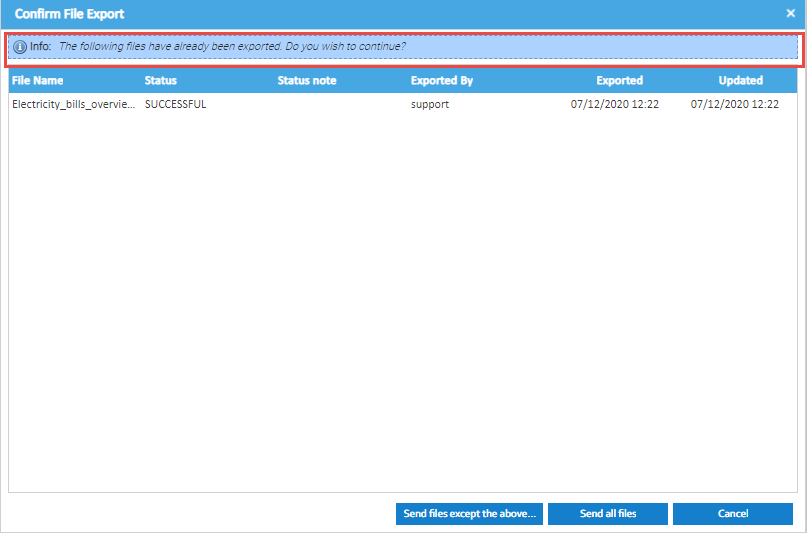
There are 3 options
- Send files except the above...
- Use this option if you have selected more than one file and you want to export the other files, but not the duplicate
- Send all files
- Use this option if you have selected more than one file and you want to export all selected files, including ones that have been previously exported
- Cancel
- Cancels the export
Audit History
You will be able to see the Audit History for exported Files.
- Click on

- All documents that have been exported to FTP from the Activity will show here
Viewing the exported date in Sigma
You can see the date a bill has been exported via the Accounts Link.
- Open Bill Entry

- Search and open the bill
- Click on History
View the Exported financially column

Related content
@ Copyright TEAM - Energy Auditing Agency Limited Registered Number 1916768 Website: www.teamenergy.com Telephone: +44 (0)1908 690018