Sigma Online User Manual
Meter Relationships
Introduction
**Click here for a pre recorded training session for additional help and guidance - Adding Asset Types for commodities (Release 12.21) which includes how to add Assets, view and manage Meter Relationships and Create Accounts, Meters, Supply Points etc
Meter Relationships gives you:
- The ability to manage and visualise the complex hierarchical structures of metering - providing the ability to add Parent/Child Meter relationships to Meters, Sub Meters and Virtual Meters
- Use this to perform gap analysis and identify potential metering problems on your sites.
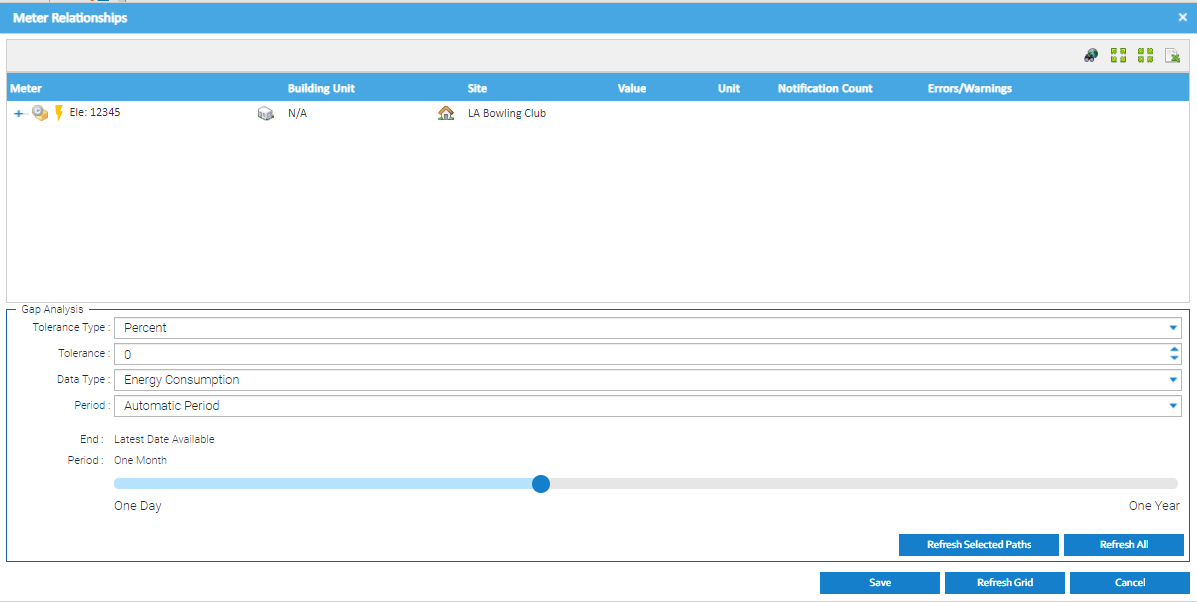
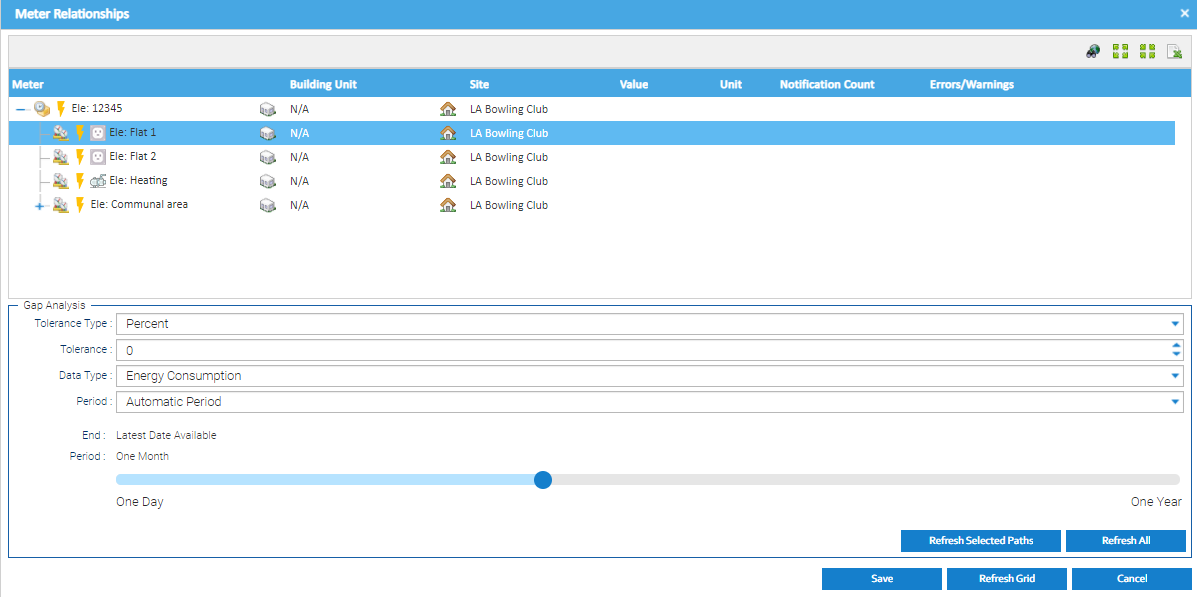
This sections shows you how to create the Parent/Child hierarchy, with the introduction of the Meter Relationships popup. This popup shows the relationship between the Parent and Children in relation to Meters, Virtual Meters and Sub Meters. It also shows any errors or warnings regarding analysis of the data in the Channels.
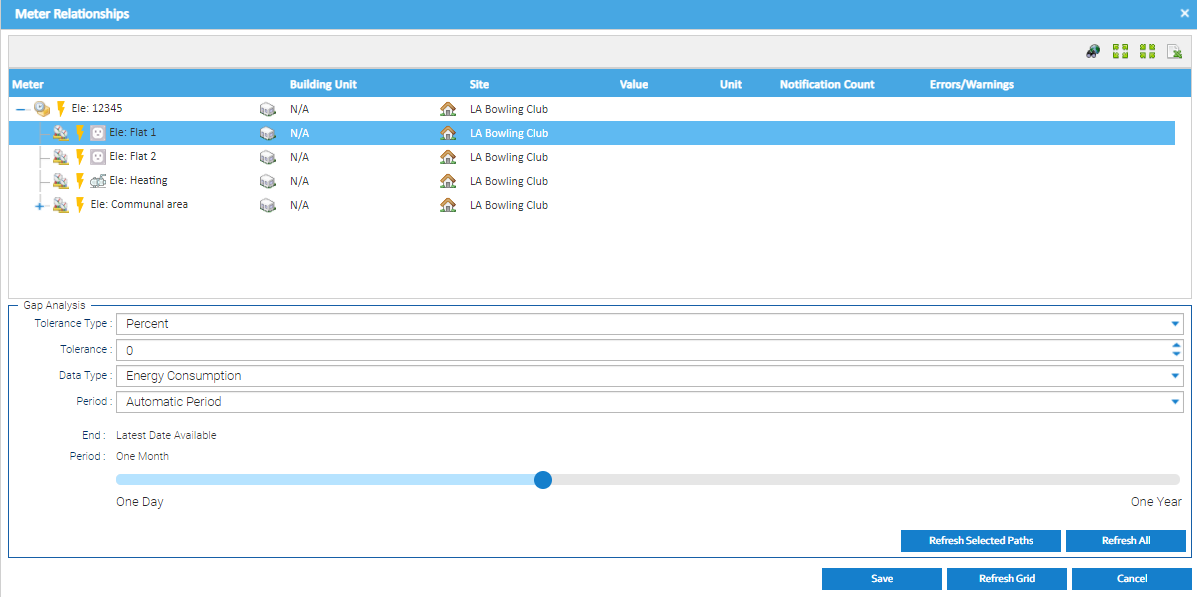
The Tree expands to show all of the Meters / Sub Meters / Virtual Meters for the Site and you can see the Parent / Child relationship. There is also the capability to allow you change the relationships from this popup.
The Asset Type is also displayed in the popup. Click for more information on Asset Types.
Use the Gap analysis at the bottom of the popup enables you to see if the data in the Child Meters add up to the data in the Main Meter. For example, you may have a Main Meter that has 4 Sub Meters, and one of those Sub Meters, also has two Virtual Meters related to it. See below:
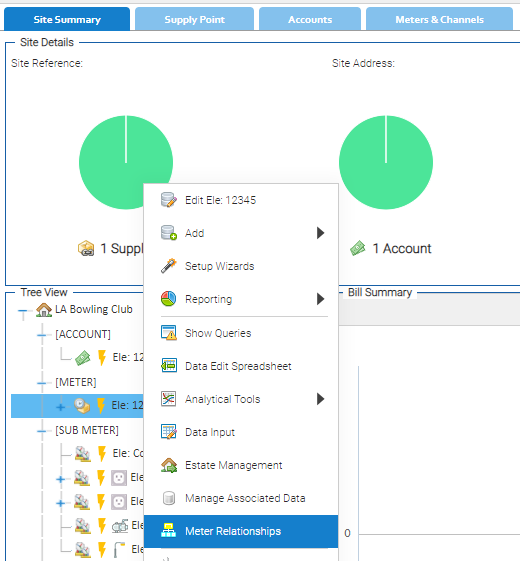
The popup is accessible from the Data Selector by selecting the Site or Meter or from the Data Management Activity.
Adding a Meter Relationship
If you have Parent and Child Meters, the relationship can be added to the Meter Editor to enable you to the details within the Meter Relationship popup.
This is added to the Child Meter:
From the Data Selector
- Right click on the Child Meter (Meter, Sub Meter or Virtual Meter)
- Choose Edit
or
From Estate Management
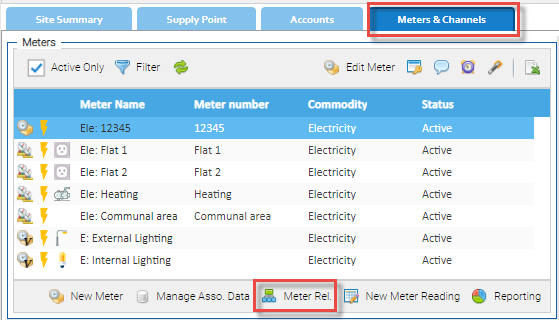
- Highlight the Child Meter in the Meters & Channels Tab
- Click on the Edit Meter button or right click on the Meter and choose Edit Meter
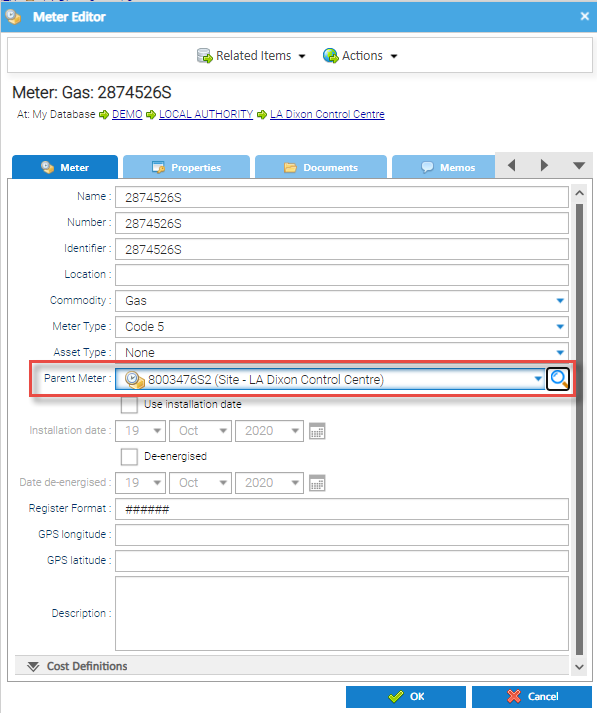
Once in the Meter Editor, add the Relationship:
If the Parent Meter is in the same Site as the Child Meter:
- Choose from the dropdown list
If the Parent Meter is in a different Site to the Child Meter:
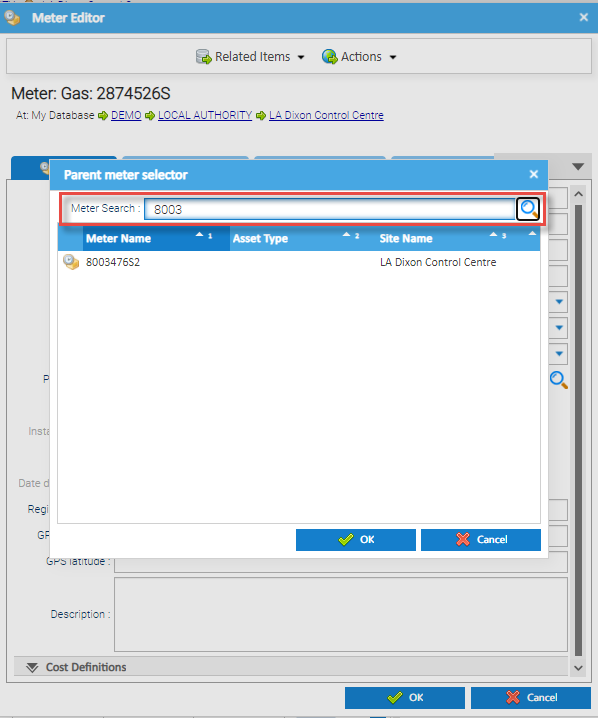
- Click on the Magnifying Glass to the side of the Parent Meter dropdown
- Enter the Meter Number in the Search field and click on the Magnifying Glass
or
- Click on the Magnifying Glass to the side of the Parent Meter dropdown
- Click on the next Magnifying Glass again to see a list of all Meters in your portfolio,
The Parent meter selector popup shows the Meter Name, along with any Asset Type that has been assigned and the Site Name
- Highlight the Meter
- Click OK
The Meter Editor is updated with the Parent Meter details.
- Click OK
or
From the Meter Relationships popup
See below on how to access the Meter Relationships popup
If the Parent/Child relationships do not exist OR they are not correct, you can re-order the Meters.
- Drag and drop the Meters into the correct order
- Click Save
Accessing the Meter Relationships detail
Once Relationships have been added, they can be viewed in the Meter Relationships popup.
From the Data Selector
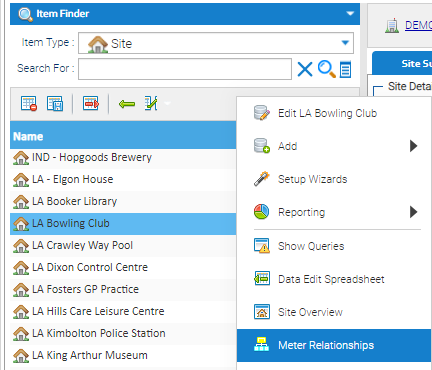
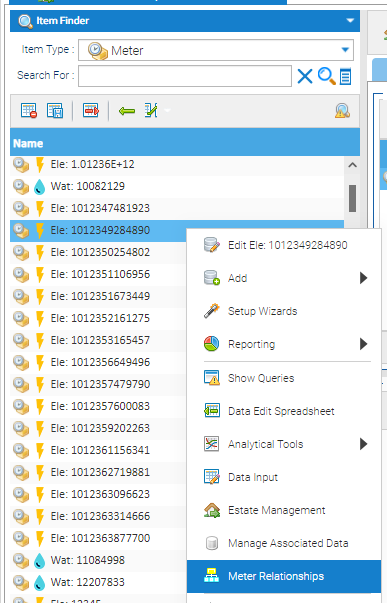
- Right click on the Site or Meter (Meter, Sub Meter or Virtual Meter)
- Choose Meter Relationships
or
From Estate Management
- Right click on the Site or Meter (Meter, Sub Meter or Virtual Meter) from the mini Tree View on the Site Summary Tab
- Choose Meter Relationships
or
- Highlight the Meter in the Meters & Channels Tab
- Click on the Meter Relationships button or right click on the Meter and choose Meter Relationships
or
From the Meter or Site Editor:
- Open the Meter or Site Editor
- Click Actions
- Click Meter Relationships
Note: If you access the popup from the Site, you need to choose the Commodity you want to view
Understanding the Relationships
The Meter Relationships popup will show the the relationship for the Meters, Sub Meters and Virtual Meters
If you have access the popup from the Meter, the Meter will be highlighted
Available Icons
At the top left of the popup are 4 Icons:
- Data Monitoring - Opens the Data Monitoring Activity
- Expand All - expands the Items in the tree
- Collapse All - collapsing all the open Items in the tree
- Export to Excel - exports the data to Excel
Relationships
This section shows what is connected as Parent and Children. The connection is created using the Meter Editor and completing the Asset Type and Parent Meter fields (see above)
- Click on the + to the left of each Meter
or
- Click to expand all
Note: you can click to collapse all
The columns will show you the Meter, Building Unit (if applicable) and Site.
Once the Gap Analysis is used, the Value, Unit, Notification and Error/Warnings columns will show details (see below).
Creating Parent/Child Relationships
If the Parent/Child relationships do not exist OR they are not correct, you can re-order the Meters.
- Drag and drop the Meters into the correct order
- Click Save
Right click options
Right click on a Meter for the standard options such as Edit, Add, Set up Wizard, Estate Management etc. You will also see Expand and Collapse options
Using the Gap Analysis
On entry to the Meter Relationship popup, the Gap Analysis will not show until you have completed the bottom section.
Once completed, you can see if the Parent/Child Meters add up to the same consumption (or set a percentage).
Completing the criteria
- Tolerance Type - Choose from Percent or Absolute
- Tolerance - Enter a tolerance, for example 10%
- Data Type - Choose from the dropdown (the default is Energy Consumption (generally used for Gas and Electricity))
- Period - Defaults to Automatic Period or choose Custom to customise the period
- End - Defaults to Latest Date Available
- Period - Defaults to One Month, but move the slider to change from one day, one week, one month, three months, six months or one year
Once you have selected the above, you can then view the results:
- Click Refresh Selected Paths to only refresh Gap Analysis for the Meters selected in the top section
or
- Click Refresh All to refresh Gap Analysis for all Meters
The popup will update depending on the criteria chosen.
Understanding the results
The remaining columns will populate data in the Value, Unit, Notification Count and Errors/Warnings fields
- Value - the Units in the Channel for the period chosen
- Unit - the Unit type, ie kWh
- Notification Count - The amount of outstanding Notifications in the Data Monitoring Activity (only applicable to Meters with Periodic Channels)
Note: Click on to open the Data Monitoring Activity, filtered to the Site
- Error/Warnings - Shows any Errors or Warnings for the Meter, ie 'The Value for this meter is not equal to the sum of its child meters'
In the above example there are two calculations as there are two Parent Meters - Meter 12345 and Communal Area
Calculation Examples
Meter 12345
If the criteria had a tolerance of 0%:
- Meter 12345 = 1000 kWh
- 450 kWh (Flat 1) + 300 kWh (Flat 2) + 100 kWh (Heating ) + 100 kWh (Communal Area ) = 950 kWh
- There is a different of 50 kWh, the message shows that the Value for Meter 12345 is not equal to the sum of its Child Meters
Communal Area Sub Meter
If the criteria had a tolerance of 20%:
- Communal area Meter = 100 kWh
- 25kWh (External Lighting) + 50 kWh (Internal Lighting) = 75 kWh
- There is a difference of 25 kWh, the message shows that the Value for this Meter is not equal to the sum of its child meters. 75 kWh (total of Internal and External Lighting) is less than 20% of 100 kWh (Communal area)
Related content
@ Copyright TEAM - Energy Auditing Agency Limited Registered Number 1916768 Website: www.teamenergy.com Telephone: +44 (0)1908 690018

