- Manually when creating the bill
- Manually after the bill has been created
- Entered in bulk using a CSV File
Sigma Online User Manual
Bill Paid Date - adding after Bill has been created
The Bill Paid Date is not a mandatory field but can be added when the bill is created or once the bill has been saved.
The Bill Paid Date is not a mandatory field and can be added in one of three ways:
Contents
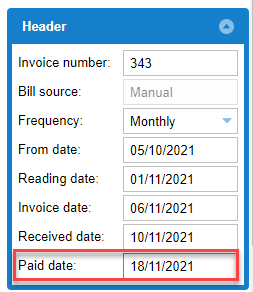
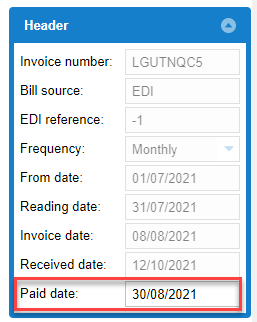
Whichever method is used, the date will appear in the Paid date field:
Entering the Paid Date when creating a manual bill
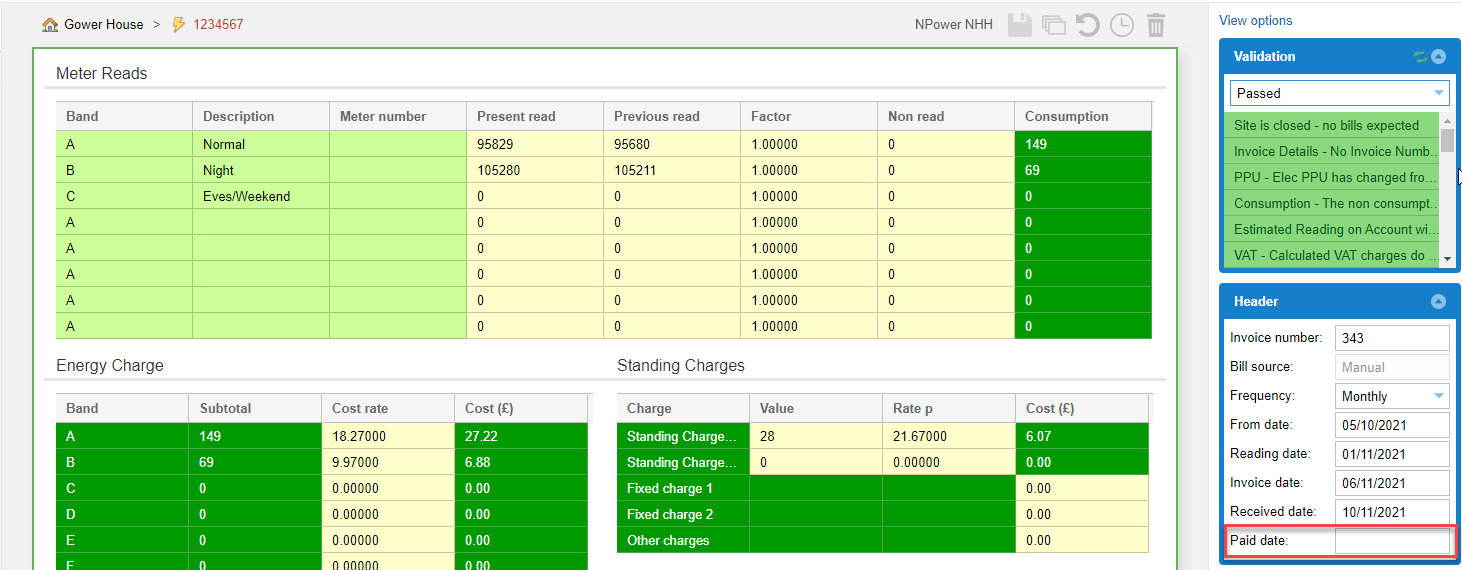
When you are in the process of entering a manual bill in Bill Entry, the Paid Date can be added:
- From Bill Entry, view the Header section on the right hand side
- Enter the Paid Date
- Continue with the Bill and save as usual
Entering the Paid Date manually after a bill has been created
The Paid Date be added to the Bill after you have saved the Bill as follows:
- Search for the Account and open the Bill
- Enter the Paid Date
- Click Save
Note: As you are saving the Bill again, the Validators will check the Bill and if it failed previously, you will need to do the following:
- Warning Validator(s)
- Click Save
- Click Save Bill
- Severe Validators(s)
- Click Save
- Enter password details and reason for override
- Click Override & Save
In bulk using a CSV File
If you want to add Paid Dates in bulk, this can be done using a Report from Energy Intelligence and the Importing Activity.
Bill Paid Date Template Report in Energy Intelligence
- Open Energy Intelligence
- Open the Bill Paid Date Template for Importing Report
- The Bill Loaded Period is mandatory - enter the period, and any other required filter(s)
- Click on Export > CSV to download the Report

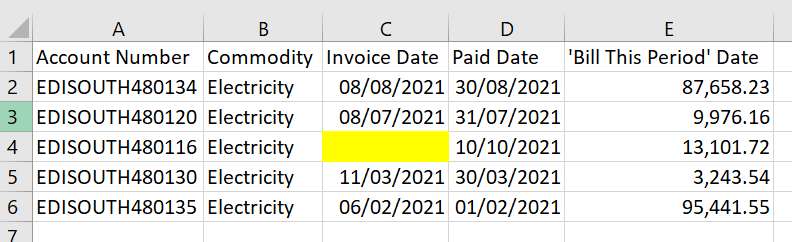
Amending the Excel file
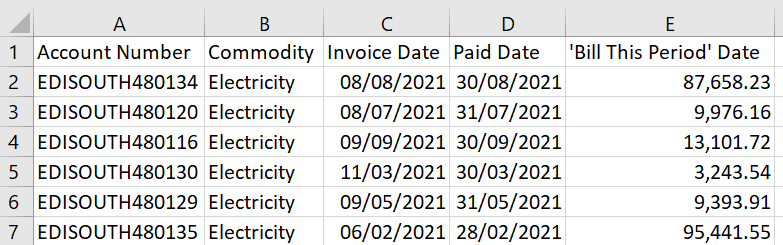
- Columns B to F are required for the import. The other columns are for information only
- Do not change anything in Columns B, C, D and F
- Add the Payment Date to Column E, using the format: 10/12/2021

- Once you have added the Paid Date, remove Columns G to L and then Column A , leaving the 5 columns highlighted above in yellow
- Save the CSV file ready to be imported
Example CSV File
If you do not want to use the Energy Intelligence Report as a basis for the import, you can use the following example:
Note: Click on the link above, then click ![]() and click on
and click on  to download the CSV file.
Importing the CSV File
- Open the Importing Activity in Sigma and following the Importing Data Manually help page
- Note: Use the Bill Paid Date Importer

Checking the Import
Once the CSV has completed, check the data was successful
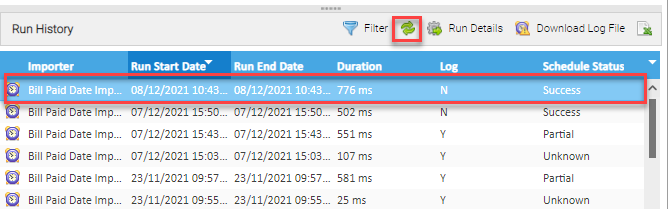
- Click Refresh and view the import line
- The below shows no log and that the schedule was successful
Common Errors
If the Import shows as Partial, check for the errors:
- Highlight the import line in the Run History and click Download Import File
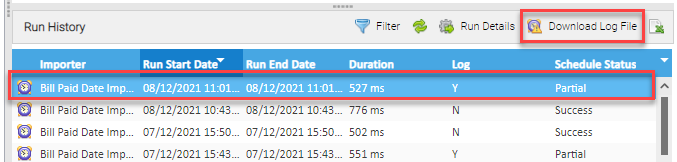
- Open the File to see the errors, such as

- The first failure is because a date wasn't entered in the Paid Date (row 5)
- The second failure is because a value wasn't entered in the Billed Paid Date column didn't match the bill (row 6)

Other errors include:

- The failure is because the CSV file didn't have an Invoice Date
Spot Checking the Data
To check that Paid Date has been imported:
- Open Bill Entry and search for the Account
- Click on the relevant Bill
- View the Header details
Overriding Existing Dates
If a date already exists in the Paid Date field, it can be overridden as follows:
- Manually - overtype the existing date and save the bill
- In bulk - follow the above process and the new date will override the existing date
@ Copyright TEAM - Energy Auditing Agency Limited Registered Number 1916768 Website: www.teamenergy.com Telephone: +44 (0)1908 690018