Sigma Online User Manual
Importing Half Hourly Metering Data
- Graham Paul
- Kim Blake
Introduction
Half Hourly data is uploaded into Sigma to a Periodic Channel, which sits underneath the Meter. The Channel stores the consumption (or readings) and can be used to run reports or validate billing.
Generally, the data is half hourly (but could be 15 minute or hourly).
Getting started
Half hourly data should be available from your supplier if you have the appropriate metering. This could be sent directly to you, or you may need to log into a portal to obtain the data. Contact your supplier to obtain the data. Once you have the data, you will need to prepare Sigma to accept it.
What will the data look like?
Each supplier will supply the data is a slightly different format, some may be a text file, but a majority a CSV file. It may look something like this:

or like this:

Checking existing Data Load IDs (unique IDs) in Periodic Channels
Once you have the Channels, you will need to check that they have the correct ID to ensure the data is uploaded to the right Channel. This can be done using the Data Edit Spreadsheet activity. The Channel ID will need to match the data you are receiving from your suppliers, generally this will be the Supply Number or the Meter number.
- Open the Data Edit Spreadsheet activity
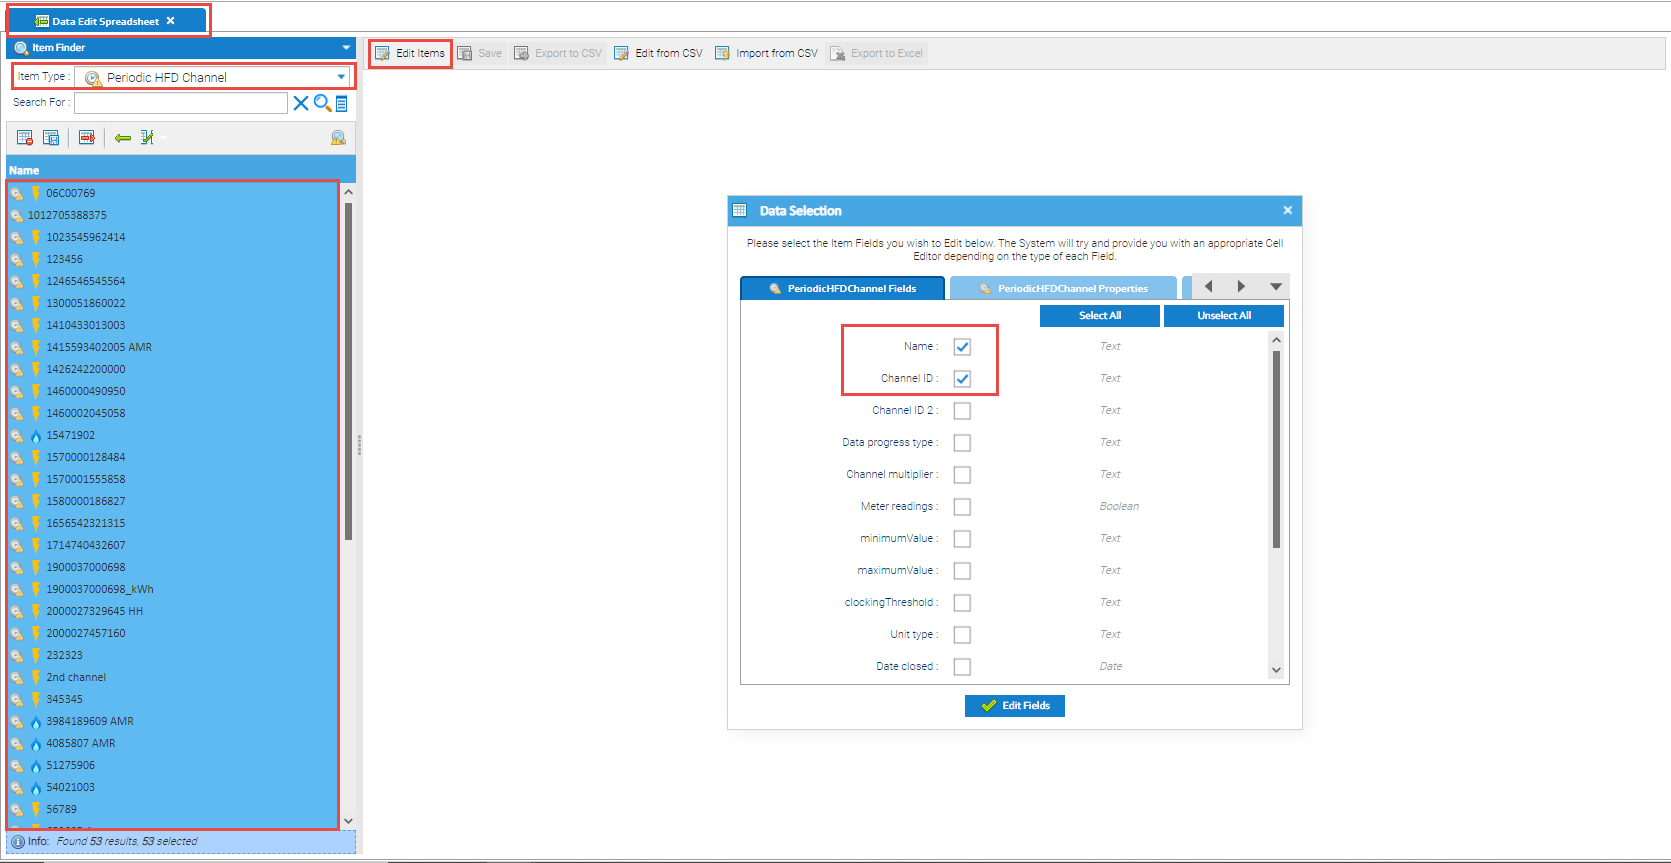
- Change the Item Finder from Site to Periodic HFD Channel to view a list of all Periodic Channels in your database
- Or use the Multi List Selector to select the Periodic Channels
- Select the Periodic Channels you want to check
- Or click on one, then Control + A to highlight them all
- Click Edit Items to see the Data Selection popup
- Tick Name
- Tick Channel ID
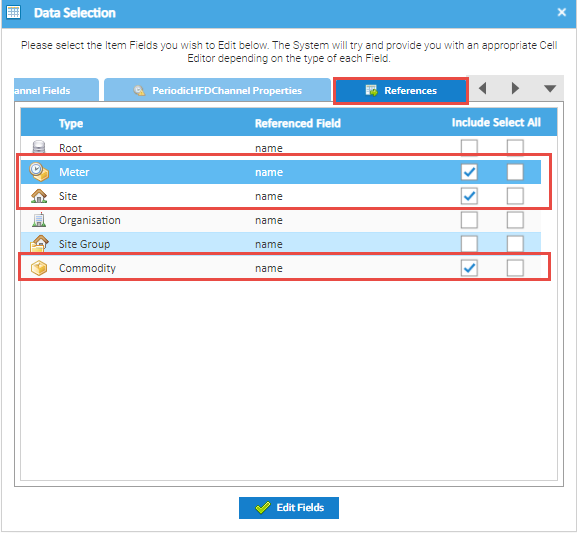
- In the Data Selector popup, use the arrows to move to the References tab and tick Include Meter, Commodity and/or Site
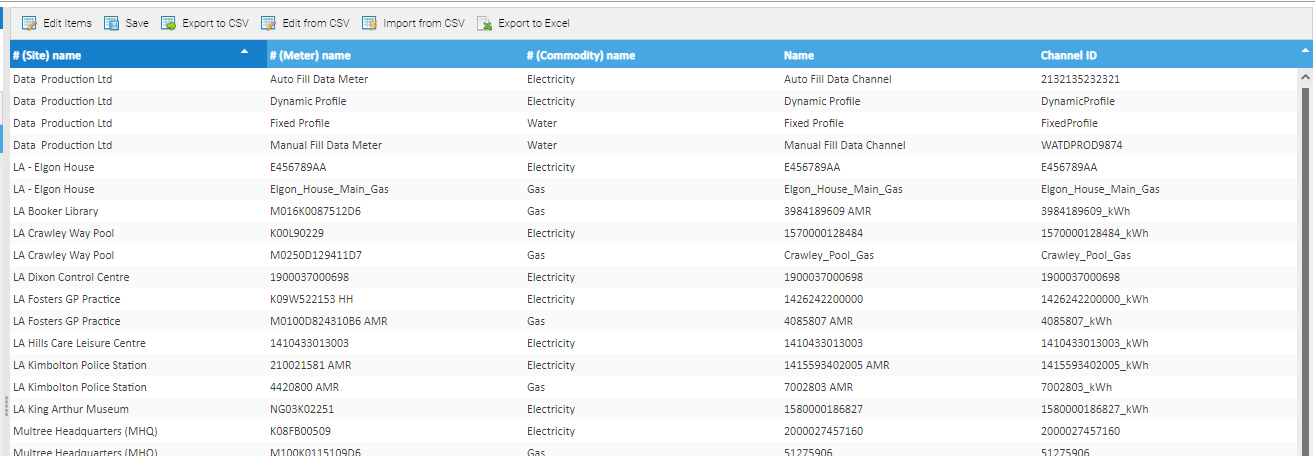
- Click Edit Fields to display the data
Comparing the data
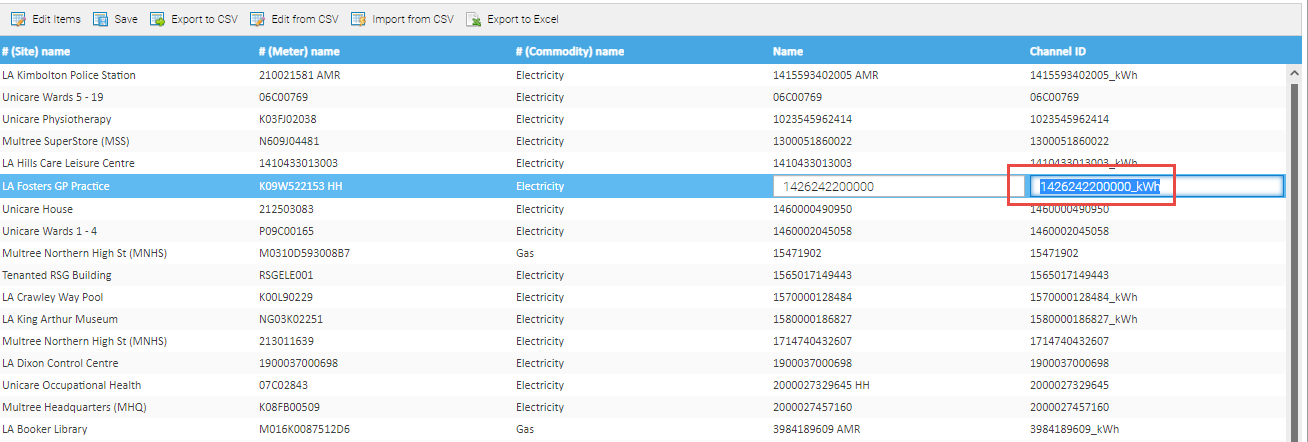
The screen displays a spreadsheet of the Channel name, Channel ID and another other references you have chosen.
Compare the data you have from the supplier, with the data in the Channel ID column. Update the Channel ID to match the supplier information, see below.
Updating the Data Load ID
When creating a Channel, Sigma will automatically enter a unique Data Load ID which can be amended using the Data Edit Spreadsheet Activity. Once you have created the above:
- Double click into the Channel ID field and enter the details as supplied by your Supplier
- Click
 once you have amended some or all of them
Alternatively
- Click Export to CSV and amend outside of Sigma, then import back into Sigma. Click here for more details on the Data Editing.
Adding additional Channels/Meters
If you have done the above and found that you don't have Periodic Channels (or Meters), click here for information on how to set them up.
Finding the right Importer
Once you have the data from the supplier, and the Periodic Channels set up correctly, you need to choose the right Importer to use.
Send an example of the file to the Support team who will let you know which Importer is correct for the data that you have. Send an email to support@teamenergy.com with the file attached.
Setting up the Importer
Once you have the name of the Importer, import the data into Sigma.
Open the Importing Activity

Saving the Importer in the Favourites list
If you have not used the Importer before, you need to find it and save it to your favourites list:
- Click

- Enter the beginning of the Importer name (given to you by Support)
- Click Search
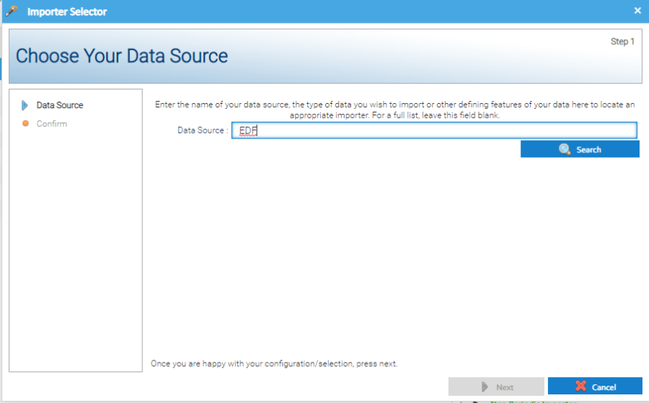
- Choose the correct Importer from the displayed list
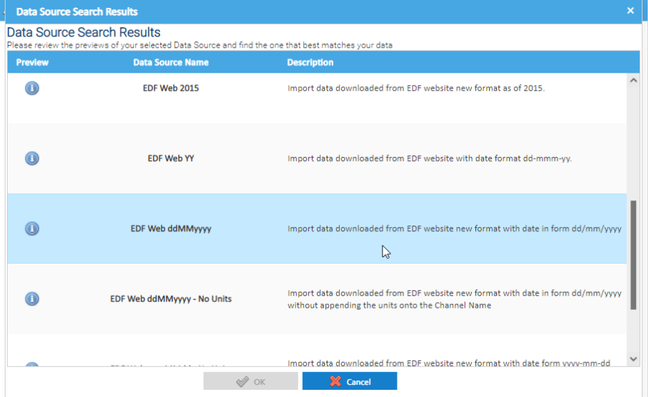
- Click OK
- Click Next
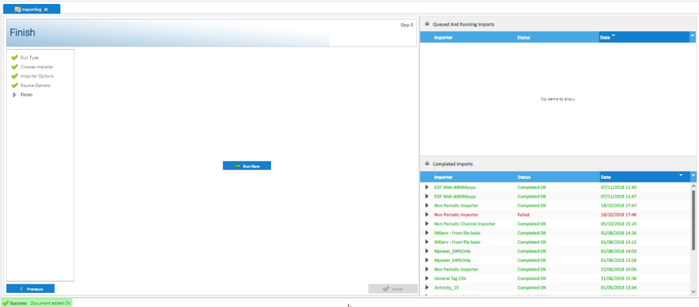
- Click Finish
The Importer has now been added to your Favourites list and is ready to use.
Importing the Data
Once you have the Importer in your favourites list, it will be available to use each time you want to import data.
- Click
 to see the list of your Favourite Importers
 - Highlight the Importer
- Click Next
- Tick Use date range (if required - usually this is left blank to allow all the data to be imported)
- Click Next
- Click

- Click

- Find the file you want to import
- Click OK
- Click Next
- Click

- Click

Viewing the importing progress
The file will show in the Queued And Running Imports area (depending how long the import takes, sometimes it doesn't show)
Refreshing the Run History
- Click on the Refresh icon in the Run History section
- The screen will refresh to show the latest import, and its status (success or failed)
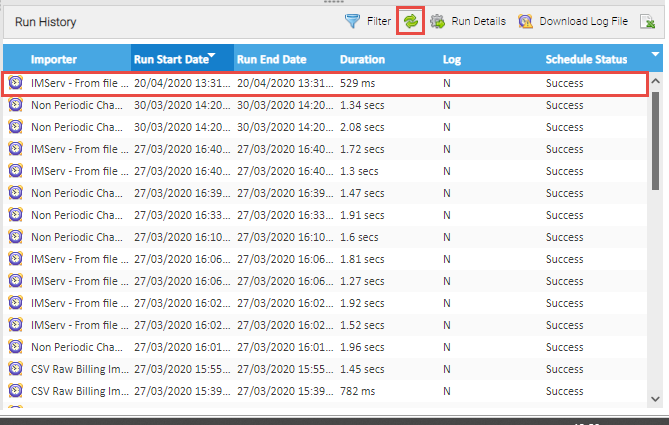
Click here for more details on the Run History section, including viewing run details and downloading log files.
Checking the Import and Data
Click here for more details on the Run History section, including viewing run details and downloading log files.
What happens to data that can't be matched in Sigma?
If the Periodic Channel hasn't been set up, or the Channel ID isn't correct, Sigma will still import the data, but add it to the Unmatched Imported Objects.
Click here for more details.
Related content
@ Copyright TEAM - Energy Auditing Agency Limited Registered Number 1916768 Website: www.teamenergy.com Telephone: +44 (0)1908 690018