Sigma Online User Manual
Budget Creation - Using a total figure per Budget
Budgets can be created using a total figure for the Account, Meter or Monitoring Points
- For example you have £5000 Budget for an Account and want to divide this equally between each period (usually 12 months). You enter a figure of £5000 and Sigma will work out the monthly Budget of £416.67.
Opening Budget Creation
- Click on the Budget Creation Activity
Setting up a new Budget Group
The Activity has 3 sections:
- Set up new Budget Group
- Assign Weighting Factors
- Assign Items and Budget Values
Set up new Budget Group
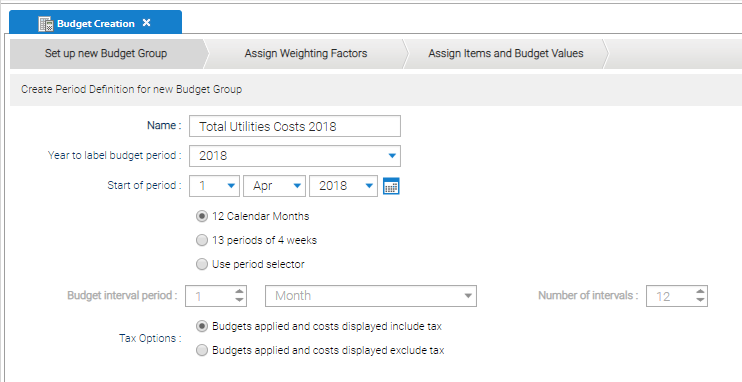
- Create the Period Definition for the new Budget Group
- Name - enter the Name of the Budget
- Year to label budget period - Using the drop-down select the year you are budgeting for
- Start of period - Enter the date to start the Budget on and tick either:
- 12 Calendar Months
- 13 periods of 4 Months
- Use period selector
- Budget internal period - use if you have selected period selector to define the periods
- Tax Options - choose either:
- Budgets applied and costs displayed include tax
- Budgets applied and costs displayed exclude tax
- Click or
- Click to continue
Assign Weighting Factors
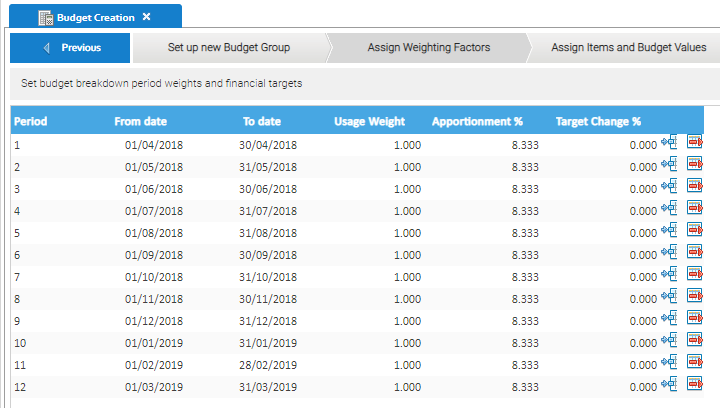
Your budget periods are displayed and from here you can apply a cost weighting to each month. The financial budget figure that you apply later will be broken down in proportion to the weightings you assign.
Target and budget figures can be changed during the year but it is important to note that once the weighting factors are applied you cannot edit or even view them from within Budget Management.
Usage Weight Column
If you do not want to apportion the usage equally, double click on a row to amend the 'Usage Weight' and the 'Apportionment %' will update automatically.
If making changes, ensure that the Total of the column still adds correctly, ie if you have chosen 12 Calendar Months, the total should be 12.
Target Change % Column
You can enter a Target by changing the figure in the 'Target Change %' column.
Sigma assumes this will be a reduction and will automatically enter it as a negative. (N.B. If you wish this to be an increase then enter it as a negative, e.g. -2 will be a 2% increase).
- Click or
- to continue to the last step
Assign Items and Budget Values
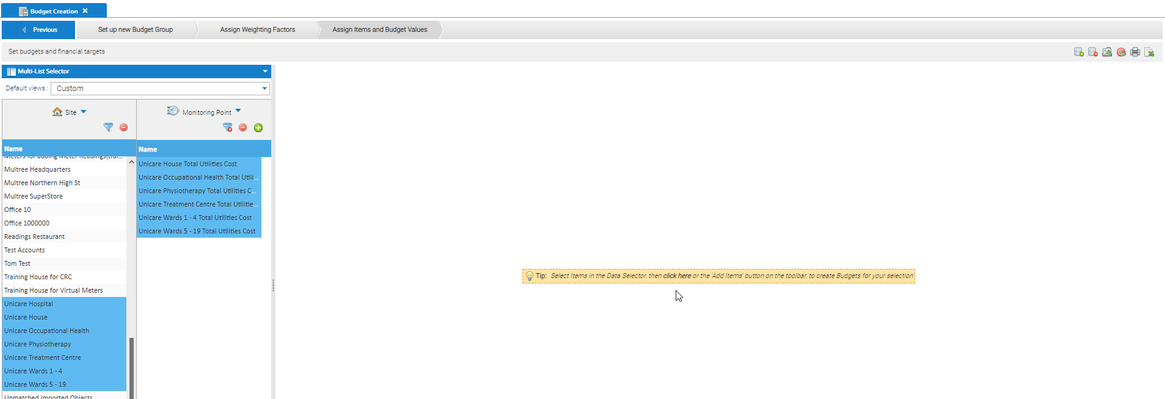
Using the data selector, select the Items you want to apply the budget to, for example, Accounts, Meters or Monitoring Points
- Select the Items then click to add to the table or on the yellow prompt in the middle of the screen
Budgets and Targets will initially show £0.
- Double click into the line to manually edit each Budget. If you have added a figure in the Target Change % Column in the Assign Weighting Factors screen, the Target will automatically fill. If not, a figure can be manually entered by clicking into the field.
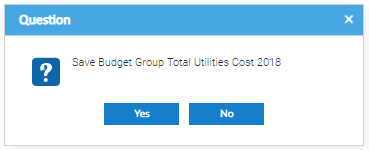
- Click to save the Budget
- Click Yes to the prompt
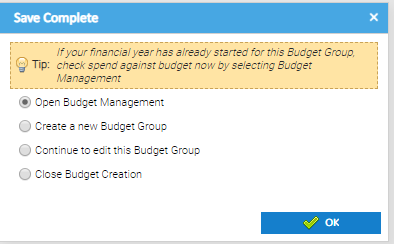
- Choose from the next prompt
Functions
Icons
| Icon | Description |
|---|---|
| Add items from the data selector | |
| Delete a budget from the table select it and click this icon | |
| Launches the Budget Import Wizard | |
| To refactor all budgets to their original weighting select this icon | |
| Use this icon to refactor all targets to budget weightings | |
| Print the table view | |
| Eport the table to Excel |
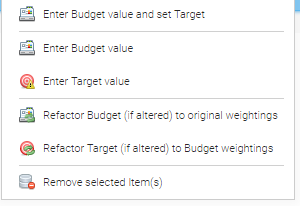
Right Click Options
Right-clicking any row within the table will produce the following menu giving you an alternative way to navigate the menu items.
Columns
You can change the visible columns by clicking the header bar and selecting Columns from the drop down menu.
Related content
@ Copyright TEAM - Energy Auditing Agency Limited Registered Number 1916768 Website: www.teamenergy.com Telephone: +44 (0)1908 690018

