Sigma Online User Manual
Moving the Original Tenant out and a New Tenant in
Open the Tenancy Management Activity
The Tenancy Management Activity opens
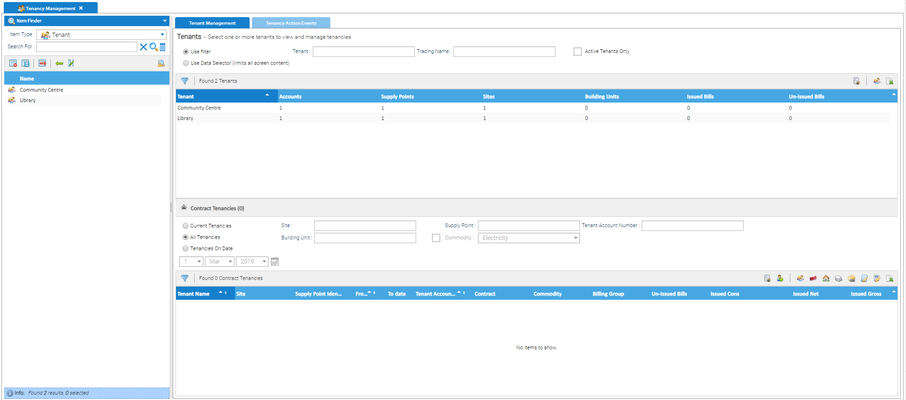
Filtering / Selecting Data
(see here for more details on understanding the Filtering for this section).
The Data Selector defaults to Item Finder > Tenants and shows all the available Tenants
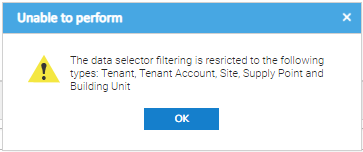
From the Data Selector, f you try to filter to an Item other than:
- Tenant
- Tenant Account
- Supply Point
- Site
- Building Unit
The following prompt appears:
Moving the Original Tenant out and the New Tenant in
To move the original Tenant out and the new Tenant in, you need to:
- Create the New Tenant
- Perform the COT
- Change the Billing Groups for both the Original and New Tenants
- Create the Final Bill
Creating the New Tenant
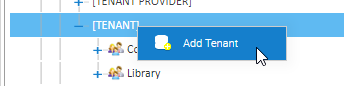
If the new Tenant is NOT already in Sigma, then you need to create them before performing the Change of Tenancy:
- From the Data Selector, go to the Tree Selector
- Right click on TENANT
- Click Add Tenant
- Enter the details as described
The Tenant Editor opens
- Configure the Tenant details as follows:
Field | Description |
|---|---|
| Name | Name of the Tenant |
| Trading Name | (optional) - Trading name of the Tenant |
| Registered Company Number | (optional) - Registered Company number of the Tenant |
| Billing Email Address | (optional) - Billing mail address of the Tenant |
| Contact Email Address | (optional) - Contact email address of the Tenant |
| Tenant Reference | Enter the name you want to appear on the bill |
| Arbitrary Reference | (optional) -This can be used to record information about the Tenant Provider that is relevant to your business |
| VAT Registration Number | VAT registration number of the Tenant. This will typically appear on Tenant invoices where they are created |
| Location Tab | Enter address details for the Tenant. This will typically appear on Tenant invoices where they are created |
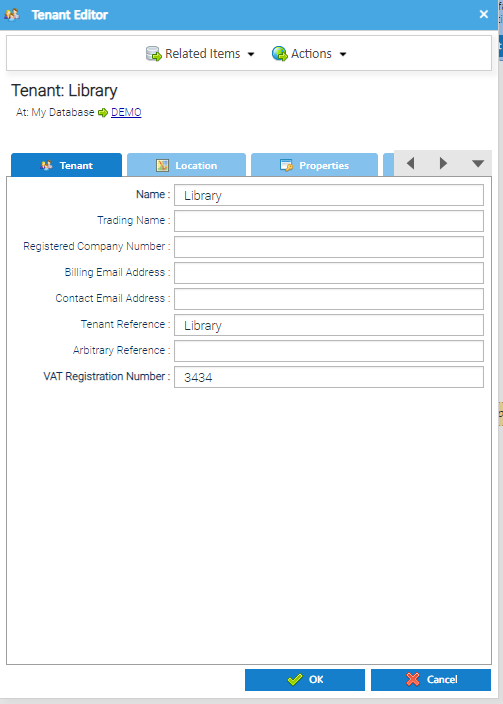
- Click on the Location Tab
- Add details in the Contact Address fields if you want the billing address to appear on the bill

- Click OK to save
The Tenant details are saved and the Tenant Editor closes
Performing the Change of Tenancy
- Open the Tenant Management Activity
- Filter (if required)
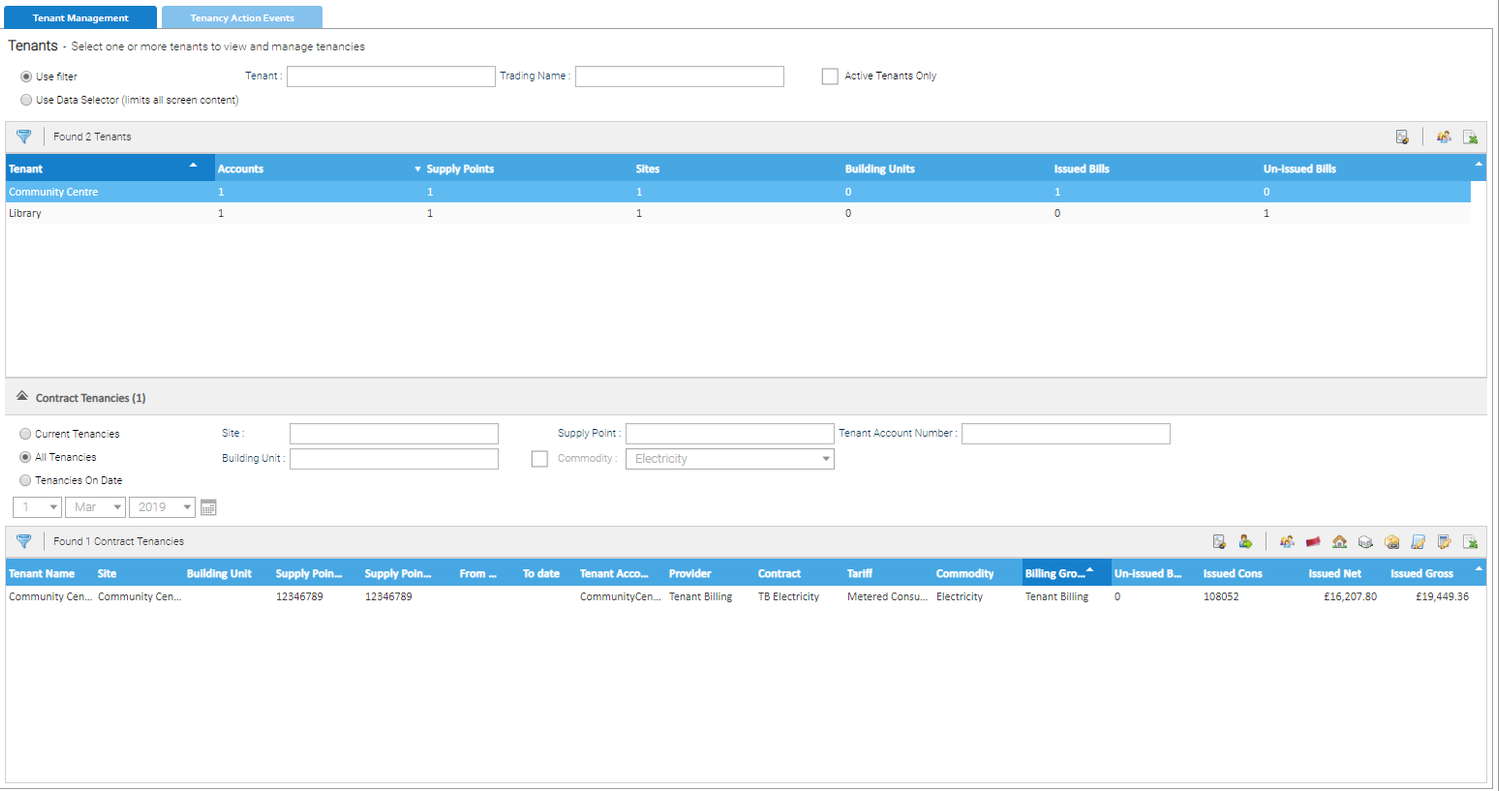
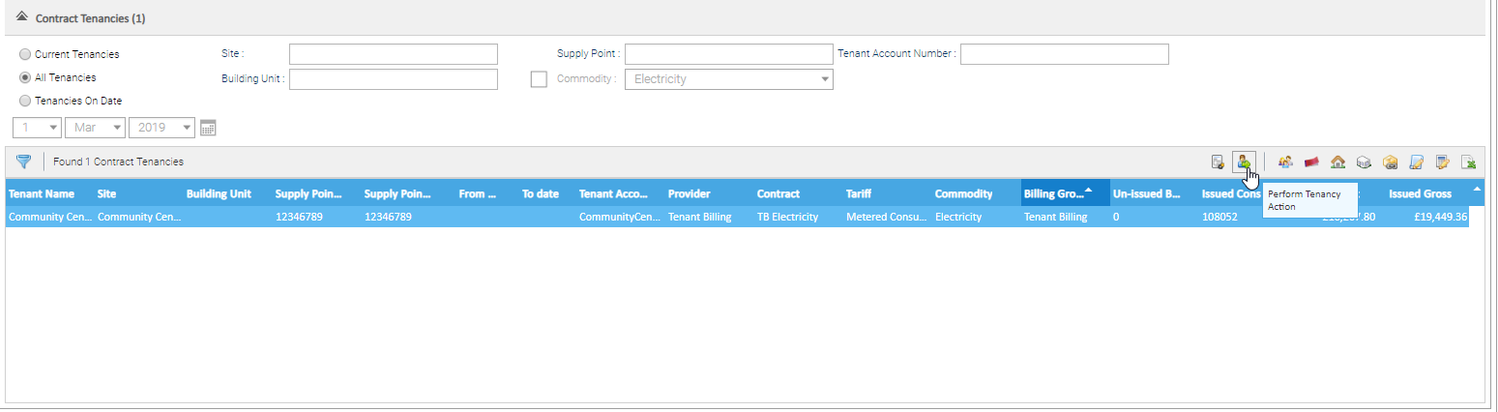
- From the Tenants section:
- Click on the Tenant you want to move out
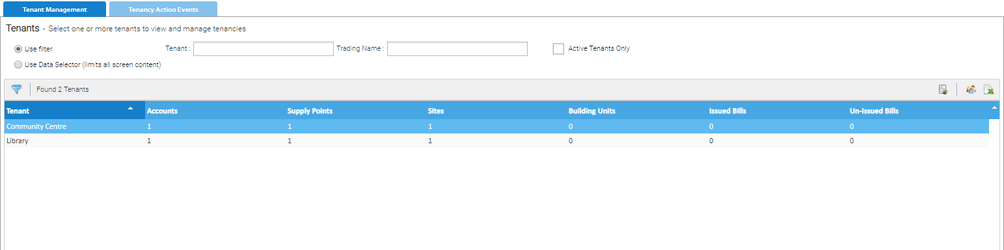
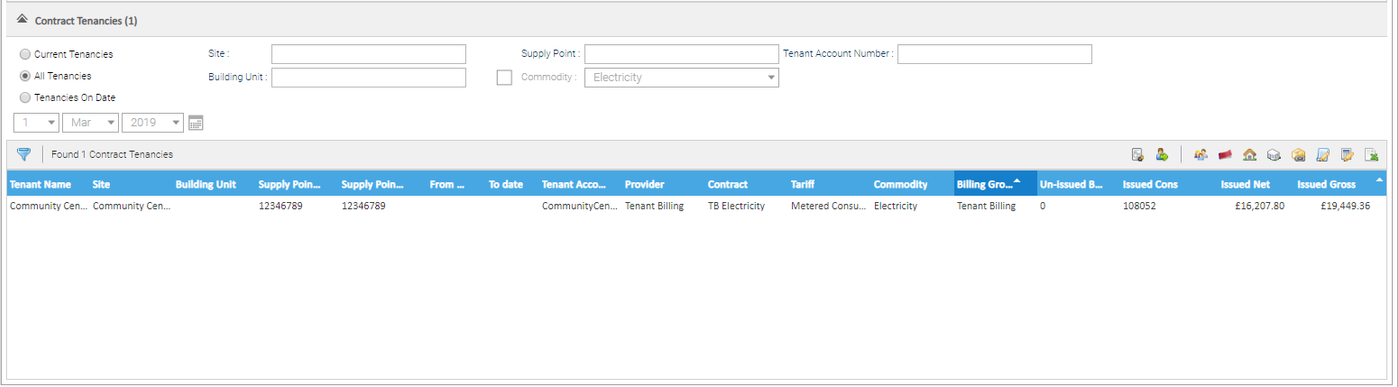
The Contract Tenancies section (below) will show details of the selected Tenant
Tip: If you have any Un-Issued Bills, you may want to issue these before you continue with the Change of Tenancy.
Click here for details on Approving and Issuing Bills.
- Highlight the relevant Contract
Tip: If you have any Un-Issued Bills, you may want to issue these before you continue with the Change of Tenancy.
Click here for details on Approving and Issuing Bills.
- Click Perform Tenancy Action
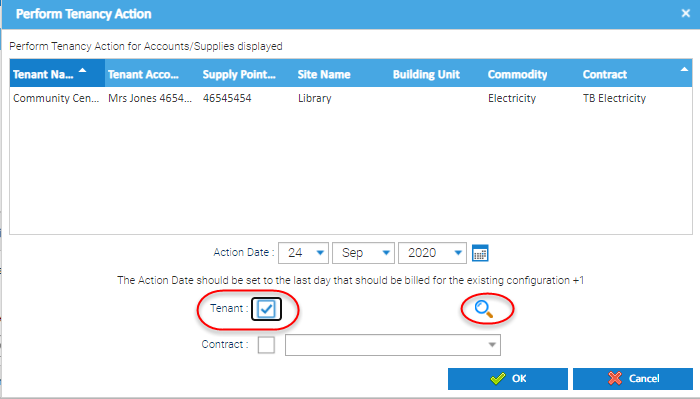
The Perform Tenancy Action popup appears:

Complete as follows:
- Action Date: The day AFTER the tenancy ended
- Tenant: Tick the field, then click on the magnifying glass
The Tenant Selector popup appears
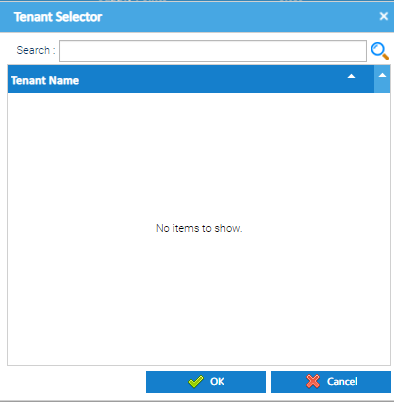
- Enter the Tenants Name (or part of it) and click on the magnifying glass
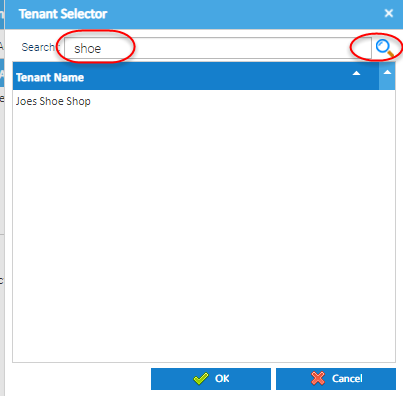
- Highlight the correct one
- Click OK and the new Tenants name shows in the Tenant field
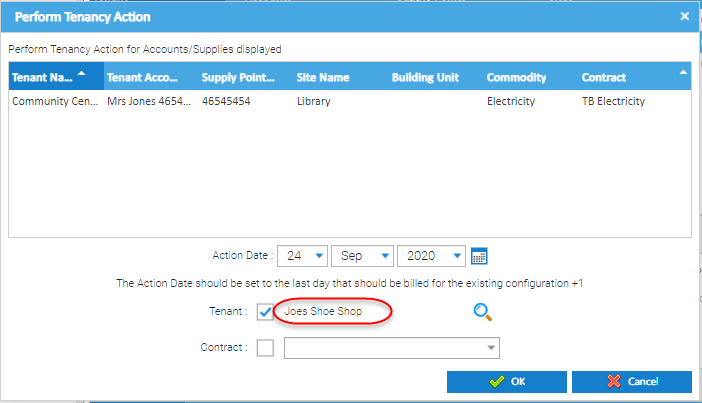
- Contract: Tick the field, then choose the Contract from the dropdown list
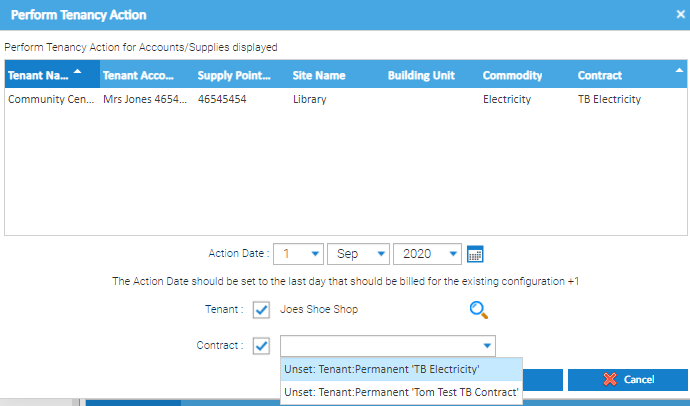
- Click OK
The Note popup appears:
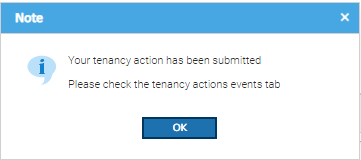
- Click OK to close the note
Note: By performing a Change of Tenancy via the Tenancy Management Activity, Sigma will automatically create a Tenant Account underneath the new Tenant, using the format Tenant Name, Supply Point Number and Commodity
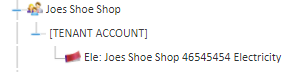
The Tenant Account number will be created using the Name of the Tenant, the Supply Point Number and then the Commodity.
Move to the Tenancy Action Events tab
- From the Tenancy Management Activity, click on the Tenancy Actions Events Tab

The Tab appears:
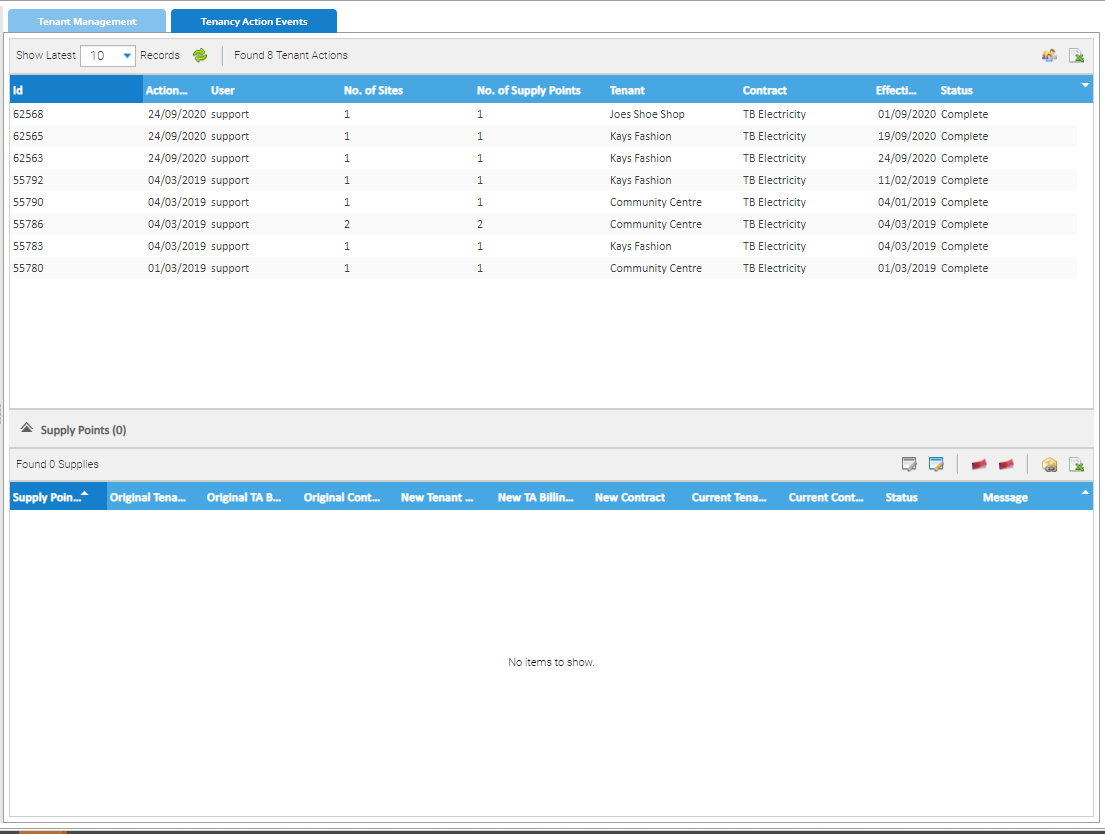
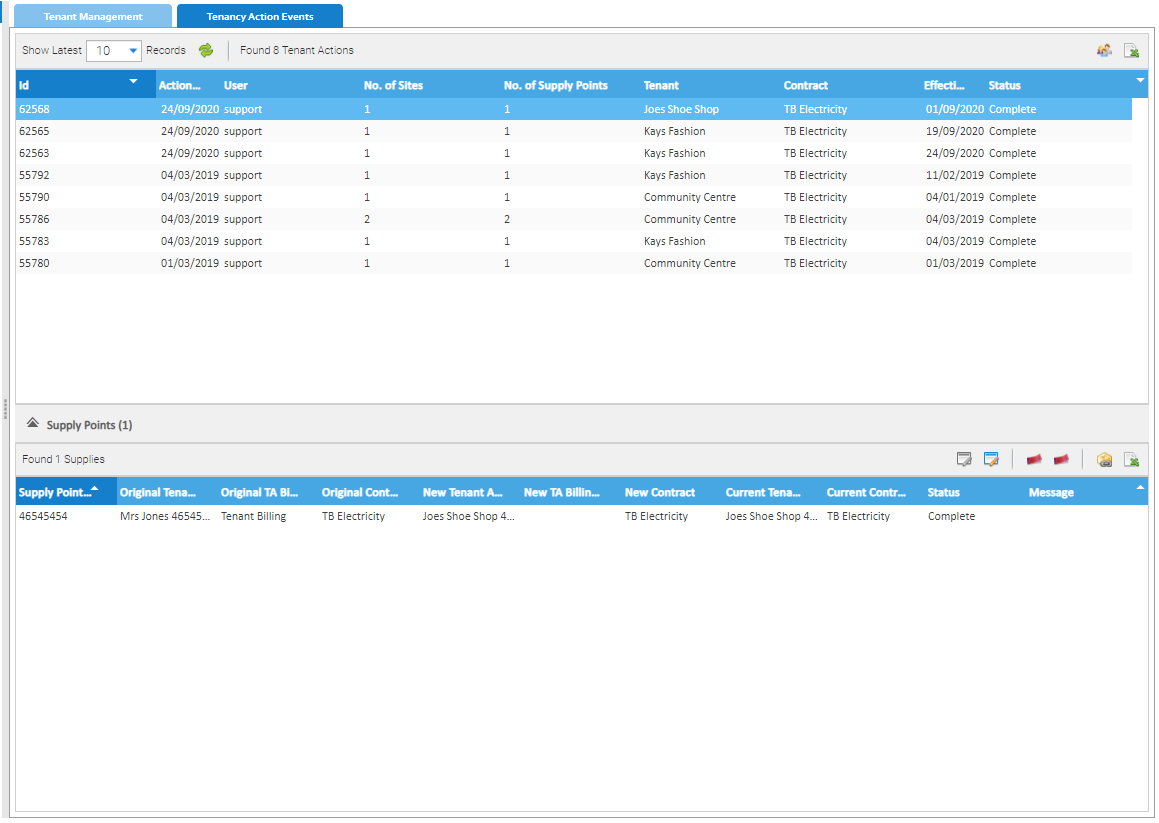
- Highlight the Tenant Action in the top section to see the related details in the bottom section
Changing the Tenant Account Billing Groups
Original Tenant
You may want to take the Original Tenant out of the current Billing Group so that you can bill them straight away.
- Highlight the Action in the top Section
- Highlight the Supply Point in the bottom Section
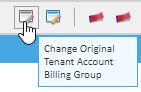
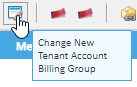
- Click Change Original Tenant Account Billing Group
The Change Billing Group popup appears:
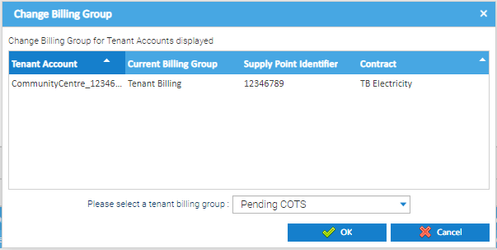
- Choose from the Billing Group dropdown, for example Pending COTS
- Click OK to save
Click here for details on how to create a new Billing Group
New Tenant Account
The new Tenant Account will need to be added to a Billing Group in order for Bills to be produced.
- Highlight the Action in the top Section
- Highlight the Supply Point in the bottom Section
- Click Change New Tenant Account Billing Group
The Change Billing Group popup appears:
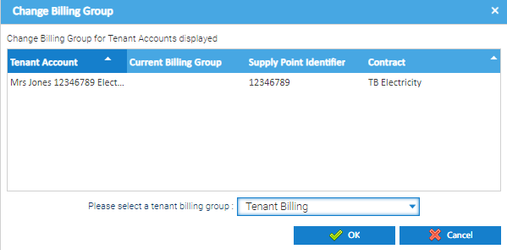
- Choose from the Billing Group dropdown, for example Tenant Billing
- Click OK to save
Click here for details on how to create a new Billing Group
The Activity will update to show the changes:

Creating the Final Bill
Once the Original Tenant has been moved out and the New Tenant moved in, you may want to produce the Bill immediately.
To do this, you will want to issue bills for all Tenant Accounts in the Billing Group you have moved the Original Tenant to, for example Pending COTs.
Click here for more information on how to Approve and Issue Bills
Moving the Original Tenant to completed COT Billing Group
Its good practice to move the Original Tenant to a separate Billing Group of Tenant Accounts that have had all their bills issued.
- Open the Tenant Bill Run Initiation Activity

- Click on the current Bill Group, for example Pending COTs
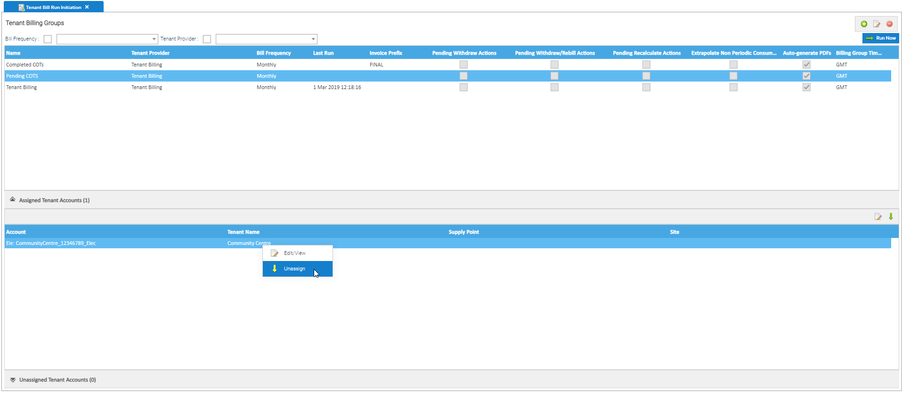
- Click on Assigned Tenant Accounts section
- Right click on the Tenant
- Click Unassign
The Tenant is now removed from that Group and will appear in the Unassigned Tenant Accounts section
- Click on the Billing Group you want to assign the Tenant Account to, for example Completed COTs
- Right click on the Tenant Account in the Unassigned Tenant Accounts section
- Click Assign

The Tenant Account will now be assigned to the new Billing Group, for example Completed COTs
@ Copyright TEAM - Energy Auditing Agency Limited Registered Number 1916768 Website: www.teamenergy.com Telephone: +44 (0)1908 690018