Sigma Online User Manual
Entering Manual Bills
- Graham Paul
- Kim Blake
Introduction
The Bill Entry activity is used to enter invoices and validate them to ensure the billing is correct. Invoices can be entered for many different commodities and there are standard views for each bill type.
Bill Entry will show if an Account is Inactive, and will also show any historic Account Numbers. Bill can then be validated with things such as do the meter readings follow on.
Opening the Bill Entry Activity
- Click on the Bill Entry activity

Searching for an Account, Site etc
Bill Entry allows you to search by the following methods:
- Account number
- Invoice number
- Supply Point
- Site name
- Post code
- Meter number
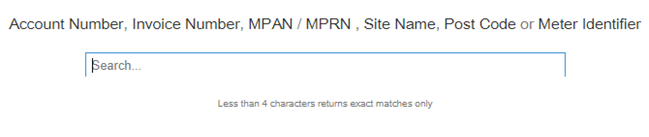
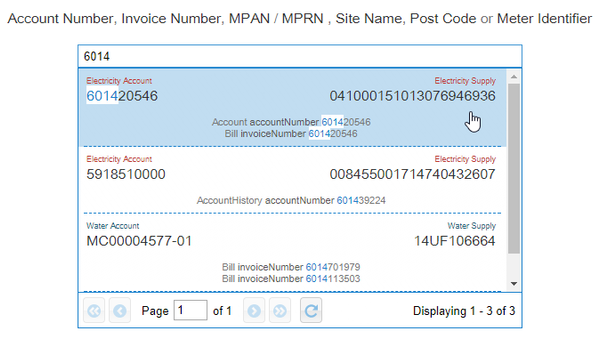
- Enter your search criteria
- Click on the Account you want to view
Supply Overview
 - click to create a new bill
 – lists all bills associated to the Account. Click on a bill to view in more detail
 - shows all the supply details – Commodity, Site, etc. Click on any of these to take you to Sigma
 – shows any outstanding queries. Click on the query for more details
 – shows any memos attached to the Account. Click
  to add a new memo
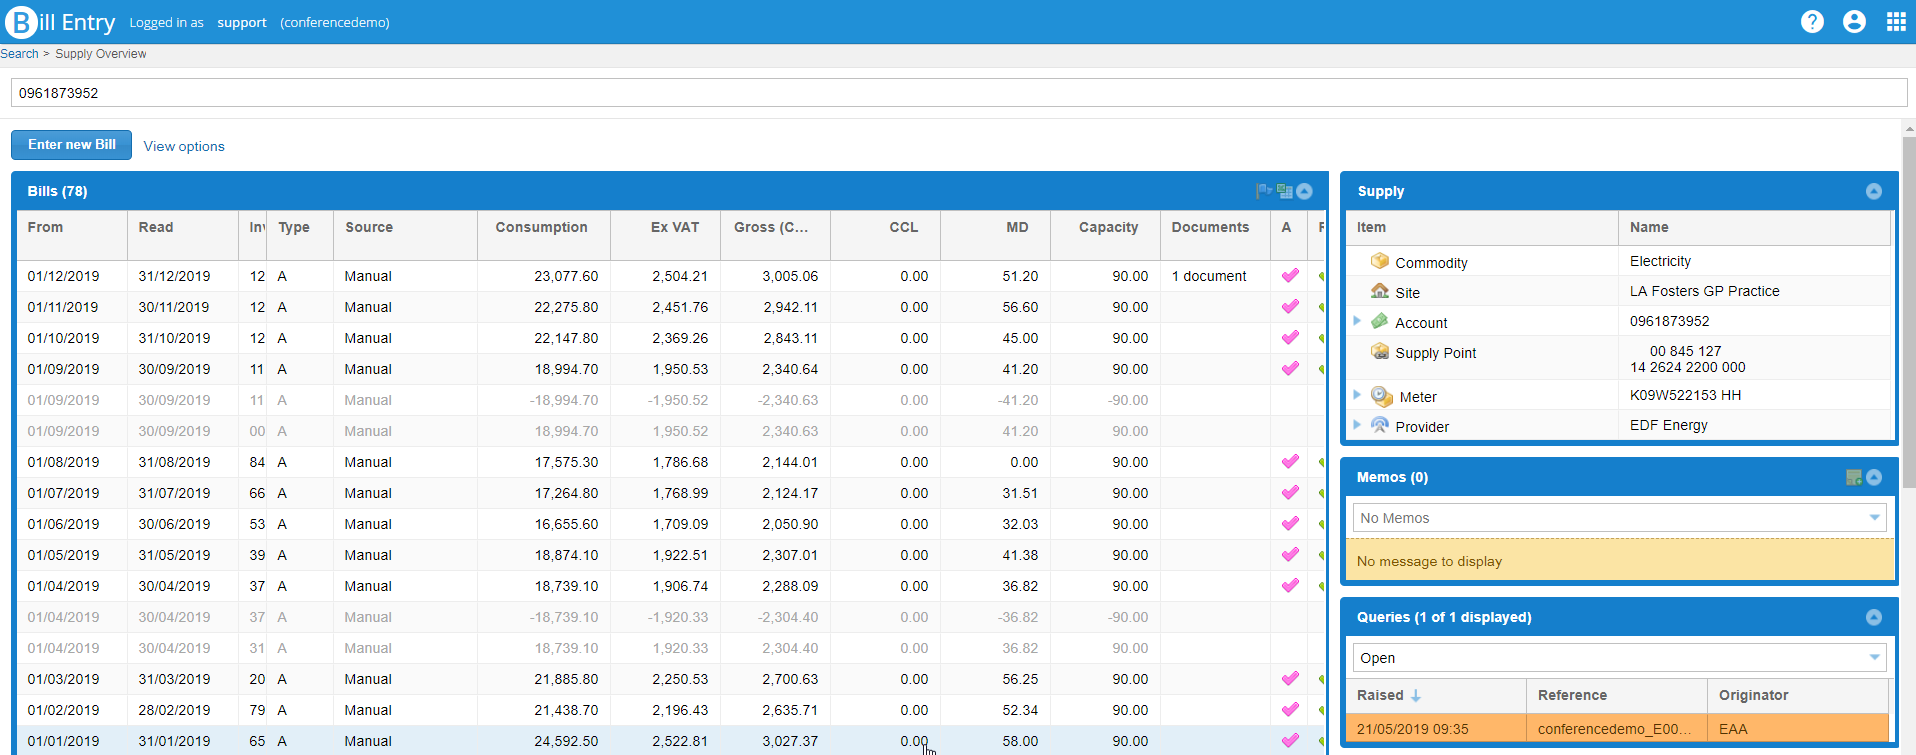
You can search for a new Account from here
or
- Click Search to go back to the Home Screen
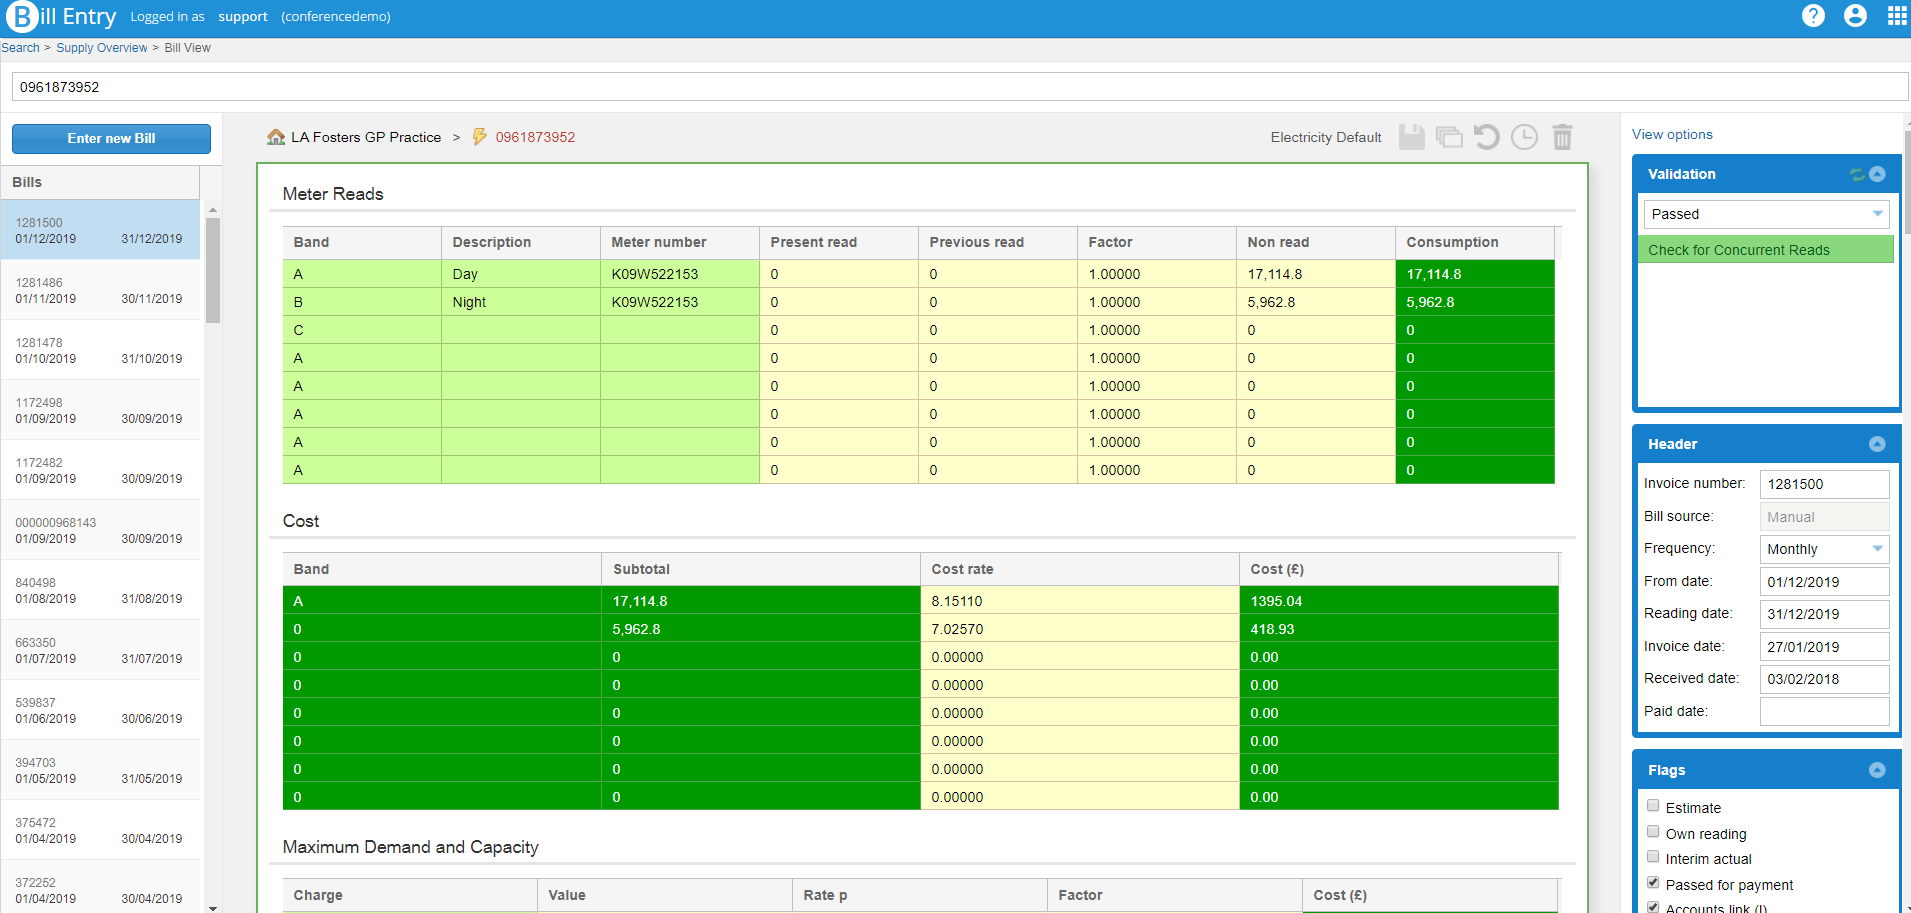
Bill View
- Click on any bill from the Supply Overview to view the bill
- Scroll down the screen to see all of the bill details. View other bills by clicking on the bill on the left hand side
 – click to create a new bill
 – shows which Validators the bill has failed on (if no failures it will default to the passed Validators)
 - details such as from/to dates, invoice number
 – flags can be ticked or unticked
 – any property keys associated with the Account
 – any documents attached to the invoice
 – any queries associated with this Account
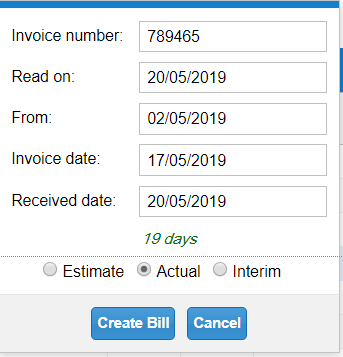
Creating a Bill
- Click on
- Invoice number – see the bill
- Read on – see the bill
- From – see the bill
- Invoice date – see the bill
- Received date – when you received the bill (will default to the current date) (if a future date is entered, a prompt will appear)
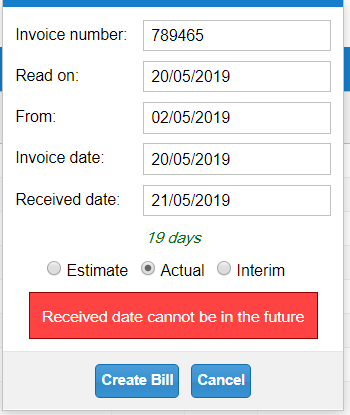
- Select Estimate, Actual or Interim
If none are selected, the following prompt appears:
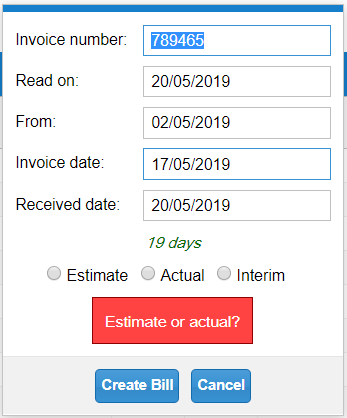
- Click

Entering the details of the bill
Enter the details of the bill such as the meter readings, PPU, standing charge, CCL, VAT in the appropriate fields
- Some fields will be pre-populated from the previous bill, such as the previous meter readings, standing charge and PPU
- Click once into a cell to enter the details
- Use the arrow keys on the keyboard to move to the next field
- Use the Tab key on the keyboard to move to the next section
- Use
 to change templates. For example from the Electricity Default to Npower
Entry Tips
- Click once into a field to add details
- Use the Arrow keys to move between fields in a section
- Use the Tab key to move to the next section
- Add the scanned copy of the document in

Date Tips
Dates can be added in the following formats
- ddmmyy (e.g. 011117)
- ddmmyyyy (e.g. 01112017)
- dd/mm/yy (e.g. 01/11/17)
- dd/mm/yyyy (e.g. 01/11/2017)
Validating the bill
- Click on Revalidate in the Validation section to show any passed or failed validators
- If all validators pass, it will default to Passed
- If any validators fail, it will default to Failed
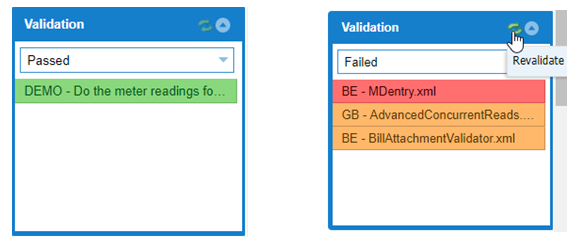
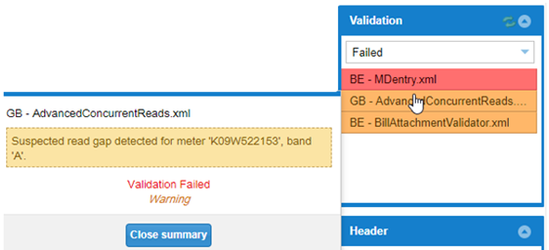
Failed validation will show
- Red failures are Severe
- Orange failures are Warnings
- Click on each failure to see more detail
Saving the Bill
Saving Tips
Bill Entry will automatically save the bill after 30 minutes. If you use the Accounts Link it is important that you don't have any changes to the bill, so it is vital to complete the bill within 30 minutes.
There is a Validator that can be added to fail the bill if there is more than one change. Click here for details.
Saving the Bill
Click to save the Bill
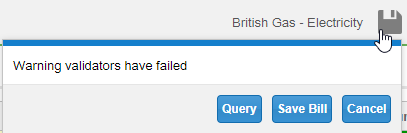
If there are warning Validators, you can either Query or Save the bill
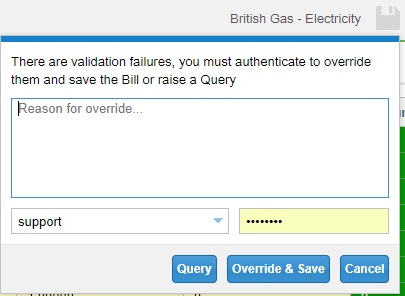
If there are severe Validators, you can either Query or Override & Save the bill
Deleting Tips
EDI and Manual Bills can be deleted from Bill Entry using the Delete Button.
If you have started a bill and do not want to keep it, you must use the Delete Button, not Discard Changes.
Discard Changes will keep the bill with the dates, but not any readings etc that have been entered.
- From the Bill, click on

- Choose your User name from the dropdown
- Enter your Password
- Click Delete
Icons
![]()
 the name of the Template you are using
 click to Save
 allows you to change between templates
 shows the number of changes to a bill, who created it and whether it has been exported via the Accounts Link
 deletes a bill. For EDI bills, it will unload the bill from the Batch and delete the bill
Views
The Supply Overview and Bill View can be arranged to suit each user
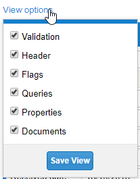
- Drag and drop the sections
- Tick/untick any sections you don't want to see
- Click Save View to see this view when you next log in
Hints & Tips
Back/Forward Buttons – You can press the back button to go between screens such as the Supply Overview and Bill View
- Click on any bill in the Summary Overview to take you to the Bill Overview
Flowchart
Click on the PDF below to download a flowchart on how to deal with failed validators.
@ Copyright TEAM - Energy Auditing Agency Limited Registered Number 1916768 Website: www.teamenergy.com Telephone: +44 (0)1908 690018