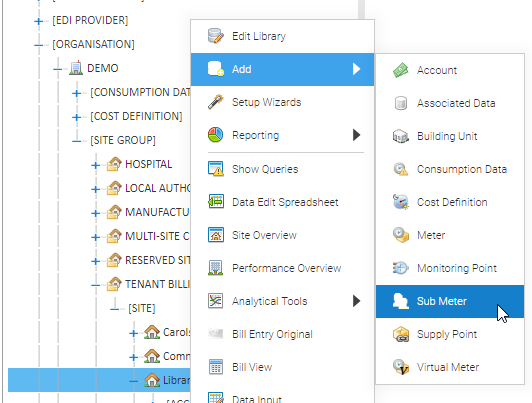
When you have a new Site or Building Unit, you will need to create the Site, Building Unit and any Accounts, Meters, Sub Meters, Virtual Meters, Channels and Supply Points.
...
Adding a Site
- Right click on the Site Group
- Click Add
- Click Site
- Enter the Site Name, Benchmark, ID's on the Site tab
- Click on the Location tab and enter the address details
- Click OK
Adding a Building Unit
- Right click on the Site
- Click Add
- Click Building Unit
- Enter the Name (mandatory), Unit reference and Location
- Click OK
Adding a Meter
- Right click on the Site
- Click Add
- Click Meter
| Field | Description |
|---|---|
| Name | Add the Meter Serial Number |
| Number | Add the Meter Serial Number |
| Identifier | Add the Meter Serial Number |
| Location | Enter the location (if known) |
| Commodity | Choose Electricity, Gas, Water etc |
| Meter Type | Choose Code 5, Domestic etc |
Use installation date | Tick to add a date |
| Installation date | Add the date the meter was installed |
- Click OK
Adding a Periodic Channel
...
Choose either Non-Periodic Channel or Periodic Channel.
- Right click on the Meter
- Click Add
- Click Non-Periodic Channel (or Periodic Channel)
| Field | Description |
|---|---|
| Name | Enter the name of the Channel (usually the supply number or the meter number) |
| Data Load ID 1 | If half hourly downloads, this will need to be the identifying number on the import |
| Data Load ID 2 | Rarely used, but some imports may have 2 IDs |
| Channel Register | Choose from All Day, Day, Night etc (default is All Day) |
| Data type | Defaults to Energy Consumption for Gas and Electricity, change to Volumetric Consumption for Water |
| Time Zone | This should be the same as the Time Zone set in the Billing Group. Click here for details of the Billing Group Setup |
| Unit of Measurement | Defaults to kWh for Gas and Electricity, change to M3 for Water |
| Conversion Factor | Defaults to 1 |
| Data Measurement | Defaults to Consumption |
| Channel Data Quality | Defaults to Primary |
| Closed | Only used if closing the Channel |
| Meter Readings | Tick to indicate that the consumption will be entered in meter readings (not as consumption values) |
...
- Right click on the Site
- Click Add
- Click Sub Meter
- Complete the Meter Editor pop up in the same way that you would a standard Meter (see above)
...
Virtual Meters can also be used with calculations. For example you may have a Sub Meter in a Shop Unit, but you also want to charge a portion of the Main Meter. Both Meters are added to the Virtual Meter and a sum entered with the equation.
- Right click on the Site
- Click Add
- Click Virtual Meter
| Field | Description |
|---|---|
| Name | Enter the name for the Virtual Meter |
| Description | (optional) |
| Commodity | Choose from the dropdown |
| Equation | Leave blank if you want to add together all of the Meters in the Selected section An example equation may be that you want to charge for a Sub Meter and a 1/4 of the Main Meter. The Equation would be [1]+([2]/4). |
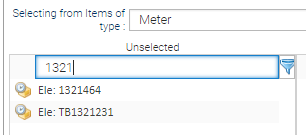
| Selecting from items of type | Defaults to Meter. Can be changed to:
When you change the Item type here, the Unselected box will show any available |
| Show all tickbox | Tick to show all available Meters across the whole database |
| Unselected | Shows any available Meters for the Site The search field allows you to search all the Meters |
| Selected | Drag and drop Meter(s) from the Unselected section |
...
An Account is required if you intend to enter your Utility Bills into Sigma and then use the consumption details for billing Tenants.
- Right click on the Site
- Click Add
- Click Account
| Field | Description |
|---|---|
| Account Number | Enter the Utility bill Account Number |
| Commodity | Choose the Commodity from the dropdown list |
...


