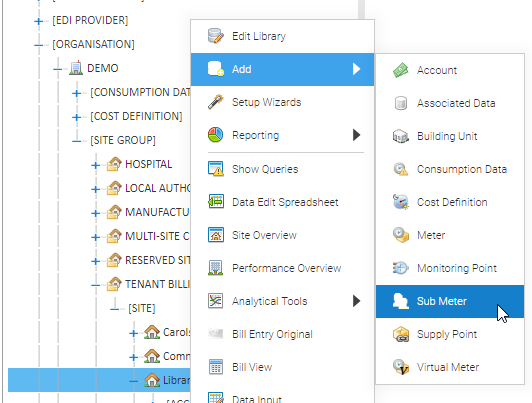
When you have a new Site, you will need to create the Site and any Accounts, Meters, Sub Meters, Virtual Meters, Channels and Supply Points.
...
Adding a Site
Right click on the Site Group
Enter the Site Name, Benchmark, ID's on the Site tab
Click on the Location tab and enter the address details
Click OK
Adding a Meter
Right click on the Site
Click Add
Click Meter
| Field | Description |
|---|---|
| Name | Add the Meter Serial Number |
| Number | Add the Meter Serial Number |
| Identifier | Add the Meter Serial Number |
| Location | Enter the location (if known) |
| Commodity | Choose Electricity, Gas, Water etc |
| Meter Type | Choose Code 5, Domestic etc |
Use installation date | Tick to add a date |
| Installation date | Add the date the meter was installed |
Click OK
Adding a Periodic Channel
...
Choose either Non-Periodic Channel or Periodic Channel.
Right click on the Meter
Click Add
Click Non-Periodic Channel (or Periodic Channel)
| Field | Description |
|---|---|
| Name | Enter the name of the Channel (usually the supply number or the meter number) |
| Data Load ID 1 | If half hourly downloads, this will need to be the identifying number on the import |
| Data Load ID 2 | Rarely used, but some imports may have 2 IDs |
| Channel Register | Choose from All Day, Day, Night etc (default is All Day) |
| Data type | Defaults to Energy Consumption for Gas and Electricity, change to Volumetric Consumption for Water |
| Time Zone | This should be the same as the Time Zone set in the Billing Group. Click here for details of the Billing Group Setup |
| Unit of Measurement | Defaults to kWh for Gas and Electricity, change to M3 for Water |
| Conversion Factor | Defaults to 1 |
| Data Measurement | Defaults to Consumption |
| Channel Data Quality | Defaults to Primary |
| Closed | Only used if closing the Channel |
| Meter Readings | Tick to indicate that the consumption will be entered in meter readings (not as consumption values) |
...
Right click on the Site
Click Add
Click Meter
Complete the Meter Editor pop up in the same way that you would a standard Meter (see above)
...
Virtual Meters can also be used with calculations. For example you may have a Sub Meter in a Shop Unit, but you also want to charge a portion of the Main Meter. Both Meters are added to the Virtual Meter and a sum entered with the equation.
Right click on the Site
Click Add
Click Virtual Meter
| Field | Description |
|---|---|
| Name | Enter the name for the Virtual Meter |
| Description | (optional) |
| Commodity | Choose from the dropdown |
| Equation | Leave blank if you want to add together all of the Meters in the Selected section An example equation may be that you want to charge for a Sub Meter and a 1/4 of the Main Meter. The Equation would be [1]+([2]/4). |
| Selecting from items of type | Defaults to Meter. Can be changed to:
When you change the Item type here, the Unselected box will show any available |
| Show all tickbox | Tick to show all available Meters across the whole database |
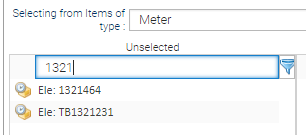
| Unselected | Shows any available Meters for the Site The search field allows you to search all the Meters |
| Selected | Drag and drop Meter(s) from the Unselected section |
...
An Account is required if you intend to enter your Utility Bills into Sigma and then use the consumption details for billing Tenants.
Right click on the Site
Click Add
Click Account
| Field | Description |
|---|---|
| Account Number | Enter the Utility bill Account Number |
| Commodity | Choose the Commodity from the dropdown list |
...


