Overdue data is defined as interval meter reading data that is now deemed as missing as it has not been received from the date it was last expected. It also highlights where no data at all has been received.
For example:
- a periodic channel which is recording data for every interval on a daily basis. If the data is not received for the day before last, then this would be deemed overdue.
- a periodic channel which is recording data for every interval on a monthly basis. If the data is not received for the previous month at the start of the next month, then this would be deemed overdue.
Adding an Overdue Data Strategy
Adding Notes to Notifications
This basic workflow allows you to capture information and update the status of the Notifications, as per your own business processes.
This is expected to be used to help you keep track of any investigative and follow-up actions which are been taken as a result of the Data Monitoring Notifications.
For example:
- where there is ongoing investigation to determine the cause of the problem, the status may be changed to "Under Investigation" and there maybe a series of notes capturing what has been happening
- where the issue has been referred to a metering agent to resolve, the status may be changed to "Assigned to Third Party" and there maybe a note to capture details of any conversations with the agent
Highlight the Notification(s) you would like to update. Notifications can be selected in bulk, even across different strategy types.
- Click
 which will display the Work Notification pop up:
The Status will default to In Progress and is not editable - the Resolve and Ignore features will update the status.
If you want to update the Sub-status, select the required option from the drop down list. The default options are:
- Under Investigation
- Assigned to Third Party
Pending Resolution
You can customise the options available for selection to suite your needs here by using the Database Object Setup activity.
You can also create reports in Energy Intelligence to keep track of the Notifications and their status, filtered as required to show the information as per your needs.
If you want to update the Note for the Notification(s), then Tick Update Note and enter the note in the text box.
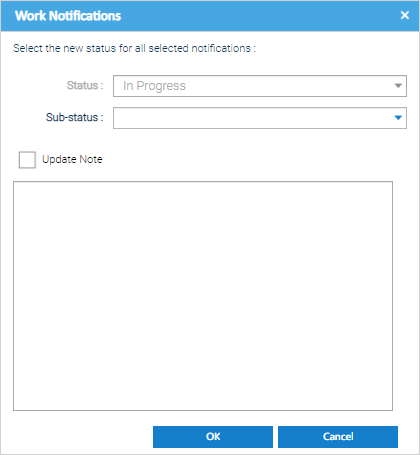
Click OK to Save.
Ignoring Notifications
This will update the status of the Notification to "Ignored" and will also prevent the same notification (for the same period and Impact) from being raised by the system again.
- Highlight the Notification(s) you would like to update. Notification(s) can be selected in bulk, even across different strategy types
- Click
 to open the Ignore Notifications pop up appears:
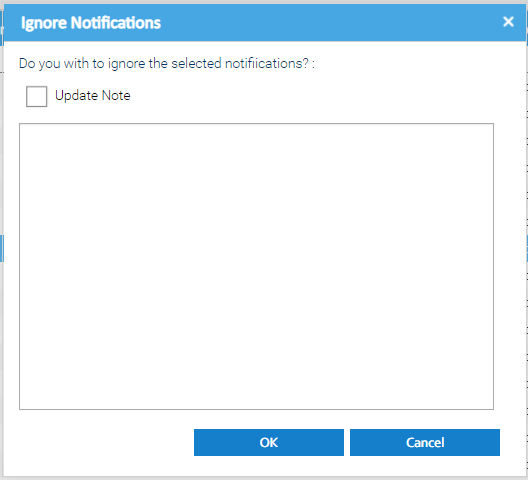
If you want to update the Note for the Notification(s), then Tick Update Note and enter the note in the text box.
- Click OK to Save
Editing Items
- Highlight the Notification
- Click
 to open the Periodic HFD Channel Editor
You can view the Channel / amend the interval reading Data associated to the notification, if required.
Please note, this option is only available if a single Notification is selected.
- Click OK if you have made changes
- Click Cancel to return to the Data Monitoring Activity
Editing Monitoring Strategies
Highlight the Notification for which you would like to edit the underlying monitoring strategy configuration.
- Click
 to open the Monitoring Strategy Editor. Note, this is only an available option if Notification(s) relating to a single strategy are selected.
 - Amend the Monitoring Strategy as required. Please see Data Gaps, Overdue Data or Unexpected Data for additional help.
- Click OK to Exit and Save
Exporting to Excel
- Click
 to download an Excel Spreadsheet of everything you see in the table
Overdue Data Configuration
The Monitoring Strategy Editor also contains an Overdue Data Configuration section that allows you to set the specific configuration to use when finding and managing the overdue data.
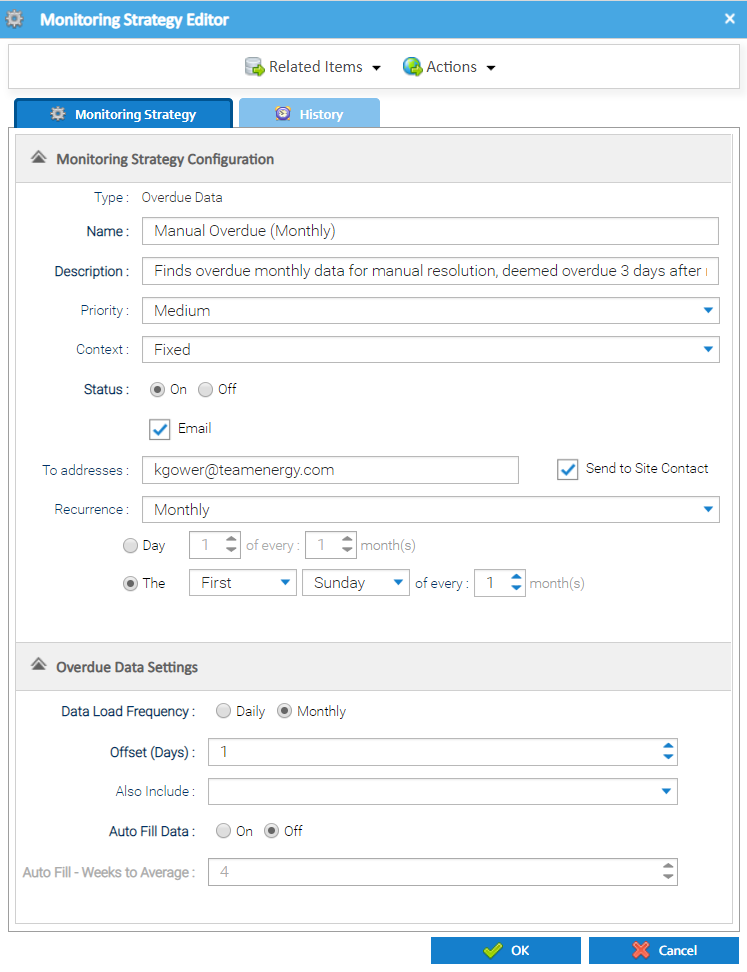
| Field | Default | Description |
|---|---|---|
| Data Load Frequency | Daily | Specification of the frequency at which data is loaded to the channel. Choose from:
|
| Offset (Days) | 1 | Choose the offset between the end date of the missing data period being checked based on the current date. Examples
Here, if data had been received up to and including 21/07/2019, the data would be deemed overdue from the 24/07/2019
Here, if data had been received up to and including 30/06/2019, the data would be deemed overdue from the 05/08/2019. |
| Also include | All unchecked | Define the combination of data values that should be considered missing data. Options include:
|
| Auto Fill Data | Off | An on/off toggle to determine whether the system should automatically estimate the data that is deemed to be overdue, based on an average from a historical period (specified below). |
| Auto Fill - Weeks to Average | 4 | Specify the number of weeks that should be used as a basis when calculating the data to use for automatically extrapolating historical data. More information about how this feeds into the system processing that it supports when filling the data can be seen here. |
Click OK to save the Monitoring Strategy.
Once the Strategy has been set up, Sigma will review the data each night and create any relevant notifications in the Notifications tab
Overdue Data Notifications
If overdue data is found for one of the strategies, then notifications will be raised that are visible in the Notification Tab.
Where the strategy was configured to auto-fill (estimate) overdue data for you, then the notification will still be raised in a closed state, for you be able to view what the system has done, providing a full audit.
Resolving Overdue DataWhere the strategy was configured not to auto-fill all gaps for you, then these can be manually resolved using the "Resolve" functionality available.
Highlight the applicable Overdue Data Notification(s) in the list.
Click  to open the Resolve Notifications popup
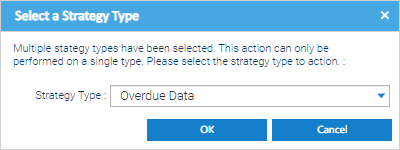
If you select notifications which include types other than gaps, then a prompt will be displayed to confirm which strategy type you want to work with as the options available are contextual to the type of data issue being worked.
The Resolve Notifications popup will be displayed, showing a list of the Notifications being resolved.
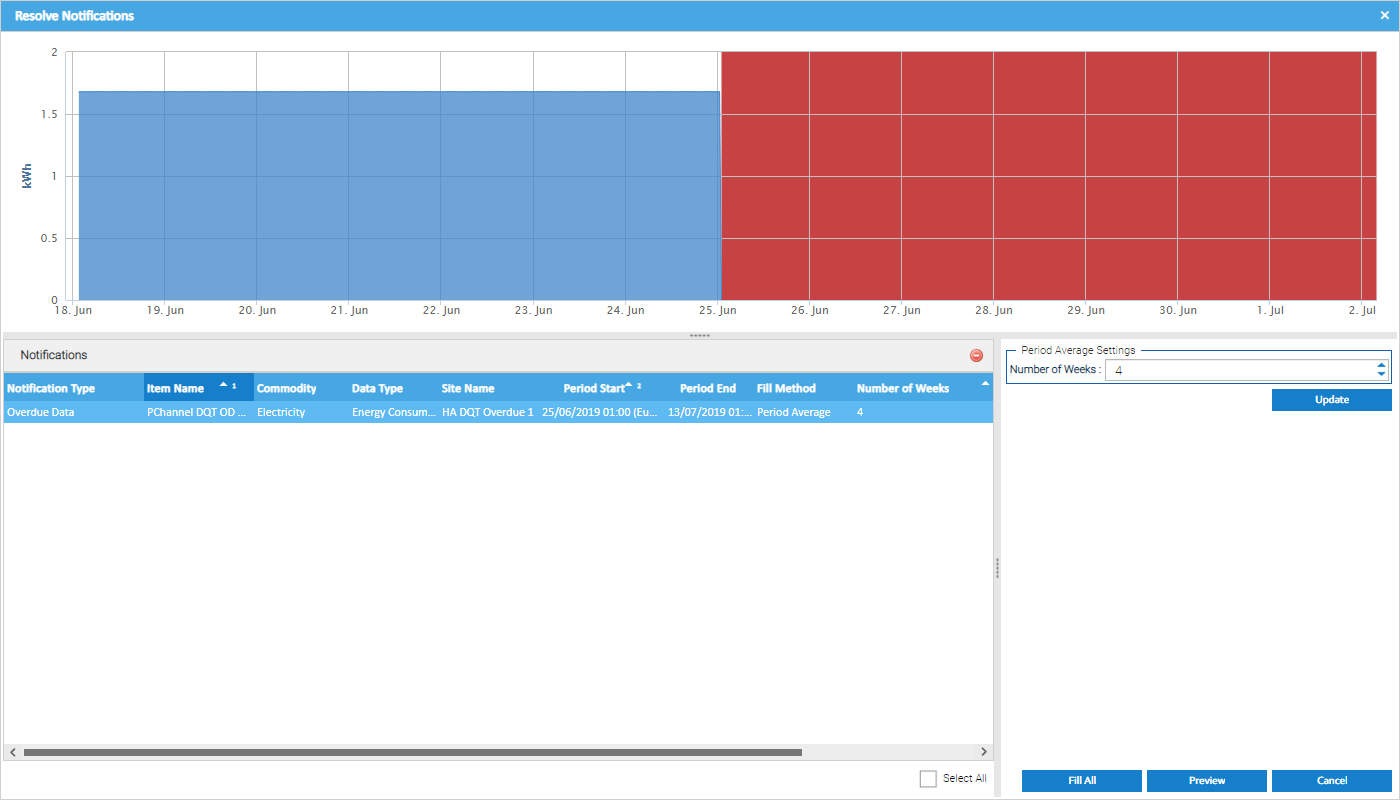
The graph at the top shows the periodic data for the channel linked to the notification selected. The red area shows the period of time for the missing overdue data.
Drag the mouse around the area on the graph to zoom in.
Click 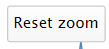 to reset.
Actions - Overdue Data
Update Period Average Setting
You can change the number of Weeks used as a basis for calculating the data to use when filling the overdue period. Select all the Notification records it should apply to then click Update. This will update the period to use when calculating the averaged data to fill the gap.
Tip
Use the "Select All" toggle at the bottom of the notifications panel if you want to quickly select all notifications.
 -
-
Preview
If you want to see what the estimated data will look like, click  first.
This will show you what the resolution would look like for the Notification that has been selected in the list. The extrapolated period is highlighted in green.
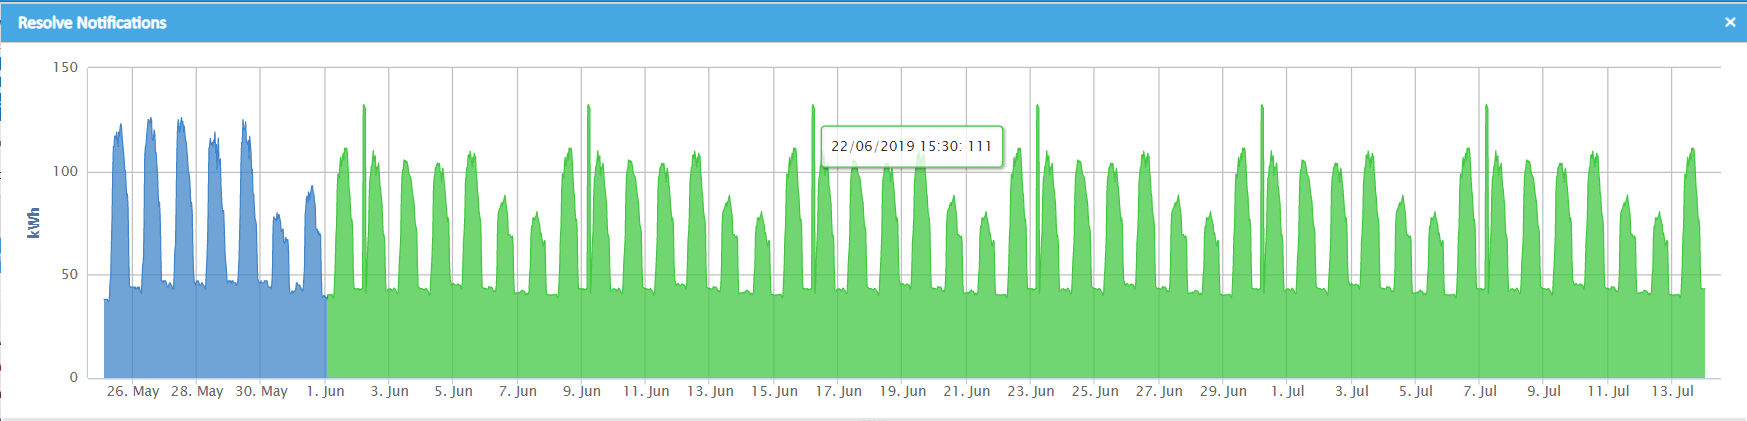
Drag the mouse around the area to zoom in
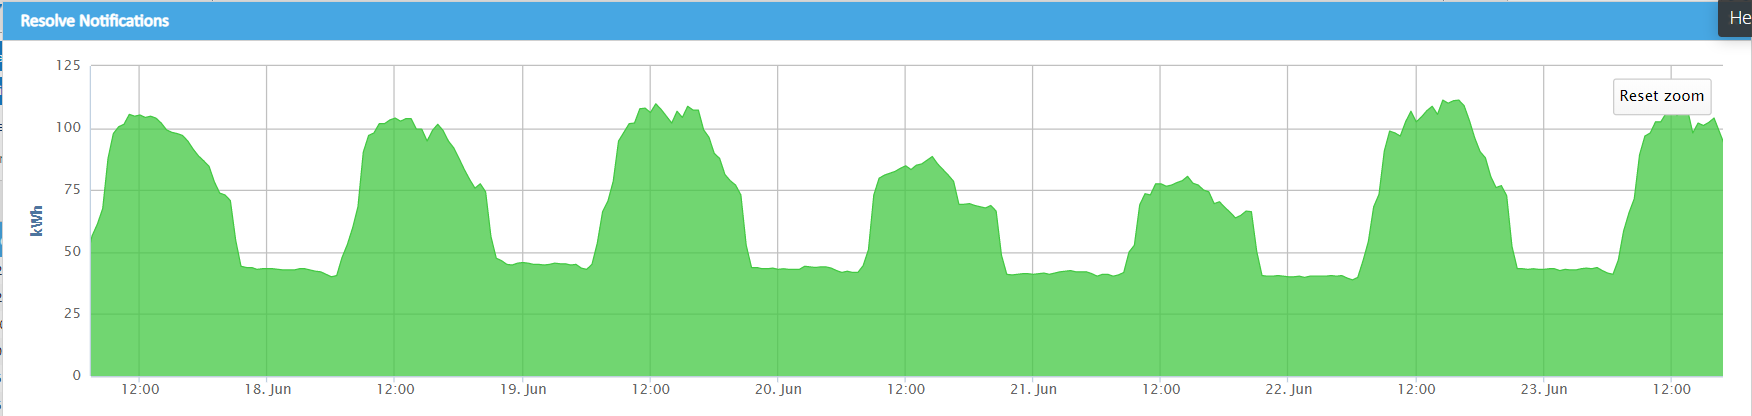
Click to reset
Fill
Click  to add the data.
The Resolve Notifications pop up appears:

A Note can be optionally entered, if required and will be stored against the Notification.
Click OK.
The following confirmation popup will be displayed:
Click OK.
Cancel
Click  to cancel without making any changes. You will be returned to the list of all Notifications.