...
- Open an Activity and find the Supply Point in the Data Selector
- Right click on the Supply Point and click Edit to open the Supply Point Editor
- Click on the Best Available Data tab to see the three section:
- Data Sources
- Estimation Config
- Forecasting Config
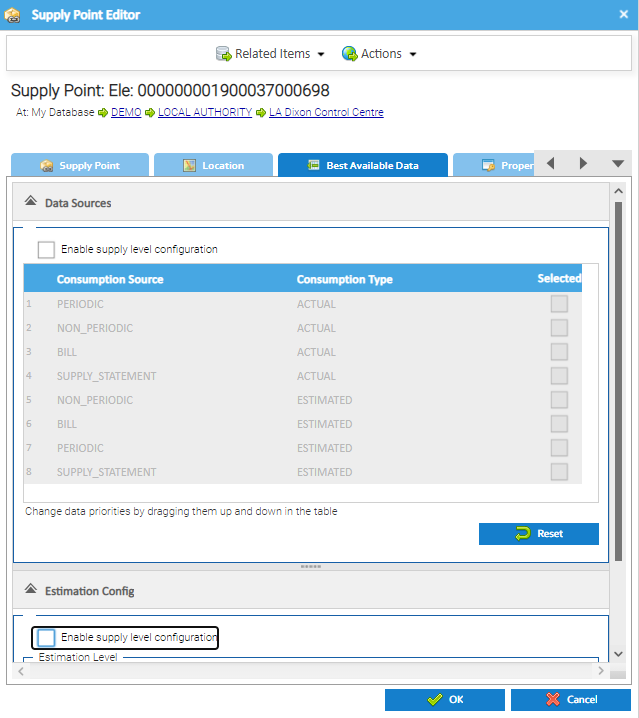
Note: the Tab shows the current configuration but is greyed out. This will either be the global configuration you have set for your database or a previous individual setting for this Supply Point.
...
- Click on the Data Configuration section
- Tick Enable supply level configuration
- Drag and drop the Data Source to change the priority
- Tick / Untick any Data Sources that you do/don't want to be used
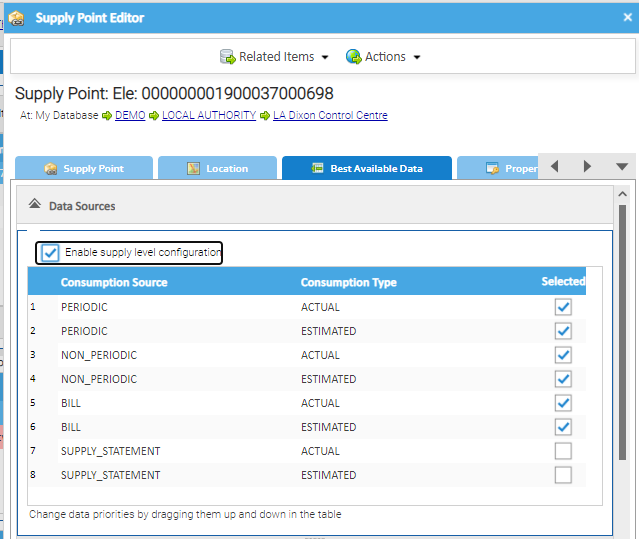
- Click OK to save
...
- Click on the Estimation Config section
- Tick Enable supply level configuration
- Use the Slider to decide on the level you require
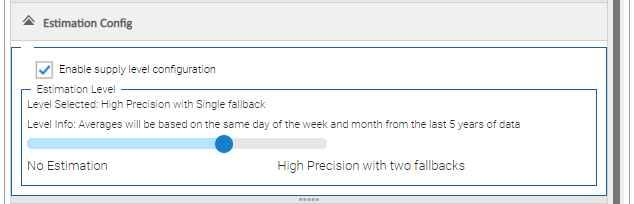

- Click OK to save
...
- Click on the Forecast Config section
- Tick Enable Supply level configuration
- Tick/Untick the Forecast Enabled Column
- Enter a Uplift/Reduction percentage (if required).
- Reductions would need to be added with a - e.g. -5 for a reduction of 5%
- There is no need to tick the Forecast Enabled column first. Adding a figure in the Uplift/Reduction will automatically tick the Forecast Enabled

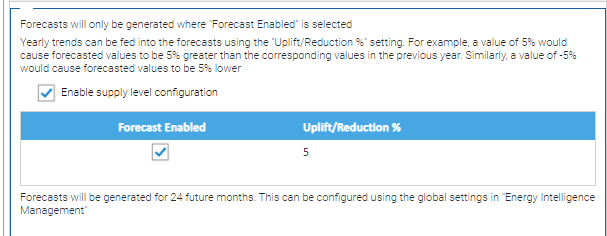
- Click OK to save
Note: You can not change the amount of future months for an individual Supply Point. This is set globally. Click here for details on the Global Settings for Best Available Consumption Data View.
...