...
- Site
- Supply Point
- Accounts
- Meter
- Channels
Table of Contents
Accessing the Manage Associated Data Feature
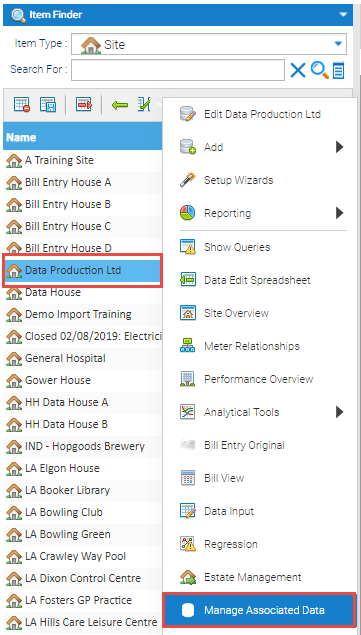
Item Finder
The Manage Associated data feature can be accessed by right clicking on the appropriate Item in the Item Finder that is found across many of the Activities in Sigma.
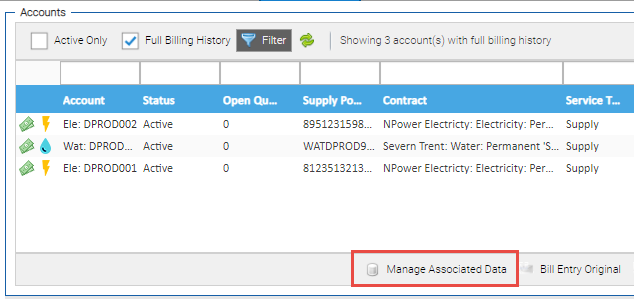
Estate Management Screen
The Manage Associated data feature can be accessed in each of the tabs in the Estate management screen for the Item that has been selected (i,e. Supply Point, Account< Meter or Channel). The button is the same across each of the screens.
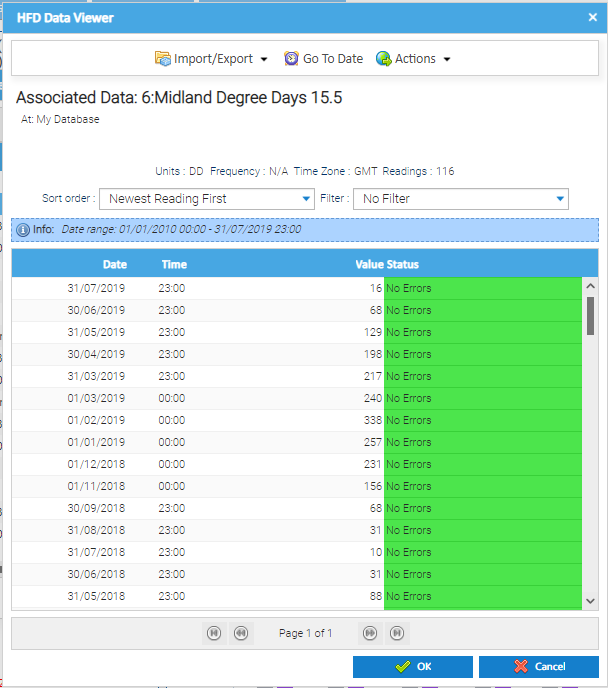
Manage Associated Data Screen
Once the screen has been opened, it will display all of the Associated Data Items that are linked to the.
...
| Info |
|---|
When the Manage Associated Data feature is accessed in the context of a Site, it will display all the Associated Data items that are directly linked with the Site itself or linked to any of the child Items for the Site (e.g. Supply Point, Account etc.). The Parent column will indicate which item the Associated Data item is associated with. |
Manage Associated Data Options - Top Menu

| Option | Description |
|---|---|
| Edit Item | Opens the Associated Data Editor for the Associated Data item that has been selected from the list. |
| New Data for Parent | Creates a new Associated Data item to be linked to the parent of the Item that has been selected in the list. For example, if an Associated Data item is selected that relates to an Account, selecting this option would create a new Associated Data item for the Account (even if the pop-up had been accessed in the context of the Site). |
| Data Viewer | Opens the High Frequency Data (HFD) Viewer for the Associated Data Channel selected to allow you to view and manage all data values that exist for the item and the applicable date and time they relate to.
|
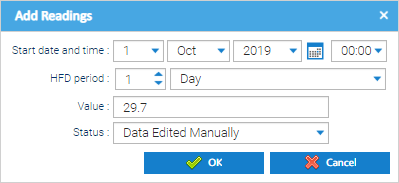
| Add Value to End | Opens the Add Readings pop up to allow a new Value to be entered for the selected Associated Data Item along with when that value was effective from.
For example, entering a a new value that was effective from a given day:
|
Manage Associated Data Options - Bottom Menu
There is one button available which allows a new Associated Data item to be linked to the appropriate item. The appropriate Item depends on the context the screen has been accessed in.
...