Overdue data is defined as interval meter reading data that is now deemed as missing as it has not been received from the date it was last expected. It also highlights where no data at all has been received.
...
- a periodic channel which is recording data for every interval on a daily basis. If the data is not received for the day before last, then this would be deemed overdue.
- a periodic channel which is recording data for every interval on a monthly basis. If the data is not received for the previous month at the start of the next month, then this would be deemed overdue.
Adding an Overdue Data Strategy
...
Overdue Data Configuration
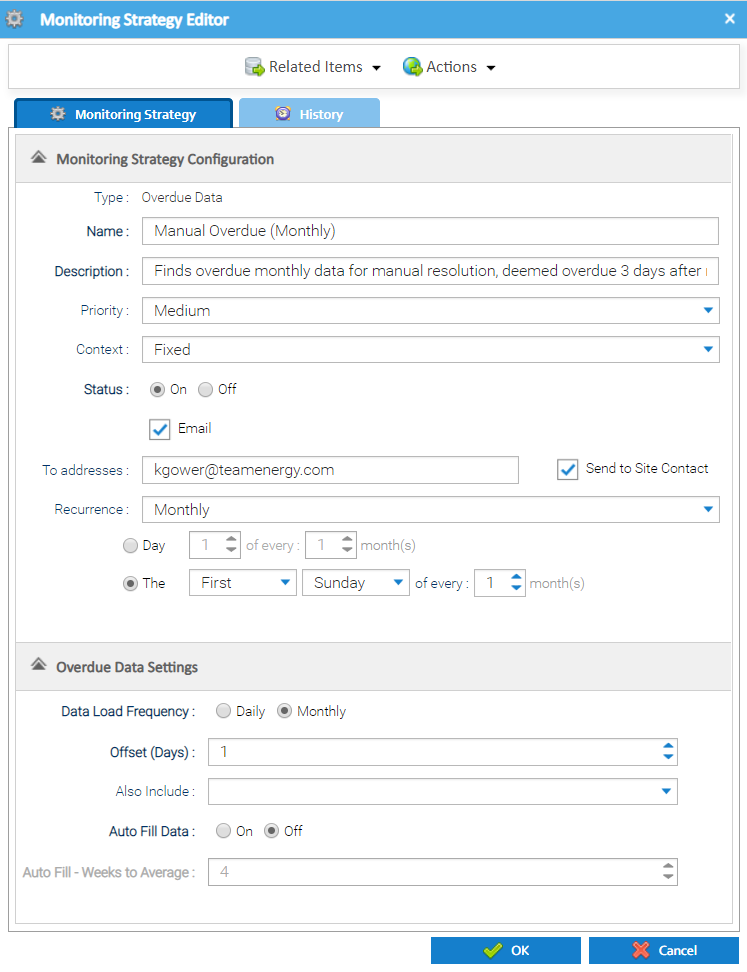
The Monitoring Strategy Editor also contains an Overdue Data Configuration section that allows you to set the specific configuration to use when finding and managing the overdue data.
...
Specification of the frequency at which data is loaded to the channel. Choose from:
- Daily
- Monthly
...
- .
...
Examples
...
Here, if data had been received up to and including 21/07/2019, the data would be deemed overdue from the 24/07/2019
- Data should be received monthly, and I want to know if I have not received data 5 days after the end of the previous month:
- Data Load Frequency should be set to "Monthly"
- Offset should be set to "4"
Here, if data had been received up to and including 30/06/2019, the data would be deemed overdue from the 05/08/2019.
...
Define the combination of data values that should be considered missing data.
Options include:
- Zero - No Error
- Checks for recorded values of '0' AND a status of 'No Error'. This represents data that the source metering system has sent as an actual meter reading value of zero. This should be used with caution as could represent valid data - it is intended to check meters which never expect to receive readings with a value of zero based on their operation.
...
An on/off toggle to determine whether the system should automatically estimate the data that is deemed to be overdue, based on an average from a historical period (specified below).
...
Specify the number of weeks that should be used as a basis when calculating the data to use for automatically extrapolating historical data.
More information about how this feeds into the system processing that it supports when filling the data can be seen here.
Click OK to save the Monitoring Strategy.
| Info |
|---|
Once the Strategy has been set up, Sigma will review the data each night and create any relevant notifications in the Notifications tab |
Table of Contents
Overdue Data Notifications
...
| Excerpt | |||||||
|---|---|---|---|---|---|---|---|
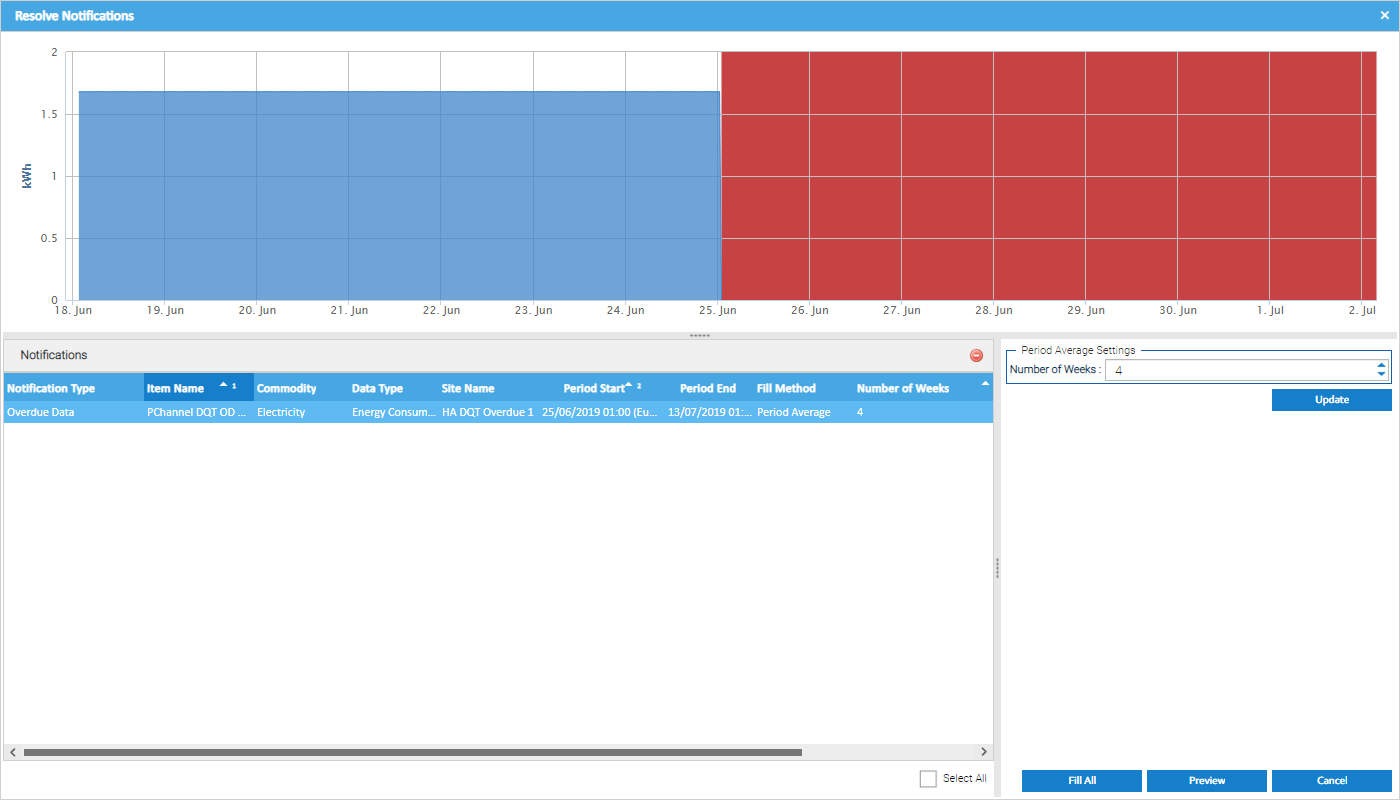
Where the strategy was configured not to auto-fill all gaps for you, then these can be manually resolved using the "Resolve" functionality available. Highlight the applicable Overdue Data Notification(s) in the list.
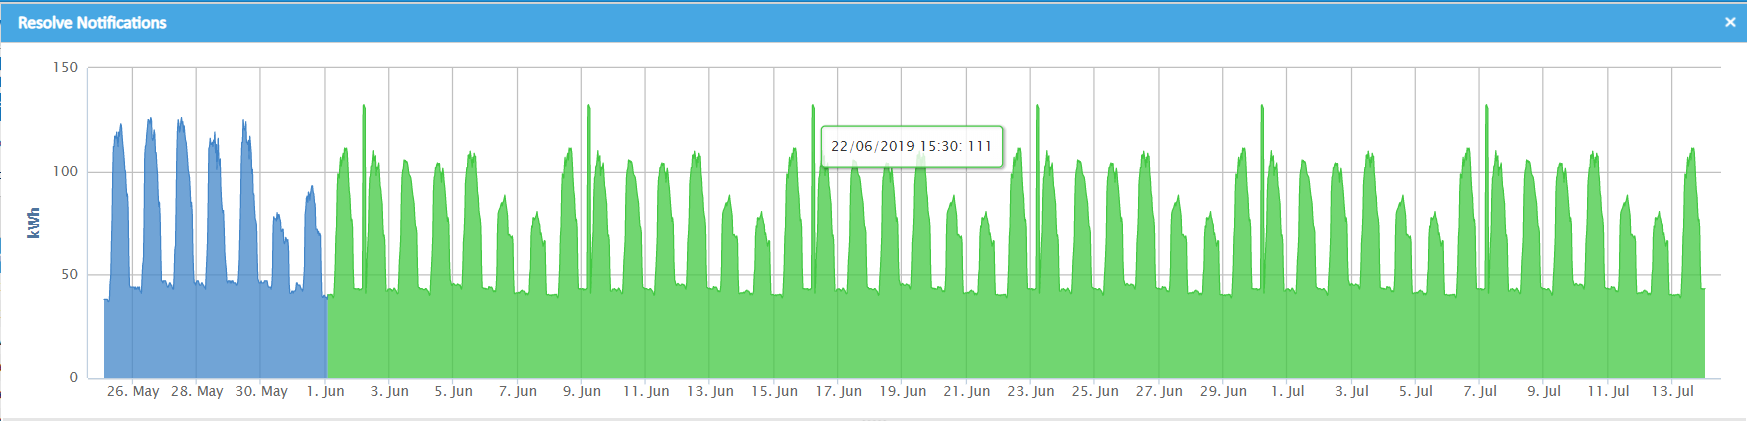
The Resolve Notifications popup will be displayed, showing a list of the Notifications being resolved.
The graph at the top shows the periodic data for the channel linked to the notification selected. The red area shows the period of time for the missing overdue data.
Actions - Overdue DataUpdate Period Average SettingYou can change the number of Weeks used as a basis for calculating the data to use when filling the overdue period. Select all the Notification records it should apply to then click Update. This will update the period to use when calculating the averaged data to fill the gap.
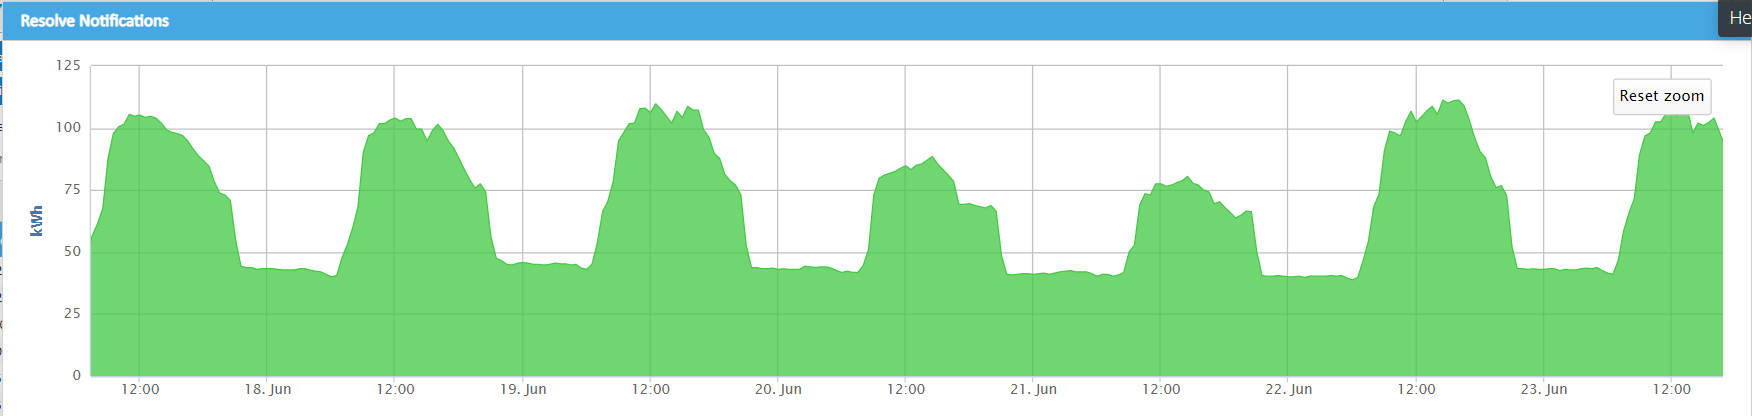
PreviewIf you want to see what the estimated data will look like, click This will show you what the resolution would look like for the Notification that has been selected in the list. The extrapolated period is highlighted in green.
Fill
The Resolve Notifications pop up appears:
A Note can be optionally entered, if required and will be stored against the Notification.
The following confirmation popup will be displayed:
Cancel
|


| Insert excerpt | ||||||||
|---|---|---|---|---|---|---|---|---|
|