...
- Open an Activity and find the Supply Point in the Data Selector
- Right click on the Supply Point and click Edit to open the Supply Point Editor
- Click on the Best Available Data tab to see the three section:
- Data Sources
- Estimation Config
- Forecasting Config
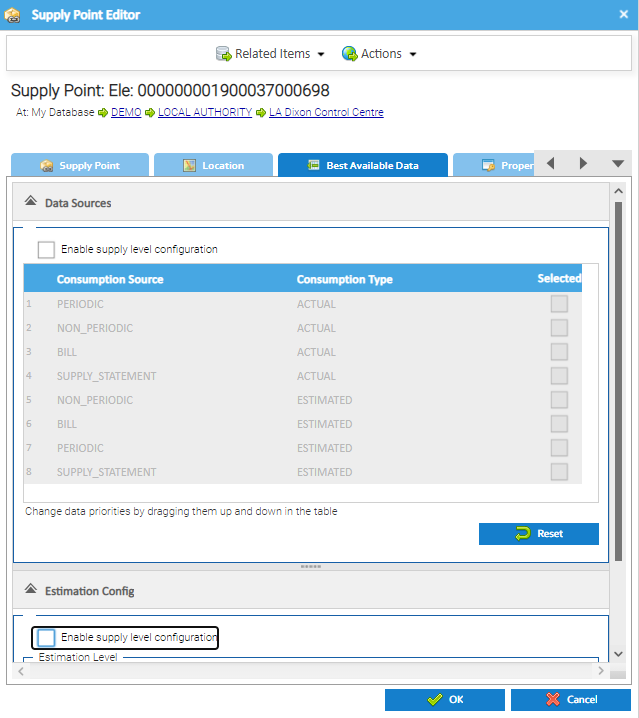
Note: the Tab shows the current configuration but is greyed out. This will either be the global configuration you have set for your database or a previous individual setting for this Supply Point.
...
- Click on the Data Configuration section
- Tick Enable supply level configuration
- Drag and drop the Data Source to change the priority
- Tick / Untick any Data Sources that you do/don't want to be used
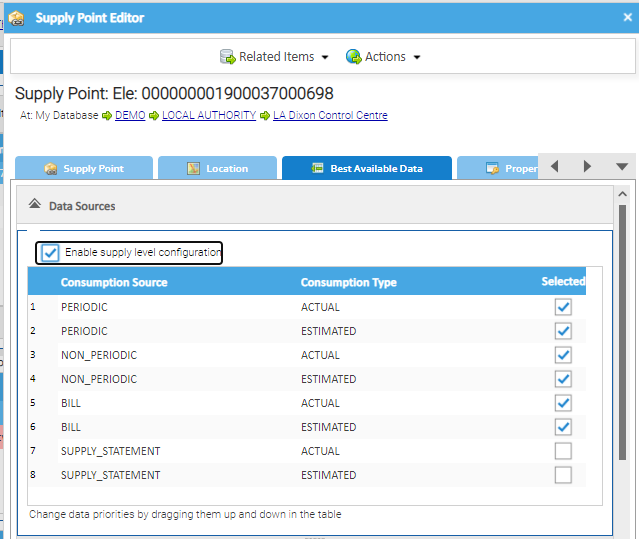
- Click OK to save
...
- Click on the Estimation Config section
- Tick Enable supply level configuration
- Use the Slider to decide on the level you require
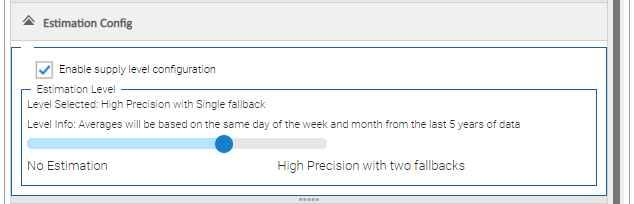

- Click OK to save
...
- Click on the Forecast Config section
- Tick Enable Supply level configuration
- Tick/Untick the Forecast Enabled Column
- Enter a Uplift/Reduction percentage (if required).
- Reductions would need to be added with a - e.g. -5 for a reduction of 5%
- There is no need to tick the Forecast Enabled column first. Adding a figure in the Uplift/Reduction will automatically tick the Forecast Enabled

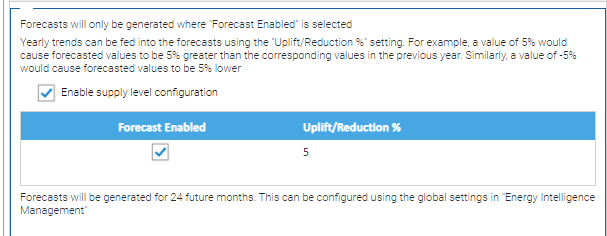
- Click OK to save
...