The User Admin activity allows you to manage your Users and their Roles. You can also define the Site(s) Users have access to.
The Activity is split into the following sections:
Introduction
A User is the individual. Each User has a unique log on. We recommend Users are set up using the first initial and last name of a user, ie Keith Smith's log on would be ksmith.
A Role is the set of Activities that a User has access to. There are default Roles already in Sigma, and new Roles can be added to suit the needs of your Users.
The Permission Management section is for updating Users who have restricted access to a selected Site(s). For example, a Headteacher may want access just to the Energy Viewer for their school and not the whole portfolio.
Logging into User Admin Activity
- Click on the User Admin Activity on the Welcome page
- Or use the Activities dropdown or the Activity Launcher
Dashboard Tab
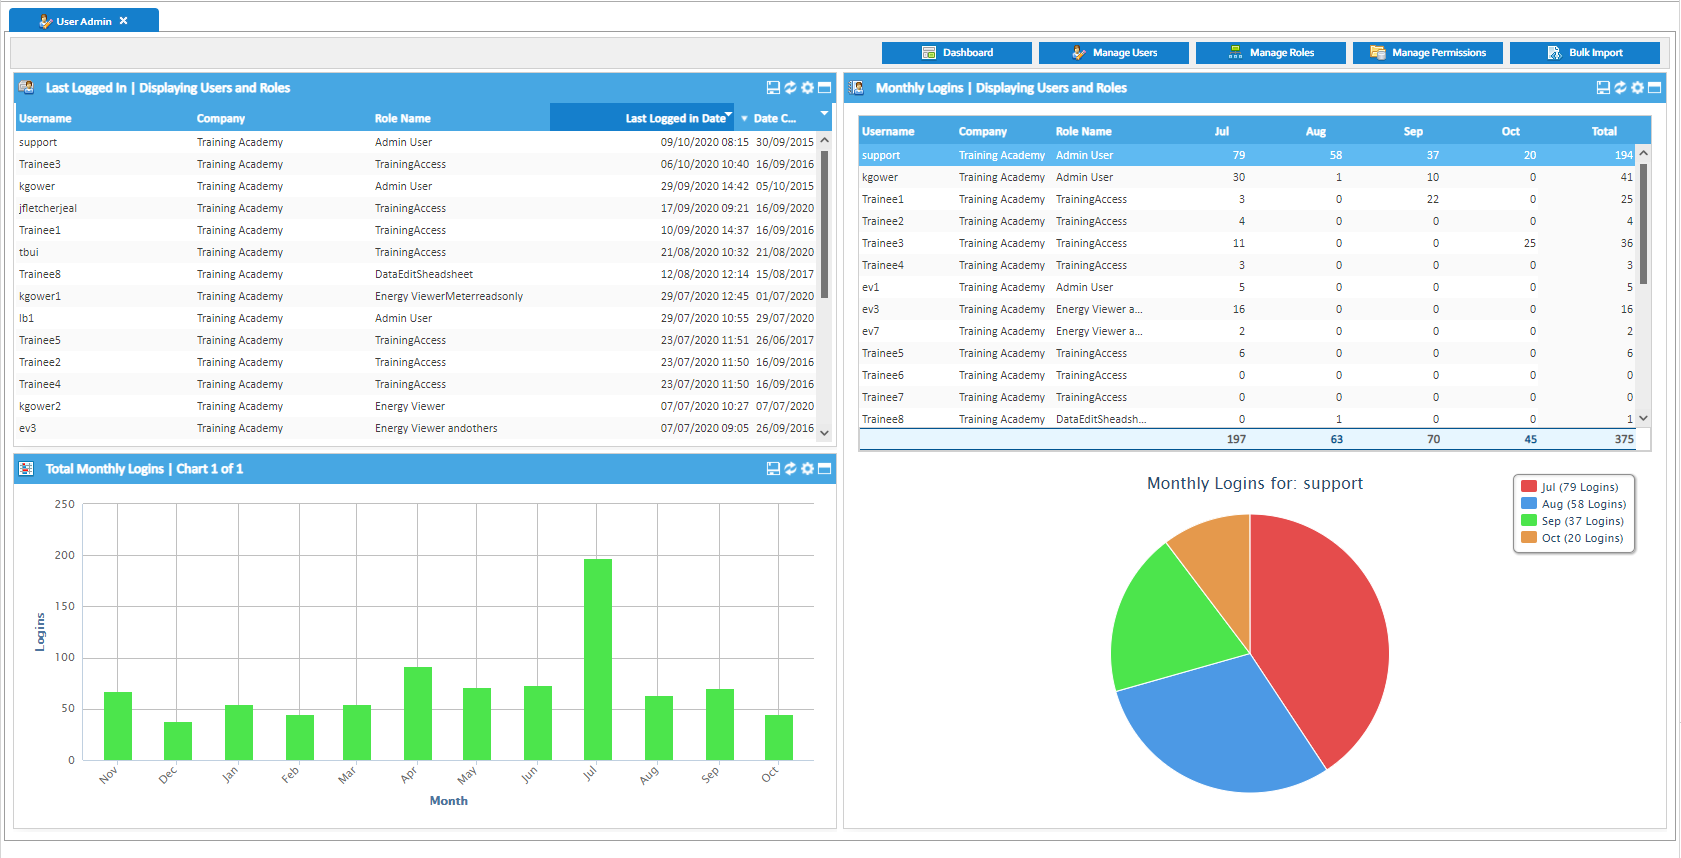
This is the default page for the User Admin Activity, and is used to view Login details at a glance.
The layout can be changed by dragging and dropping the sections.
Last Logged In section
Shows when the Users last logged in, the date the Users were created and if a user has 'Never' logged in.
- Select to save the section to an XLS file
- Select to refresh the section
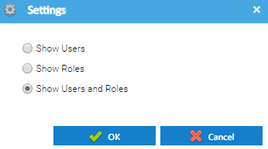
- Select to amend the Settings of the section. The section can display the Users, the Roles or the Users and the Roles
- Select to maximise to screen size. Click again to minimise
Total Weekly / Monthly Logins Section
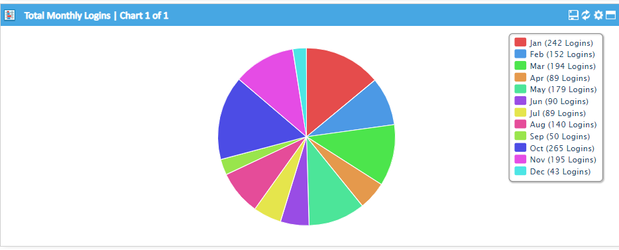
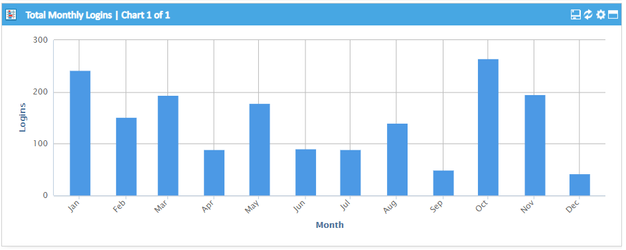
This section displays how many logins there have been in a week or month. The section can display data as a Pie Chart, Bar Chart or rotate between both.
- Select to save the section to a zip file
- Select to refresh the section
- Select to amend the settings of the section
- Chart selection - choose between Bar, Pie or Rotate both
- Period - choose between Week or Month
- Number of Intervals - choose between 1 - 8 for a Week, or 1 - 12 for a Month
- Select to maximise the section to full screen. Click again to minimise
OR
Weekly / Monthly Logins Section
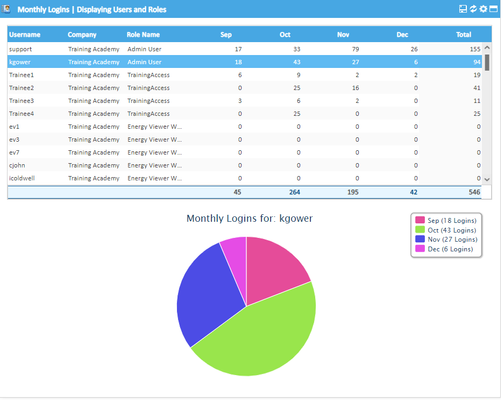
This section displays how often a User has logged in each Month or Week. There is a table of data at the top and a chart below.
- Select to save the section to a zip file
- Select to refresh the section
- Select to amend the settings of the section
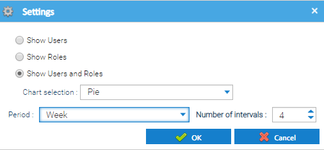
- Role - choose between Show Users, Show Roles or Show Users and Roles
- Chart selection - choose Bar or Pie
- Period - choose Month or Week
- Number of intervals - choose between 1 - 8 for a Week, or 1 - 12 for a Month
The Chart at the bottom will display details for the first user in the table by default, select another in the table for the chart to update.
- Select to maximise the section to full screen. Click again to minimise
Managing Roles
- Click
The list of all Users shows on the left hand side.
Default Roles
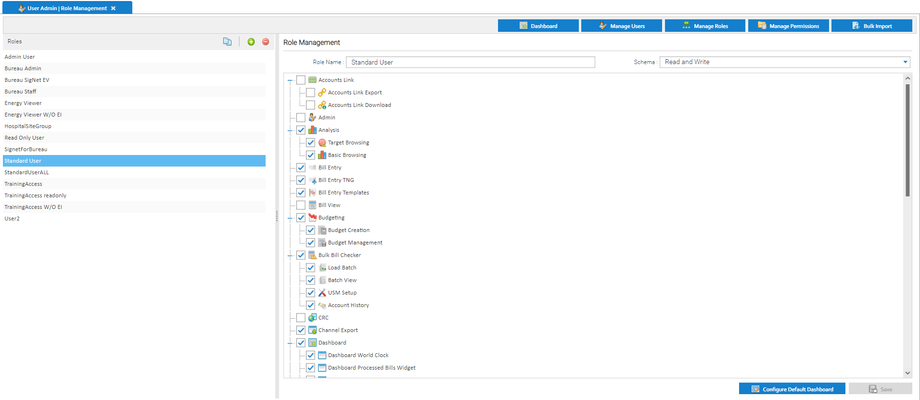
- Admin User – full access (read and write) including Admin activity
- Read Only User – read only access to all activities excluding Admin
- Standard User – full access (read and write) excluding the Admin activity
- Click on a Role to see the details in the Role Management section.
- Each Activity or Sub Activity can be ticked/unticked to be included/excluded in a Role
Adding a new Role
- Click Add Role
- Role Name - enter the name of the new Role
- Schema - choose from the dropdown, i.e. Read and Write or Read Only
- Tick boxes - tick the Activities that apply to this Role
- Click
Managing Users
- Click
Creating a New User
Click here for information on how to create a new User
Resetting Passwords
Users are able to reset the password themselves from the Sigma log on screen. However Admin Users can also send out the reset password email on their behalf.
User Reset
Users should click here for more information on how to reset their own passwords.
Admin Reset
Administrators can reset a password for a User. Click here for more information.
Resetting Secret key
The Secret Key is used to facilitate Two Factor Authentication.
When this has been enabled, it provides an extra layer of security whereby users must provide a verification code that they have generated, in addition to their username and password.
Click here for more information regarding Two Factor Authentication.
Adding a User to a Group from the Manage Users tab
- Click on the Manage Users tab
- Highlight the User
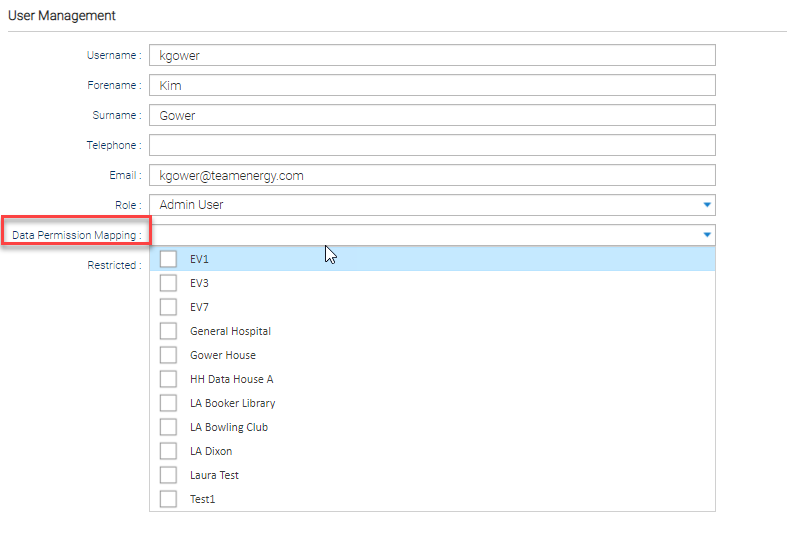
- Tick the Group from the Data Permission Mapping dropdown
- Tick the Restricted field
- Click
Managing Permissions
- Click on
Groups are added into this section and are usually for 1 or 2 sites. This narrows down the Users log in so that they only have access to the selected Site(s). Once the Group has been added, it can then be assigned to a User.
Adding a new Data Permission Group
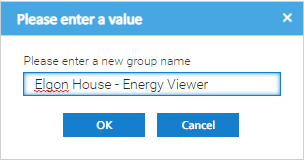
- Click Add a group
- Enter the name of the new group
- Click OK
Adding Users to a Group
- Select the Group
- Drag and drop the the User(s) from the Available Users section to the Selected Users
- Drag and drop the Site(s) from the Data Selector to the Selected Items section
- Click
- Tick Restricted to restrict the User to that Group
Adding Users to a Group from the Manual Users tab
If the User and the Role already exist:
- Click on the Manage Users tab
- Click on the User
- From the Data Permissions Mapping dropdown, choose the Role
- Click Save
Bulk Importing
Use the below example to create a file for importing Users in bulk.
Note: Click then click on to download the CSV file.
- Once created, click on
- Click Upload
- Choose the File to upload

