Queries can be added to Items such as Account, Meters or Sites in various way. See below for details:
Adding Queries
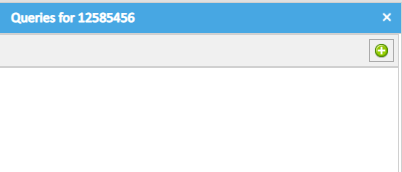
Adding a Query from an Item
Queries can be added onto Items such as Accounts, Meters, Sites.
- Open an Activity and highlight the Item in the Data Selector.
- Right click on the Account (or Meter or Site)
- Select Show Queries
- Select the
 icon to add a Query
Adding a Query from EDI Batch Management
- Right click on the bill line
- Select Generate Queries
- Select Generate Account Queries
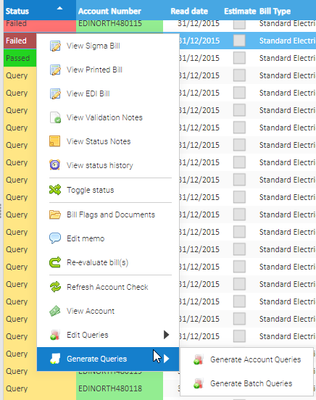
The Batch number and Invoice number will automatically be added, along with the validation notes.
Adding a Query from a Bill in Bill Entry
- Open Bill Entry
- Enter the bill
- Click on Save
- If there are failed validators, you will get the option to save or query the bill
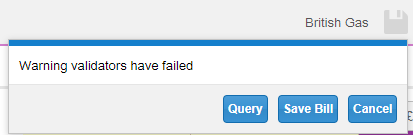
- Click on
 in the Queries section

Complete the pop up:
- Reference – unique reference is automatically generated for each query
- Value - enter a cost value based on the query
- Originator – choose who created the query, for example supplier or client
- Category – choose from the query categories available from the drop down menu
- Summary – enter details on the query
Note: details will show on who raised the query and on what date. It will also show 'Invoice number : null' as it isnt being raised on a particular invoice, but on the Account. Amend if required
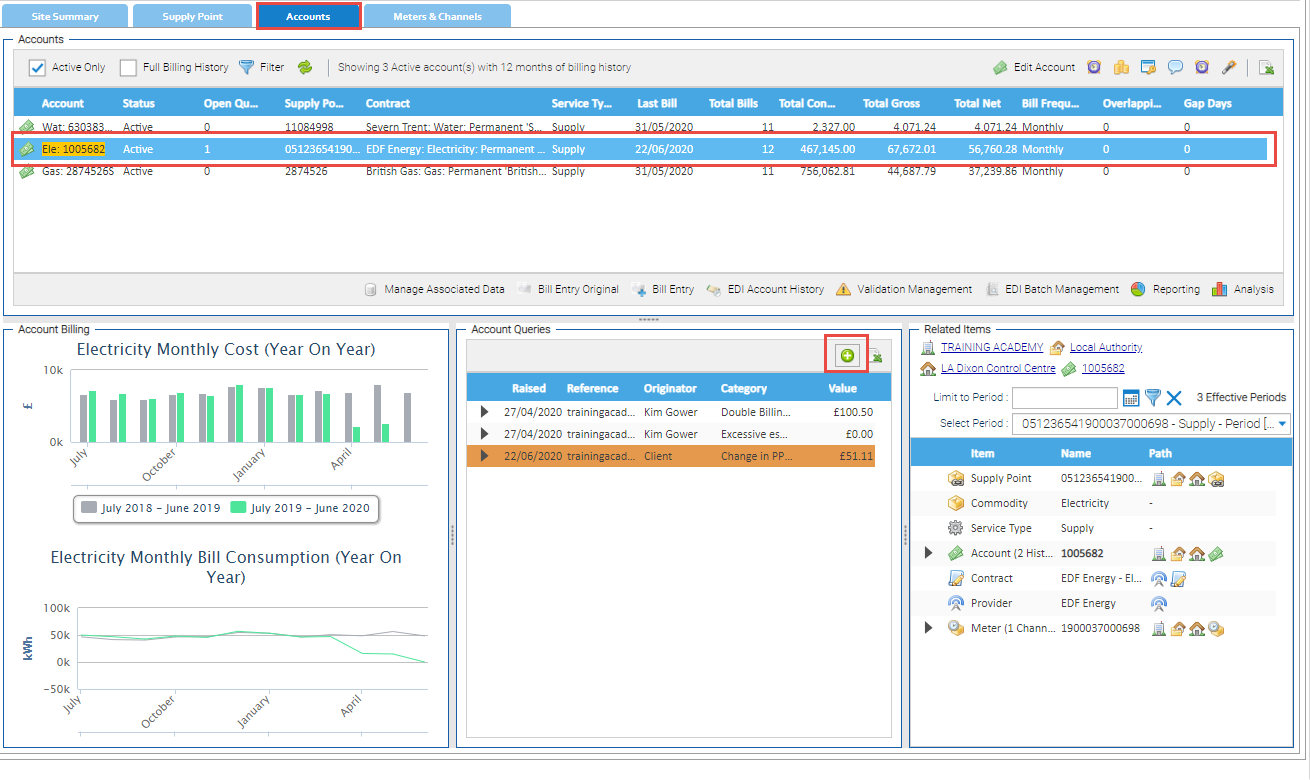
Adding a Query from the Estate Management Activity
- Open Estate Management
- Click on the Accounts Tab
- Highlight the Account
- Click +
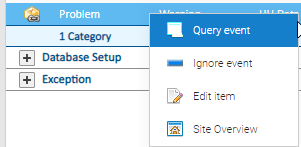
Adding a Query from the Events Overview Activity
- Right click on an Event
- Select Query Event to generate a Query
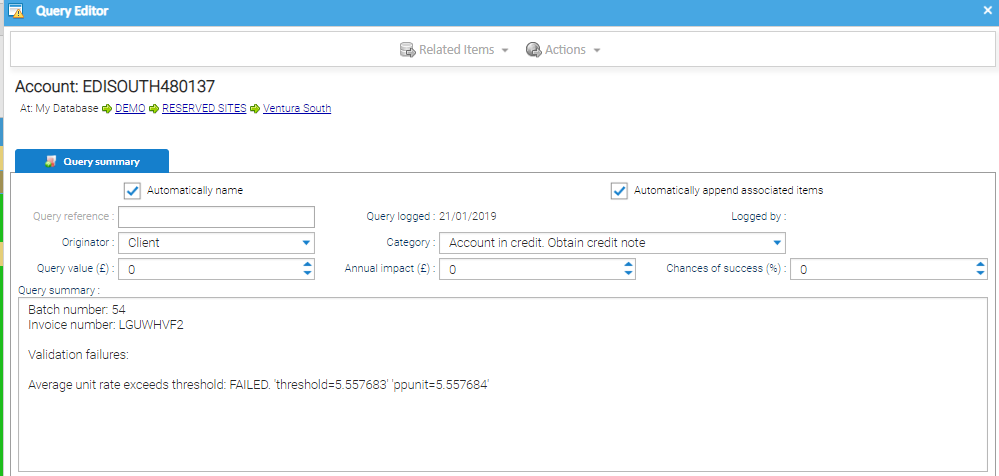
Completing the Query Summary
Once you have the Query Summary pop up, you can see the following details:
- Query Reference – unique reference is automatically generated for each query
- Query Logged – date the query is raised
- Logged By – the username the query is created by
- Originator – choose who created the query, for example supplier or client
- Category – choose from the query categories available from the drop down menu
- Query Value – enter a cost value based on the query
- Annual Impact – enter a cost impact over a year
- Chances of Success – add a percentage chance of a successful query
- Query Summary – enter details on the query
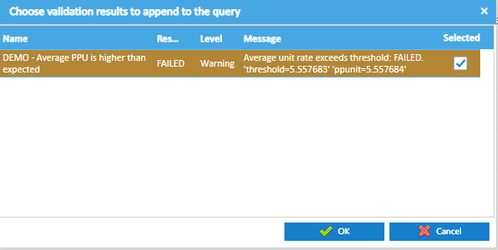
Note: If the Query is created from EDI Batch Management, the Batch number and Invoice number will appear in the summary, along with details of the failed validation (if previously ticked).
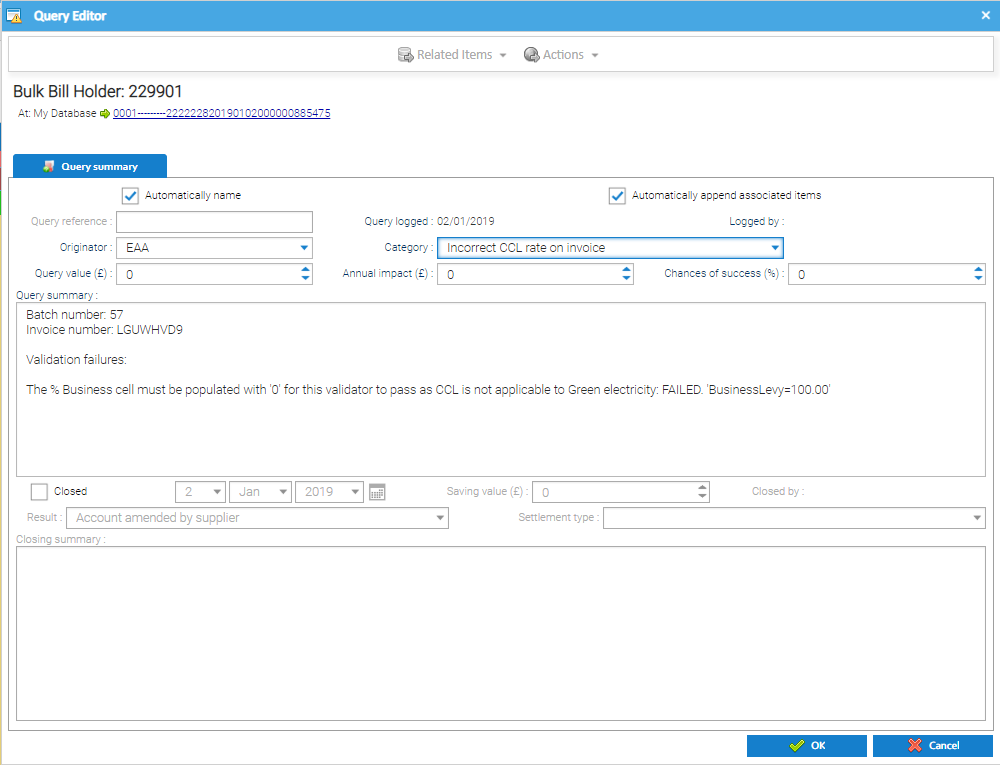
- Click OK to save the query
Viewing Existing Queries
Once a Query has been created it can be viewed.
Click here for more details on how to view existing queries.
Managing Queries
Once a Query has been created it can then be managed and subsequently resolved.
Click here for more details on how to manage queries