Introduction
The administration activity is split into five sections;
A User refers to the individual login required per user.
A Role is a specific category of user with custom activity permissions. You can assign different roles for different user activities (such as Bill Entry or Energy Managers).
The permission management is for updating users who have restricted access to a select group of sites. For example, a Head of a school may want access just to the Energy Viewer for their school, not the whole portfolio.
By default you will have a template role that has all available activities. It is recommended you configure your required roles before creating the individual users. Selecting one of these thumbnails will open that activity in a new tab.
Logging into User Admin Activity
- Click on the User Admin Activity on the Welcome page
Dashboard Tab
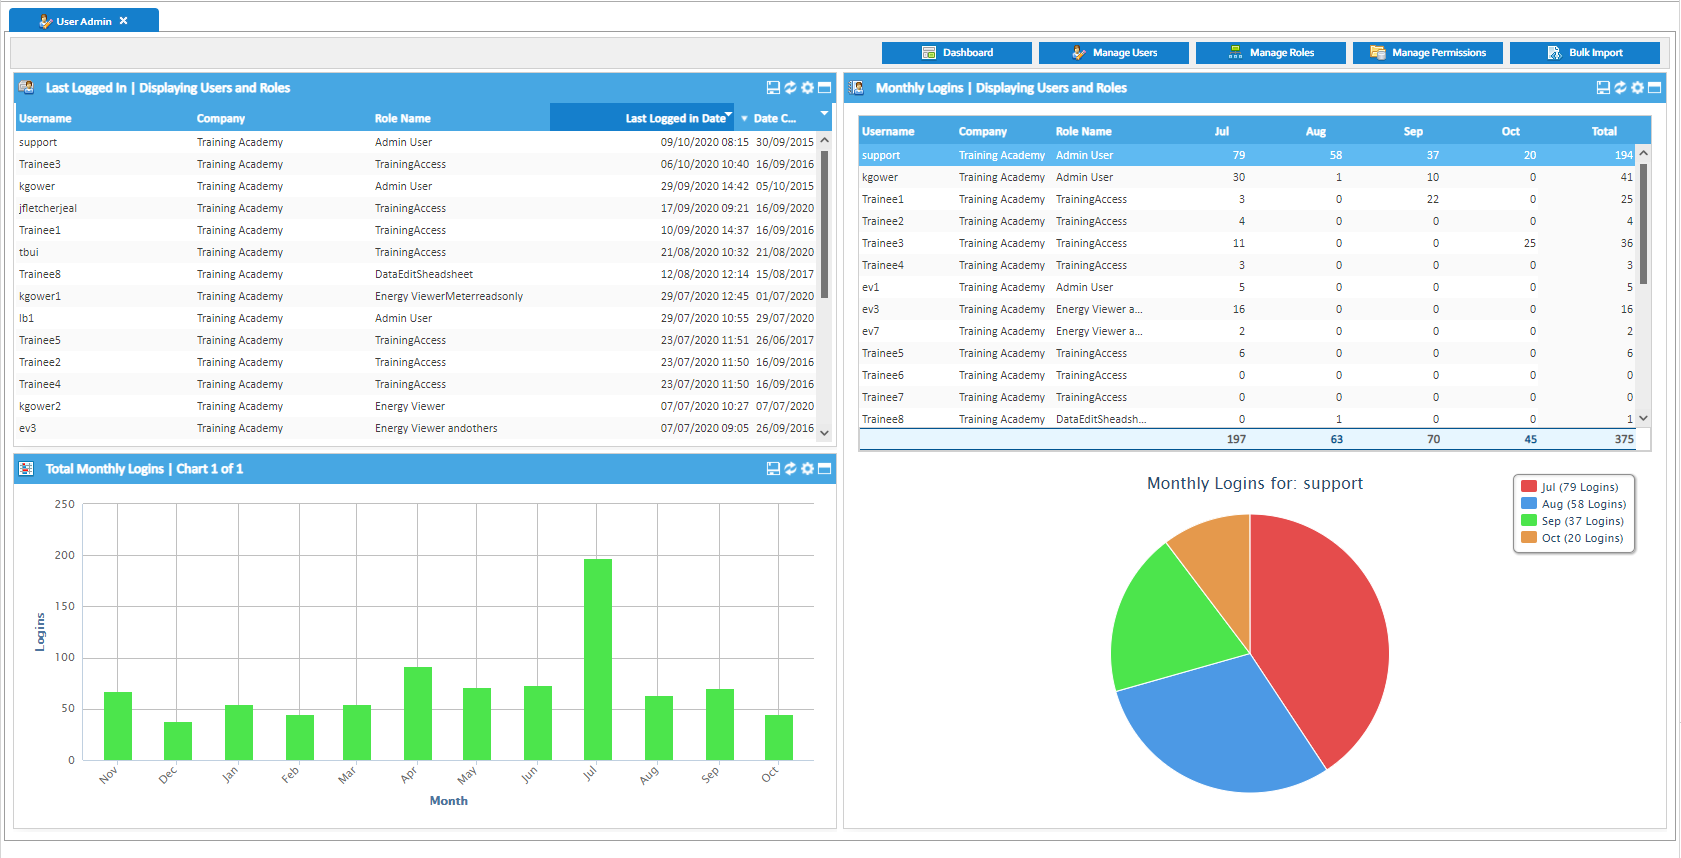
This is the default page for the Admin Activity, useful to view your Login details at a glance.
The Widgets layout can be changed in the same manner as the main Dashboard:
- Drag and drop to rearrange
Last Logged In Widget
This Widget displays when the users last logged in, the date the Users were created and if a user has 'Never' logged in.
- Select to save the Widget to an XLS file
- Select to refresh the Widget
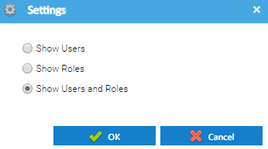
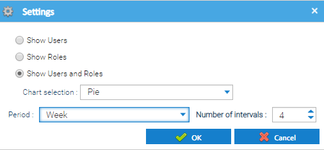
- Select to amend the Settings of the widget. The Widget can display the Users, the Roles or the Users and the Roles
- Select to maximise the Widget to full screen.
Total Weekly / Monthly Logins Widget
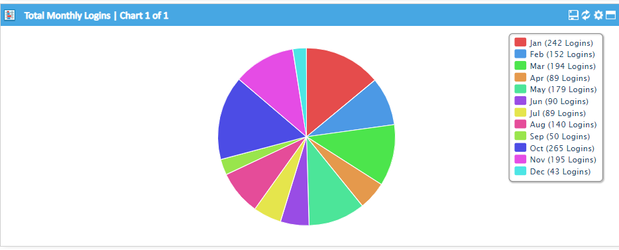
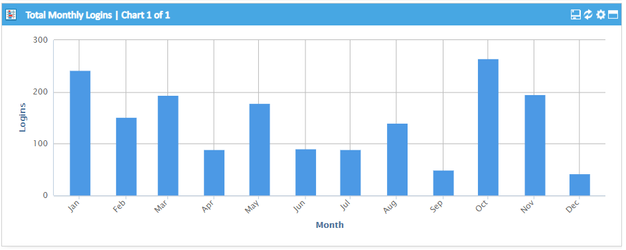
This Widget displays how many logins there have been into a week or month – this is for both User Roles and User Aliases. The Widget can be displayed data as a Pie Chart, Bar Chart or rotate between both.
- Select to save the Widget to a zip file
- Select to refresh the Widget
- Select to amend the Settings of the widget
The Data can have an interval of Month with a maximum of 12 or Week with a maximum of 8.
- Select to maximise the Widget to full screen.
Weekly / Monthly Logins Widget
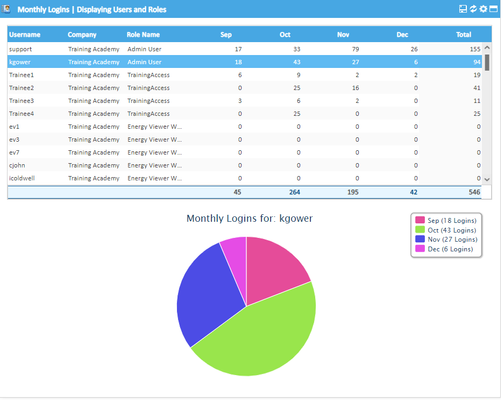
This Widget displays how often a User Alias or User Role has logged in each Month or Week. There is a table of data at the top and a chart below.
- Select to save the Widget to a zip file
- Select to refresh the Widget
- Select to amend the Settings of the Widget
The Widget can display data as a Pie Chart and/or Bar Chart.
The Data can have an interval of Month with a maximum of 12 or Week with a maximum of 8.
The Widget can display data for Users (User Alias), Roles (User Roles) or both.
The Chart at the bottom will display details for the first user in the table by default, select another in the table for the chart to update.
- Select to maximise the Widget to full screen
Managing Roles
- Click
The list of all Users is on the left hand side.
Default Roles
- Admin User – full access (read and write) including Admin activity
- Read Only User – read only access to all activities excluding Admin
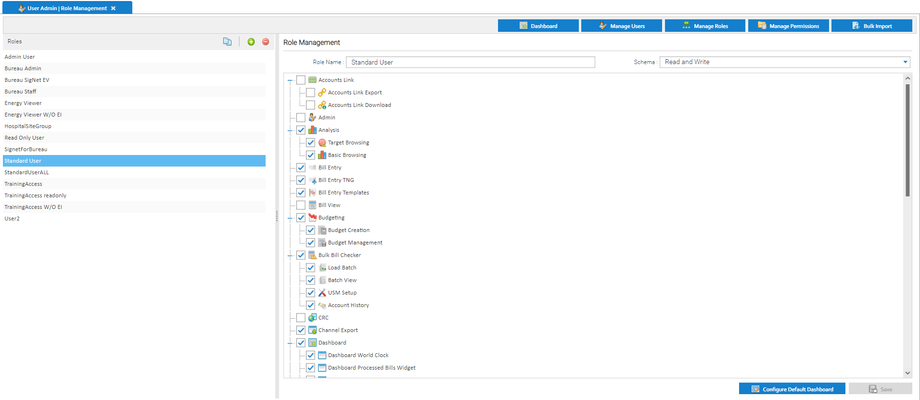
- Standard User – full access (read and write) excluding the Admin activity
Note: You will only be able to see a sub-activity if the master activity has been selected.
- Click on a Role to see the details in the Role Management section.
- Each Activity or Sub Activity can be ticked to be included in the Role
Adding a new Role
- Click Add Role
- Role Name - enter the name of the new Role
- Schema - choose from the dropdown, i.e. Read and Write or Read Only.
- Tick boxes - tick those that apply to this Role
- Click
Managing Users
- Click
To add a new User:
- Click Add User
- Populate all fields that require input; required fields are marked with the symbol
- Select the Role of your User; these will have been defined in the Manage Roles section
Note: Selecting 'Override Validation' means that the User will be able to use their password to override a failed validator on an invoice in the Bill Entry activity.
- Click Save to commit the changes
An email will be sent to the specified email address providing details for users to access the system and set their password.
Resetting Passwords
From the Manage Users tab:
- Click on the User
- Click
An email will be sent to the specified email address:
Resetting Secret key
The Secret Key is used to facilitate Two Factor Authentication.
When this has been enabled, it provides an extra layer of security whereby users must provide a verification code that they have generated, in addition to their username and password.
Click here for more information regarding Two Factor Authentication.
Managing Permissions
- Click on
Adding a new Data Permission Group
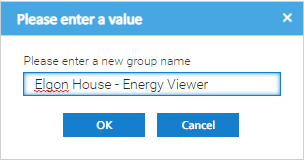
- Click Add a group
- Enter the name of the new group
- Click OK
Adding Users to a Group
- Select the Group
- Drag and drop the the User(s) from the Available Users section to the Selected Users
- Drag and drop the Site(s) from the Data Selector to the Selected Items section
- Click
- Tick Restricted to restrict the User to that Group
Adding a User to a Group from Manage Users tab
- Click on the Manage Users tab
- Highlight the User
- Tick the Group from the Data Permission Mapping dropdown
- Tick the Restricted field
- Click
Bulk Importing
Use the below example to create a file for importing Users in bulk.
Note: Click then click on to download the CSV file.
- Once created, click on
- Click Upload
- Choose the File to upload

