If the meter is faulty or there has been a routine change, you need to update Sigma.
You will need to:
De-energising the old Meter
- Open Estate Management Activity

- Search for, and highlight the Site, Meter or Supply Point using the Data Selector
- Click on the Meters & Channels tab
- Highlight the Meter
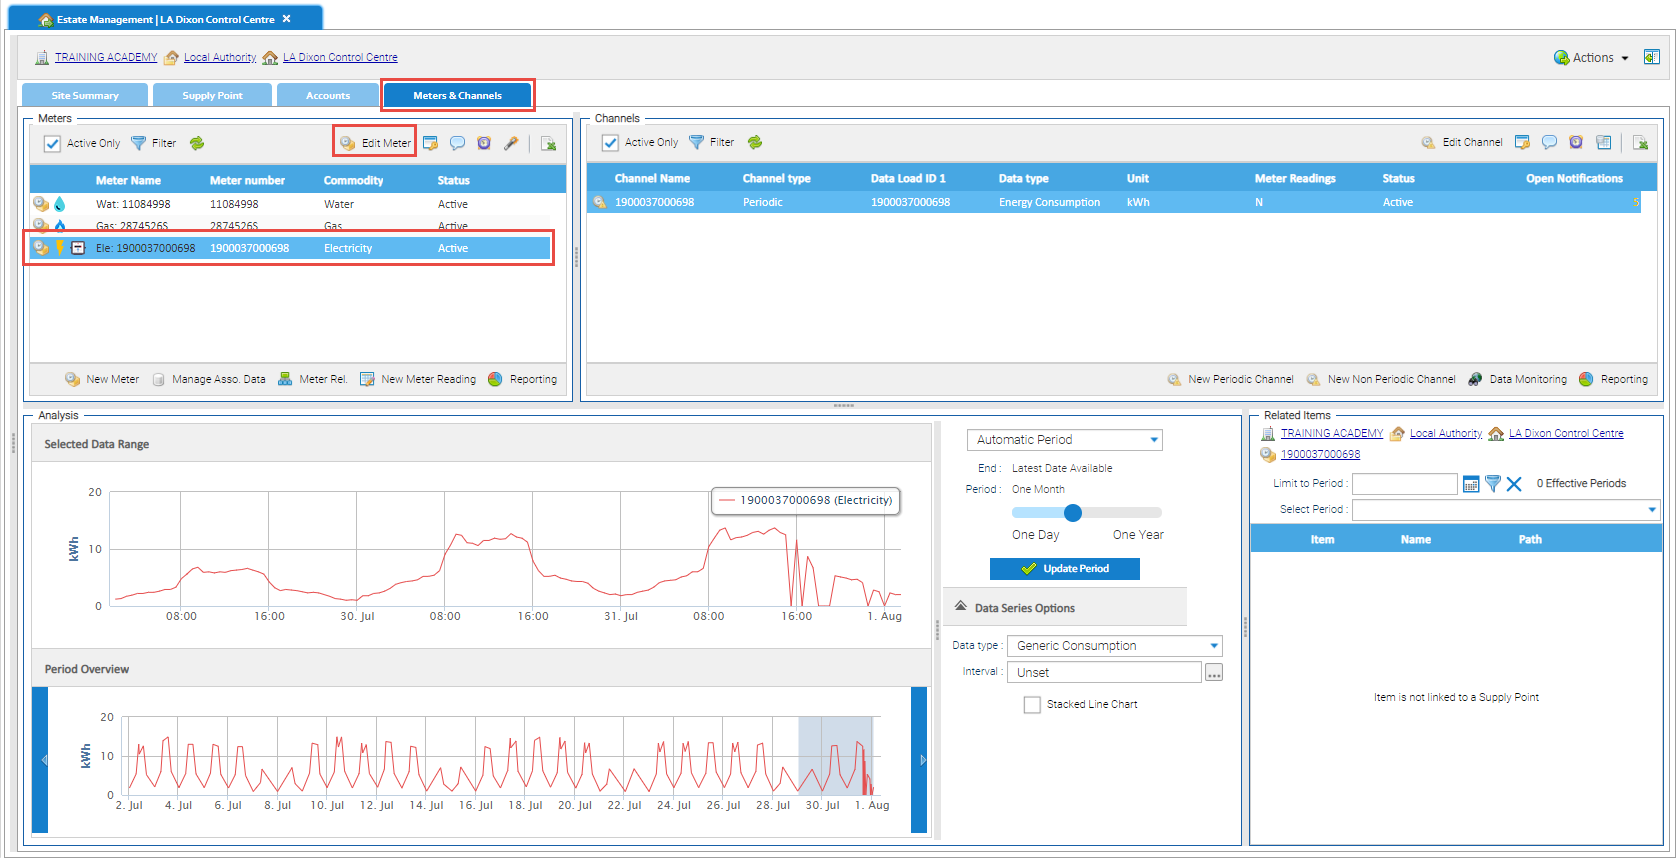
The Meter Editor popup appears:
- Tick De-energised
- Add the de-energised date (optional)

- Click OK to confirm the changes
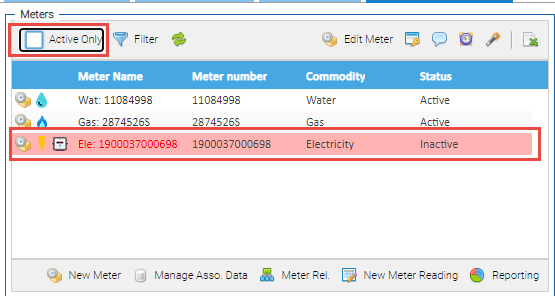
Note: the Meter will not show in the Meters & Channels tab as the default is only show active Meters. I
To see the Meter:
- Untick Active Only to see the Meter
Creating a New Meter
From the Meters & Channels tab of Estate Management:
- Click New Meter

- Choose the Type of Meter (choose from Meter, Sub Meter or Virtual Meter)
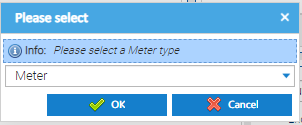
- Click OK
- Complete the Meter Editor popup
- Name – Add the Meter Serial Number
- Number – Add the Meter Serial Number
- Identifier - Add the Meter Serial Number
- Location – Enter the location (if known)
- Commodity – Choose Electricity, Gas, Water etc
- Meter Type – Choose Code 5, Domestic etc
- Asset Type - Choose from the dropdown list (not mandatory)
- Parent Meter - Choose the Parent Meter from the dropdown list (if the Meter is on the same Site), or search using the Magnifying Glass)
- Use installation date – Tick to add a date
- Installation date – Add the date the meter was installed (not mandatory)
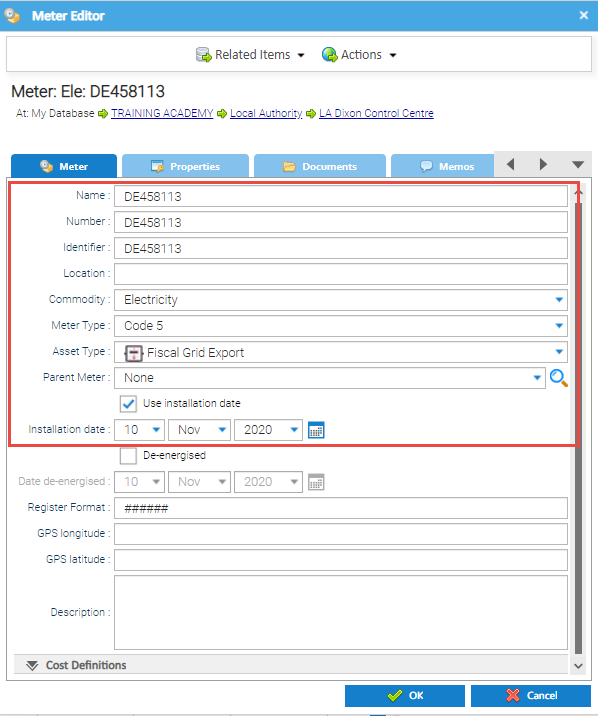
- Click OK to create the Meter
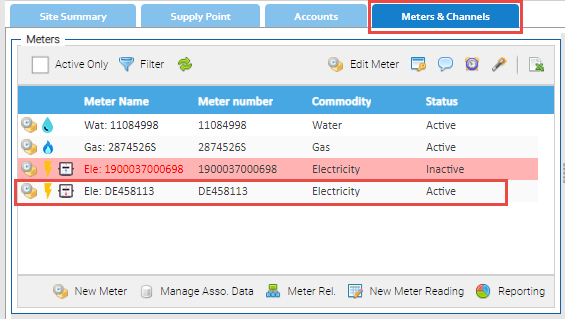
The new Meter now shows in the Meters section:
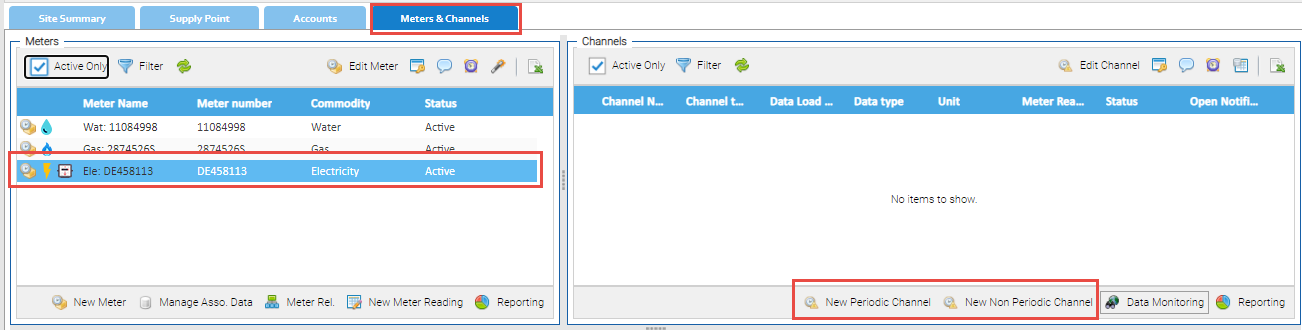
Adding a Periodic (or Non Periodic) Channel
For you to be able to add meter readings or consumption values, you need to add a Periodic or Non Periodic Channel.
Adding the Channel
From the Meters & Channels tab of Estate Management:
- Highlight the newly added Meter
- Click New Periodic Channel or New Non Periodic Channel
Completing the Channel Editor
- Name – Enter the name of the Channel (usually the supply number or the meter number)
- Data Load ID 1 – If half hourly downloads, this will need to be the identifying number on the import (often the Supply number)
- Data Load ID 2 – rarely used, but some imports may have 2 IDs
- Channel Register – Choose from All Day, Day, Night etc (default is All Day)
- Data type – Defaults to Energy Consumption for Gas and Electricity, change to Volumetric Consumption for Water
- Time Zone – Defaults to Europe/London
- Unit of Measurement – Defaults to kWh for Gas and Electricity, change to M3 for Water
- Conversion Factor – Defaults to 1
- Data Measurement – Defaults to Consumption
- Channel Data Quality – Defaults to Primary
- Closed – only used if closing the Channel
- Meter Readings – tick to indicate that the consumption will be entered in meter readings (not as consumption values)
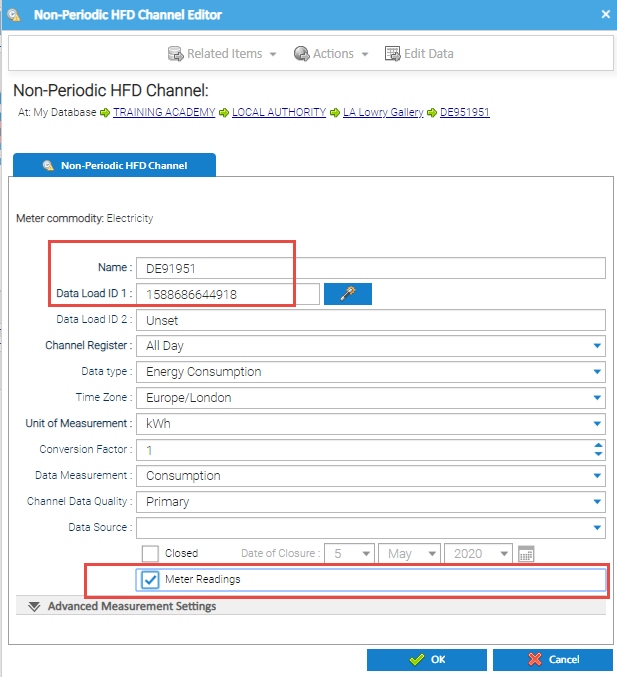
- Click OK to create the Periodic or Non Periodic Channel
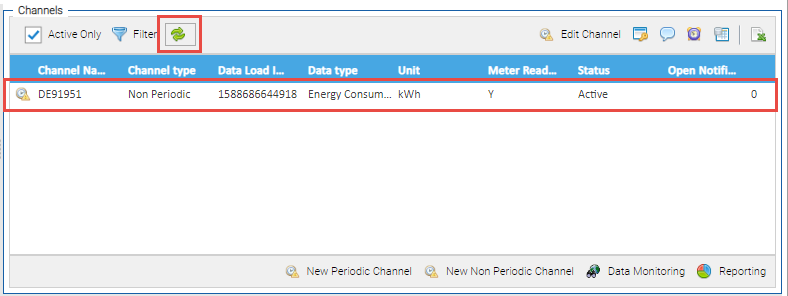
Refreshing the Channels Section
- Click on the Refresh button in the Channels section
Adding the Meter Number to the Account
To ensure consistency, update the Account Editor to show the new meter.
- Click on the Accounts tab of Estate Management
- Highlight the Account
- Click Edit Account

The Account Editor popup appears
- Enter the new Meter number (or replace if it has an existing Meter number)

- Click OK to save
Adding the Meter to the Supply Point
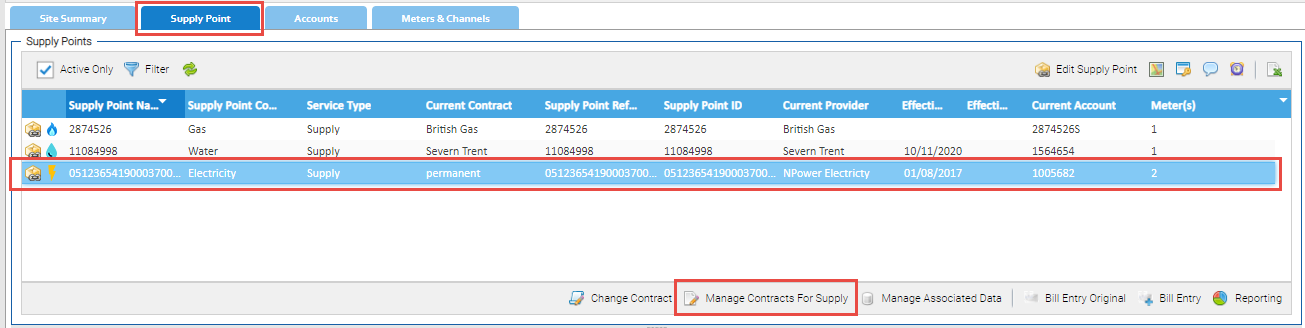
To ensure consistency, you need to update the Supply Point to show the new meter.
- Click on the Supply Point tab of Estate Management
- Highlight the Supply Point
- Click Manage Contract For Supply
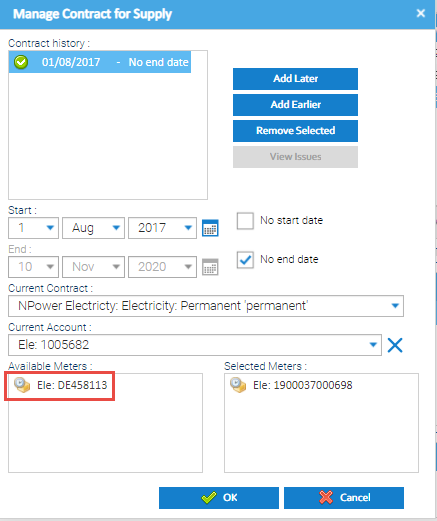
The Manage Contract for Supply popup appears.
- Drag and Drop the new meter from the Available Meters to the Selected Meters
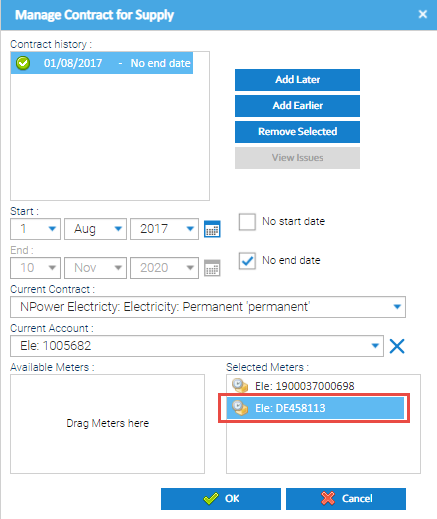
- Click OK to close the Supply Point Editor and update the Supply Point
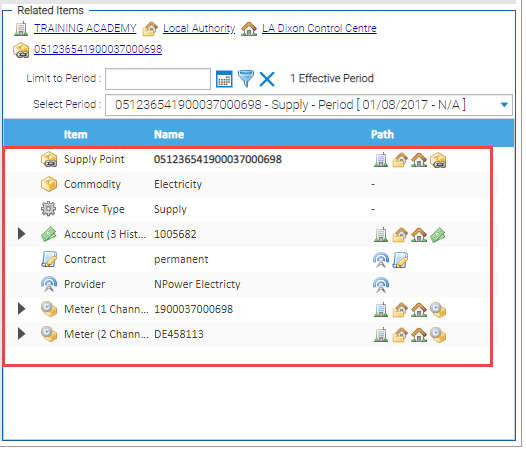
Checking the Supply Point, Account and Meter are connected
- From either Supply Point, Account or Meters & Channels tabs, highlight the relevant Supply Point, Account or Meter and view the Related Items section