Introduction
...
Getting started
Half hourly data will should be available from your supplier if you have the appropriate metering. This could be sent directly to you, or you may need to log into a portal to obtain the data. Contact your supplier to obtain the data. Once you have the data, you will need to prepare Sigma to accept it.
...
- Change the Item Finder from Site to Periodic HFD Channel to view a list of all Periodic Channels in your database
- Or use the Multi List Selector to select the Periodic Channels
- Select the Periodic Channels you want to check
- Or click on one, then Control + A to highlight them all
- Click Edit Items to see the Data Selection popup
- Tick Name
- Tick Channel ID
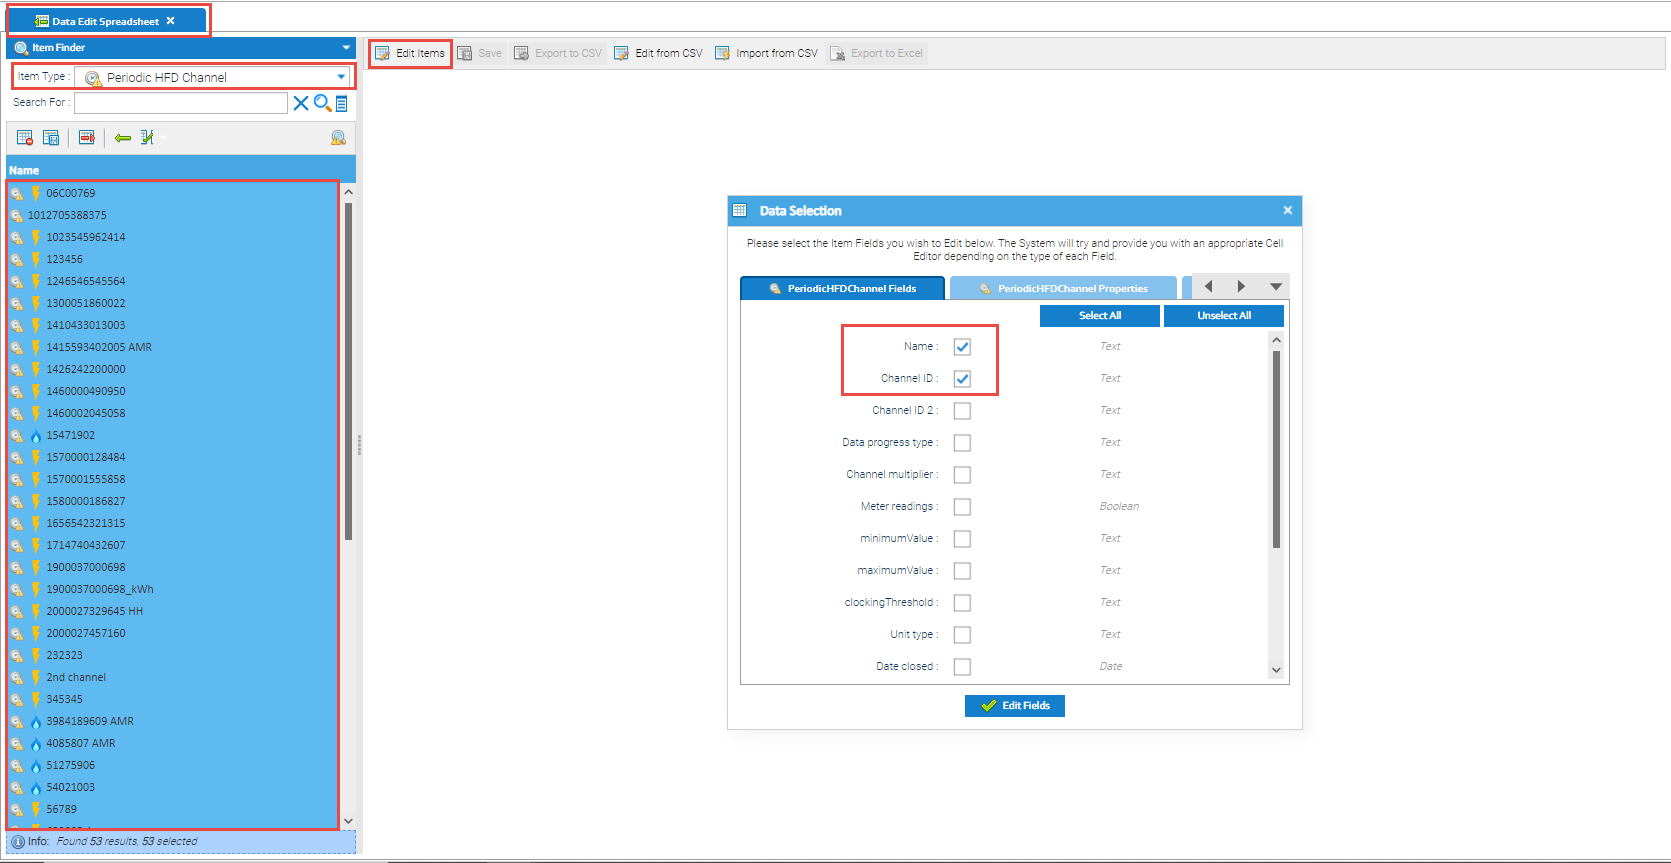
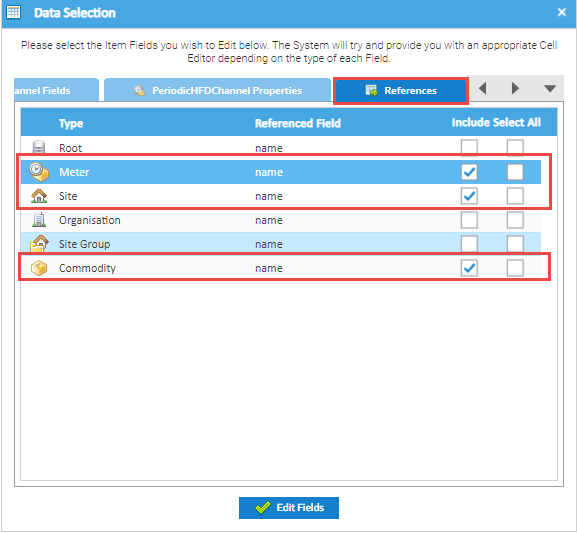
- In the Data Selector popup, use the arrows to move to the References tab and tick Include Meter, Commodity and/or Site
- Click Edit Fields to display the data
Comparing the data
...
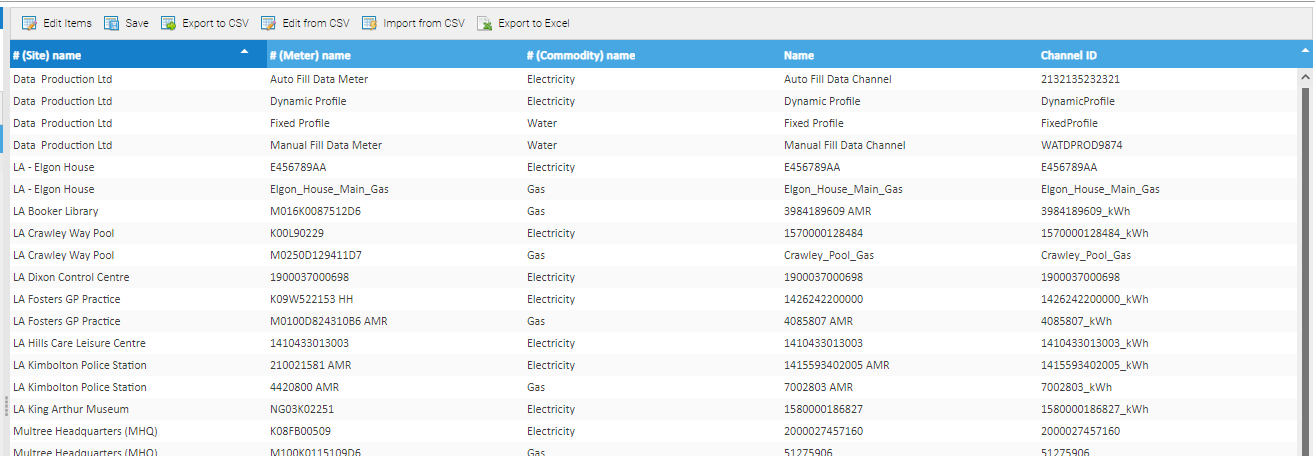
Compare the data you have from the supplier, with the data in the Channel ID column. Amend Update the Channel ID to match the supplier information by double clicking into the column and overtype with the correct ID, see below.
Updating the Data Load ID
If the When creating a Channel, Sigma will automatically enter a unique Data Load ID was created by Sigma, it can be amended in here which can be amended using the Data Edit Spreadsheet Activity. Once you have created the above:
- Double click into the Channel ID field and enter the details as supplied by your Supplier

- Click
 nnce once you have amended some or all of them
...
- Click Export to CSV and amend outside of Sigma, then import back into Sigma. Click here for more details on the Data Editing.
Adding additional Channels/Meters
...
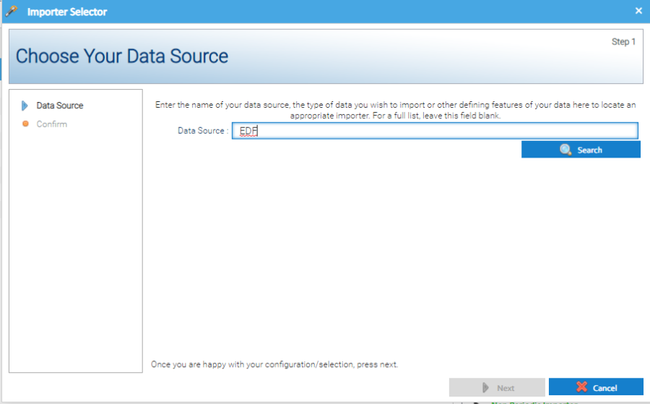
- Click

- Enter the beginning of the Importer name (given to you by Support)
- Click Search
- Choose the correct Importer from the displayed list
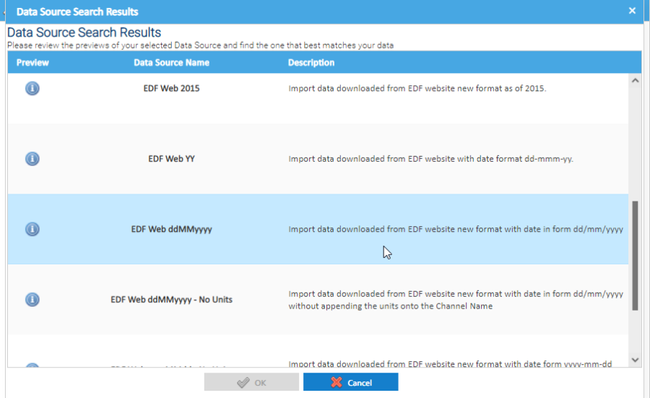
- Click OK
- Click Next
- Click Finish
The Importer has now been added to your Favourites list and is ready to use.
Importing the Data
Once you have the Importer in your favourites list, it will be available to use each time you want to import data.
- Click
 to see the list of your Favourite Importers
 - Highlight the Importer
- Click Next
- Tick Use date range (if required - usually this is left blank to allow all the data to be imported)
- Click Next
- Click

- Click

- Find the file you want to import
- Click OK
- Click Next
- Click

- ClickClick

| Excerpt |
|---|
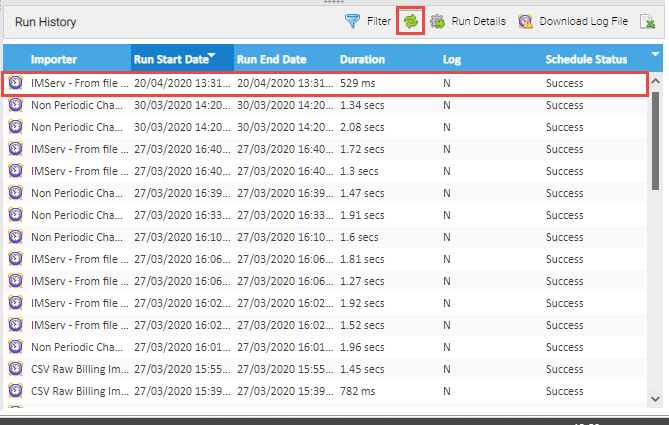
Viewing the importing progressThe file will show in the Queued And Running Imports area (depending how long the import takes, sometimes it doesn't show)
Refreshing the Run History
Click here for more details on the Run History section, including viewing run details and downloading log files. |

Checking the Data
Status of Success
Once the Import shows as Success, you can check the Import:
- Right click the Import line > Run Details to display the Run Details pop up OR
- Highlight the Import line > Click on

- Highlight the Import line > Click on

- This shows the following:
- File Name - the name of the File you have uploaded
- Load Start Time - the time the upload started
- Load End Time - the time the upload finished
- Duration - how long the upload took
- File Size - the size of the file
- Count - the number of Channels to be updated
- Status - shows Success, Failure or PartiaL
- In this example 3 Channels have been updated. To view more details:
- Right click the data line > Diagnostics to display the Diagnostics pop up OR
- Highlight the data line > Click

- Highlight the data line > Click
- Right click the data line > Diagnostics to display the Diagnostics pop up OR
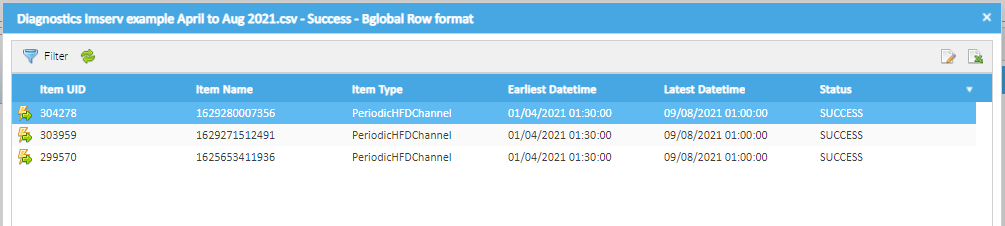
- This shows the following:
- Item UID - the unique Sigma ID for the Channel
- Item Name - the Channel name
- Item Type - the type of Item, ie Periodic Channel
- Latest Datetime - the date and time of the last Value for this Channel
- Status - status of the Channel import, ie Success
Viewing the Channel
- To view the Channel details and check the data:
- Right click the data line > Edit Item to display the Channel Editor pop up OR
- Highlight the data line > Click

- Highlight the data line > Click
- Right click the data line > Edit Item to display the Channel Editor pop up OR
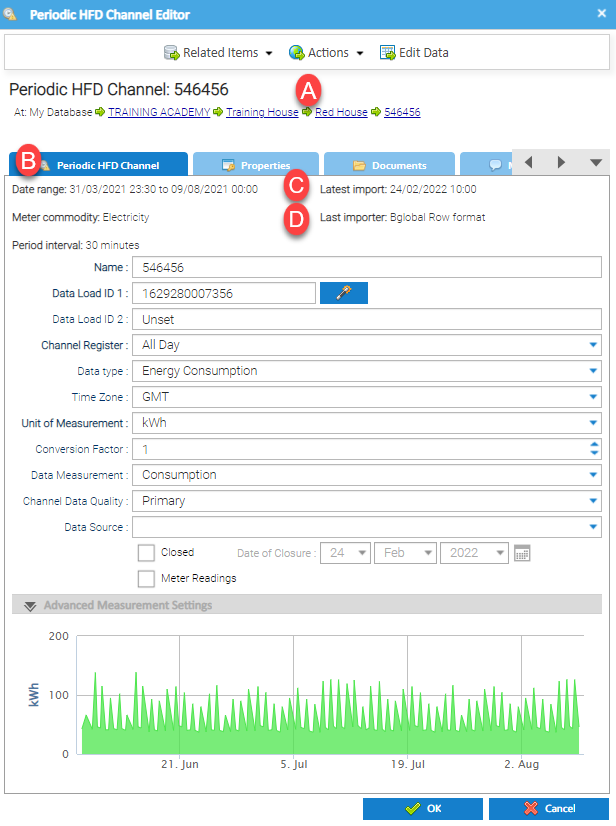
- A - The File path for the Channel, it this example the Organisation, Site Group. Site and Meter
- B - Date Range - the from and to dates for the Data in the Channel
- C - Latest Import - the last time data was imported into the Channel
- D - Last Importer - the last Importer used to import data into the Channel
Spot checking the Data in the Channel
Once the import has completed, it is advisable to do a spot check to ensure the data has imported.
...