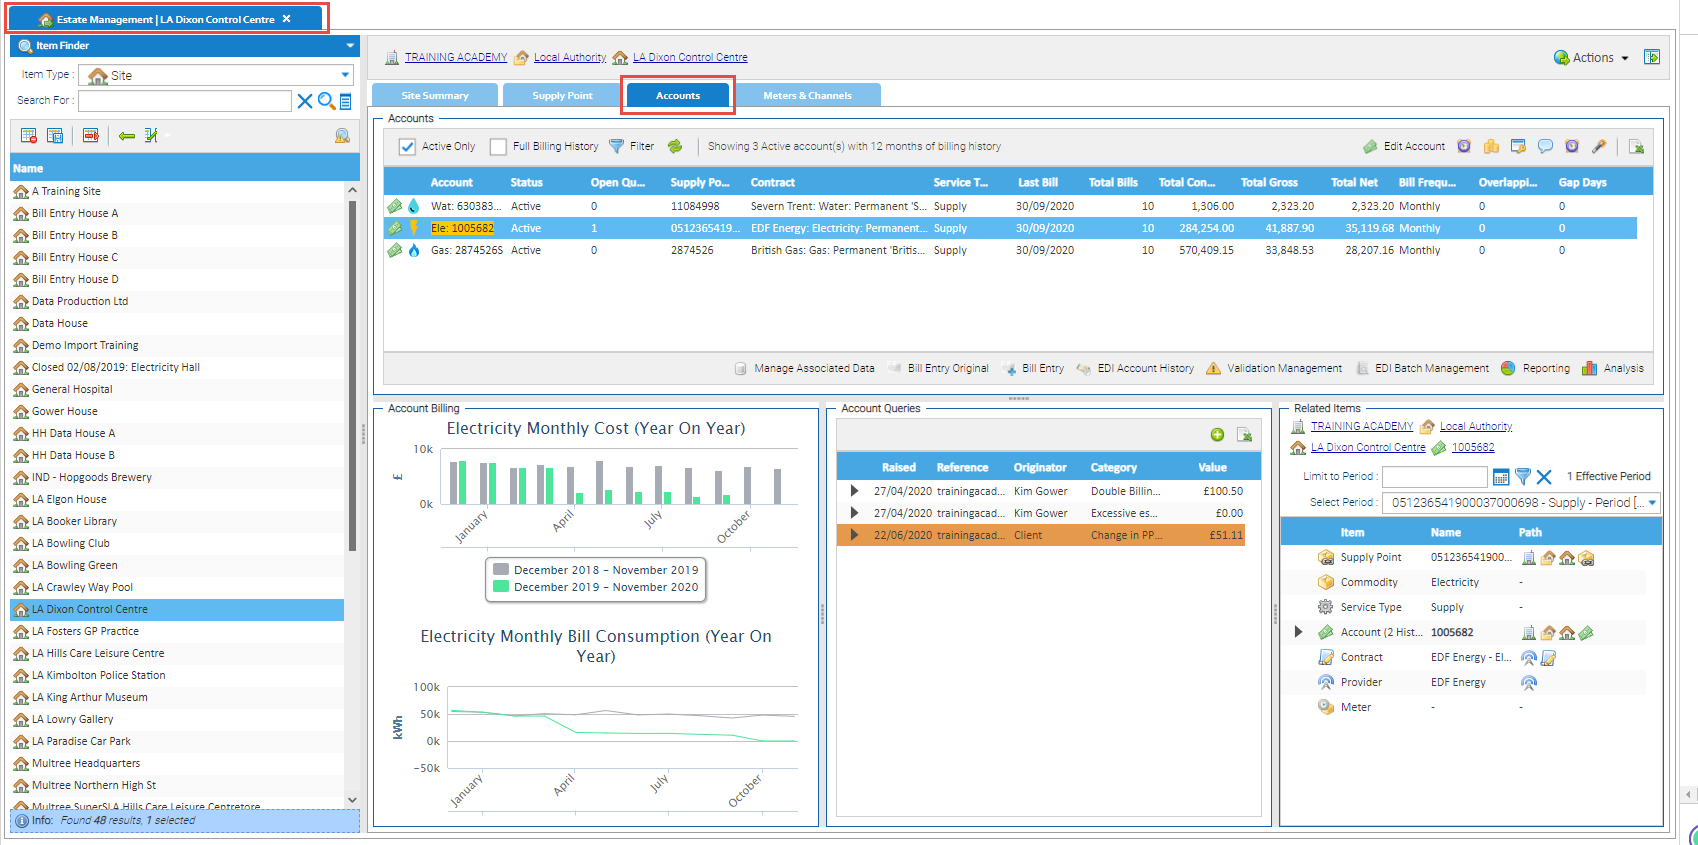
The Accounts Tab provides an overview of all the Accounts connected to the selected Site. The definition of an Account can be found here.
It details key information such as the Account number, supplier contract details, billing information for the last 12 months or all time, any Queries associated with the Accounts. It also provides the ability to see how the Billing Account is connected to meters and channels and supply points and how that relationship evolves over time. From here you can manage the Accounts and edit details, view Memos, Properties, Set up Wizards. You can link to other Activities such as Validation Management and EDI Batch Management and manage all Associated Data relating to the Accounts.
If you do not have these items in your database, click here for details on how to add Sites, Accounts, Meters, Channels and Contracts.
The default view is to show the Active Accounts, with 12 months of data.
...
- Open the Estate Management Activity.
- Highlight a Site in the Data Selector.
- Click on the Accounts Tab OR Click on the Accounts Pie Chart.

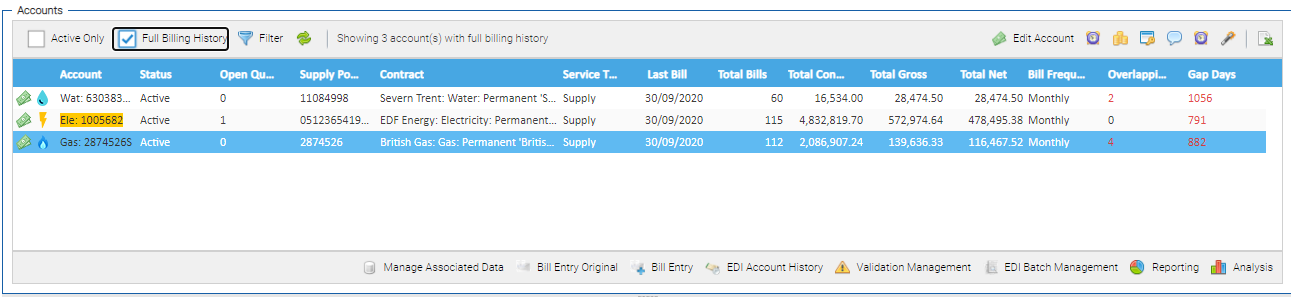
Accounts
By default, this shows a list of all Active Accounts associated to the Site. Details relating to the latest contract, such as the Supply Point Name it is related to and the current Contract and key information for the Bills that have been received for the Account for the prior period of time are displayed. 
| Info |
|---|
|

...
| Tip |
|---|
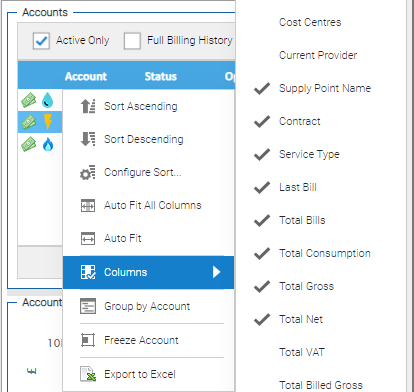
To change the displayed Columns in any section on the screen, right click the Column Header, then click on Columns to tick or untick the required Columns. |

Options


| Option | Description |
|---|---|
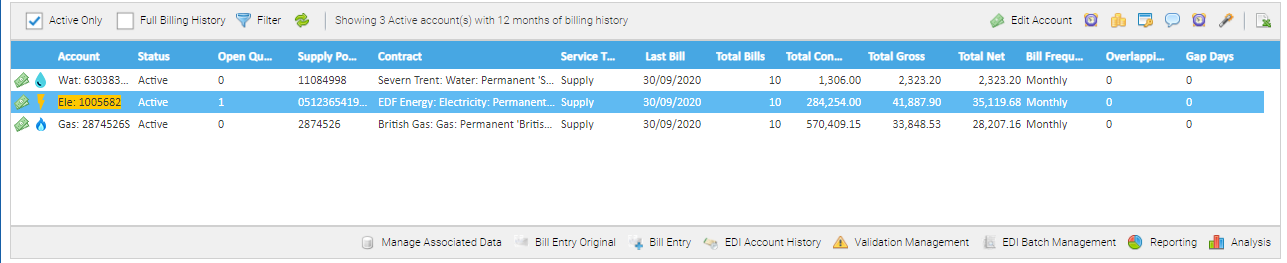
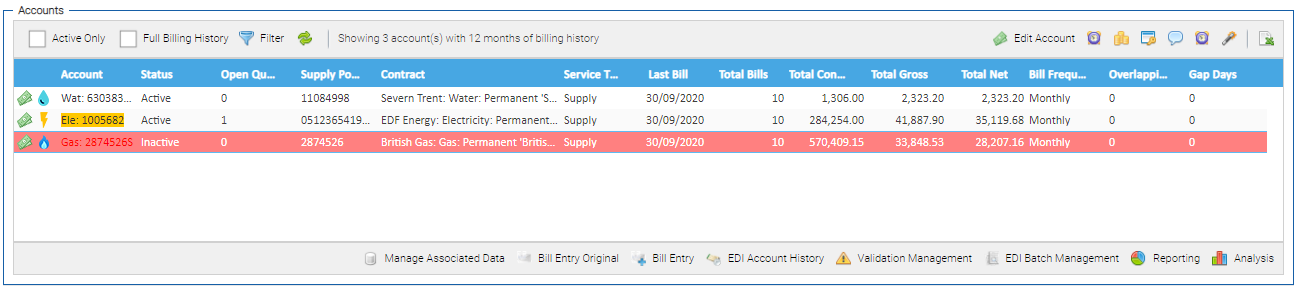
| Active Only | When ticked, By default, the Active Only option is ticked and the screen will show only Active Accounts, unticking .. Unticking will show Active and Inactive Accounts. Any inactive Accounts will be highlighted in red. An Inactive Account is where the "Active" checkbox against the Account item has been unticked. |
| Full Billing History | The default behaviour is for the screen to show 12 months of historical data for each Account. Ticking this checkbox will cause the screen to refresh and retrieve the history for each of the Billing Accounts for all time across each of the columns.
|
| Filter | Click to open the Filter option which will display above the table headings. It is search as you type so the filtering will start applying as soon as you start typing. For example, to filter to only the Electricity Accounts, type Ele and it will show just the Electricity ones.
|
| Refresh | Refreshes the screen |


Top Menu Options

| Option | Icon | Description |
|---|---|---|
Edit Account |  | Opens the Account Editor for the selected Account in the list. |
Account Number History |
| Opens the Account History screen for the selected Account in the list. This will detail each of the Account number changes along with their effective date and provider, where one has been specified. |
| Cost Centres |
| Opens the Cost Centre Editor for the selected Account in the list. This supports the ability to specify set proportions of the bills received to be linked with defined Cost Centres for Accounting purposes. Click here for more details on creating Cost Centres. |
| Properties |
| Opens the Properties Tab in the Account Editor for the selected Account in the list. Click here for more details on creating Property Keys. |
| Memos |
| Opens the Memos Tab in the Account Editor for the selected Account in the list. |
| Audit History |  | Opens the History Tab in the Account Editor for the selected Account in the list. |
| Wizards |
| Provides the ability to access the Account Number Migration or Data Permissions Wizards for the selected Account. |
| Export to Excel |
| Exports an Excel spreadsheet of the data in the section |


Bottom Menu Options

| Option | Icon | Description |
|---|---|---|
| Manage Associated Data |
| Provides the ability to Manage the Associated Data Channels that are linked to the selected Account. |
| Bill Entry Original |
| Opens the Bill Entry Original Activity in the context of the selected Account. |
| Bill Entry |
| Opens the Supply Overview in the Bill Entry Activity in the context of the selected Account. |
| EDI Account History |
| Opens the EDI Account History Activity in the context of the selected Account. |
| Validation Management |
| Opens the Validation Setup Activity. To see all Validators set up for the selected Account, click on the "Validators for <account number>" Tab |


| ||
| EDI Batch Management |
| Opens the EDI Batch Management Activity |
| Reporting |
| Opens the Reporting Activity in the context of the selected Account. |
| Analysis |
| Opens the Analysis Activity |


Account Billing
The Account Billing section will default to scroll through the Monthly Cost (Year on Year) and Monthly Consumption (Year on Year) for each Commodity, showing the current 12 months versus the previous 12 months for the selected Account.
...
| Info |
|---|
|

Options

| Option | Icon | Description |
|---|---|---|
| Add a query |
| Click to open the Query Editor to enable you to add a new Query. |
| Excel |
| Exports an Excel spreadsheet of all the queries in the section. |


Right click Options
...