Consumption Data is generally used for Scope 3 reporting. It is added into the Consumption Data Channel and then used in Energy Intelligence for reporting on.
If you want to add them in manually, move to the Entering Consumption Data Values in manually page.
This page shows how to enter Consumption Data Values in bulk:
Creating the Import CSV File
You can have more than one Value and more than one Channel in the CSV File.
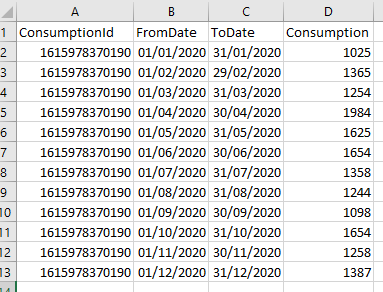
The CSV File will need to look like this:
This example has 12 Consumption Values for one Consumption Data Channel and the Columns are explained below.
You can have more than one Channel in a CSV File, add lines for your data for the first Channel, then your second, third etc
| Column | Description |
|---|---|
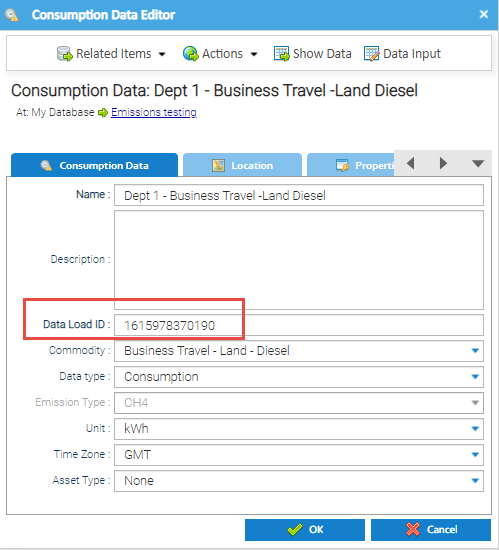
| A | Consumption ID - this is the Data Load ID field in the Consumption Data Editor
This is a unique number to any other Consumption Data Channel. |
| B | From Date - relating the Consumption Value. This needs to be in the following format: 01/01/2020 |
| C | To Date - relating the Consumption Value. This needs to be in the following format: 31/01/2020 |
| D | Consumption Value for the above period, for example: 200 |
Downloading the CSV sample File
- Click here to download an example File: Consumption value example file - one line of data.csv
Saving the completed CSV File
- Save the File as a CSV File to ensure it can be imported
Note: Before saving your data, remove the example line
Importing the File
Choosing the Importer
The File is imported using the Consumption Data Importer CSV Importer, in the Importing Activity
- Open the Importing Activity
- Click Run Now
Note: If the Consumption Data Importer CSV Importer is not in your favourites list, you need to add it using the green +
- From the Favourites list, highlight Consumption Data Importer CSV

- Click Next to move to the Importing Options
Importing Options
From the Importer Options section, tick or untick as necessary.
- Tick Has header row If your CSV has a header row

- Tick Add day to date to use the beginning of the Start Date to the end of the End Date
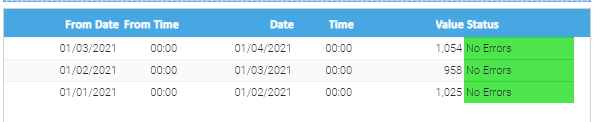
- For example From Date: 01/01/2021 and To Date: 31/01/2021 on the CSV file will import into Sigma as below (which is from the beginning of the 01/01/21 to the end of 31/01/21)
OR
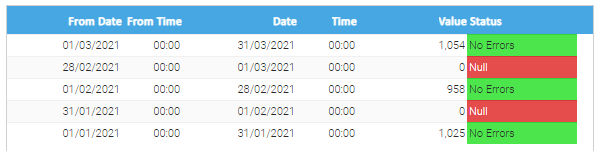
- Untick Add day to date to use the beginning of the Start Date to the beginning of the End Date
- For example From Date: 01/01/2021 and To Date: 31/01/2021 on the CSV file will import into Sigma as below (which is from the beginning of the 01/01/2021 to the beginning of 31/01/2021)
Common Importing Errors
Note : The results will depend on which Importing Option is used:
If you create the CSV using the below formula, TICK the Add day to date:

- If Add day to date is UNTICKED, the results will not be correct
If you create the CSV using the below formula, UNTICK the Add day to date:

- However, if Add day to date is TICKED, the results will not be correct: (INCORRECT)
- Click Next to move to the Source Options
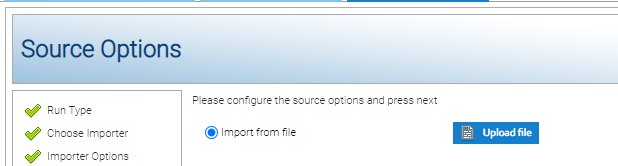
Source Options
- From Source Options, click Upload File
- Choose the file and click OK
- Click Next
- From the Finish tab, click Run Now
- Click Finish to complete the process
Refreshing the Importing Activity
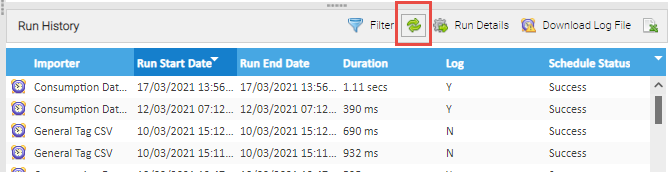
Once you have clicked Finish, you can refresh the Activity to see if the File has imported successfully.
- Click Refresh in the Run History pane
Checking for any Validation Issues
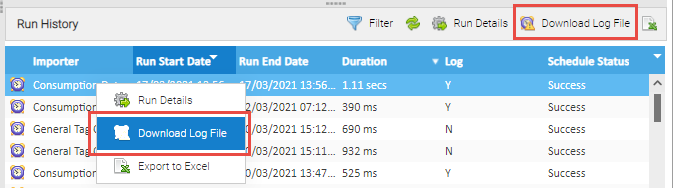
Once the File has imported and shows in the Run History, we recommend you check the Log File to see if there are any Validation issues.
- From the Run History, right click on the Import and click Download Log File
Alternatively
- Highlight the Import and click the Download Log File icon
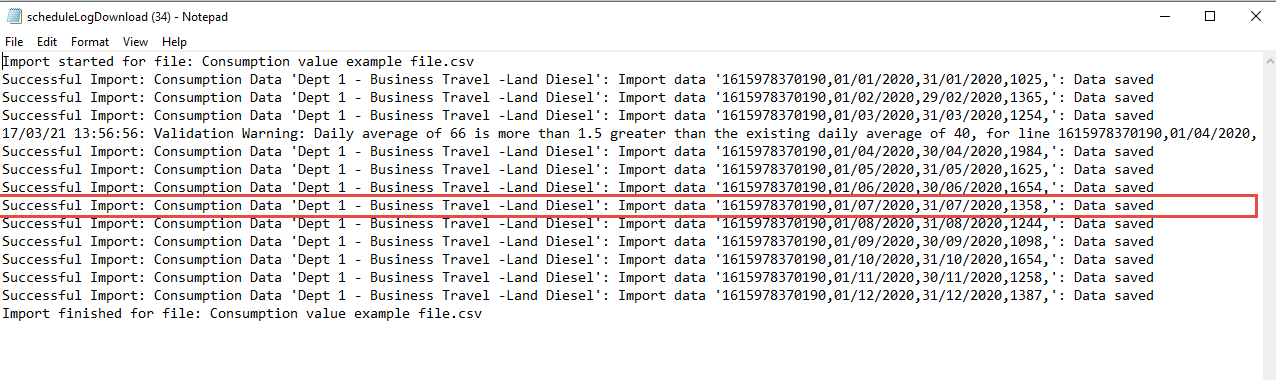
Example Log File
Successful Import
- An example Success Import
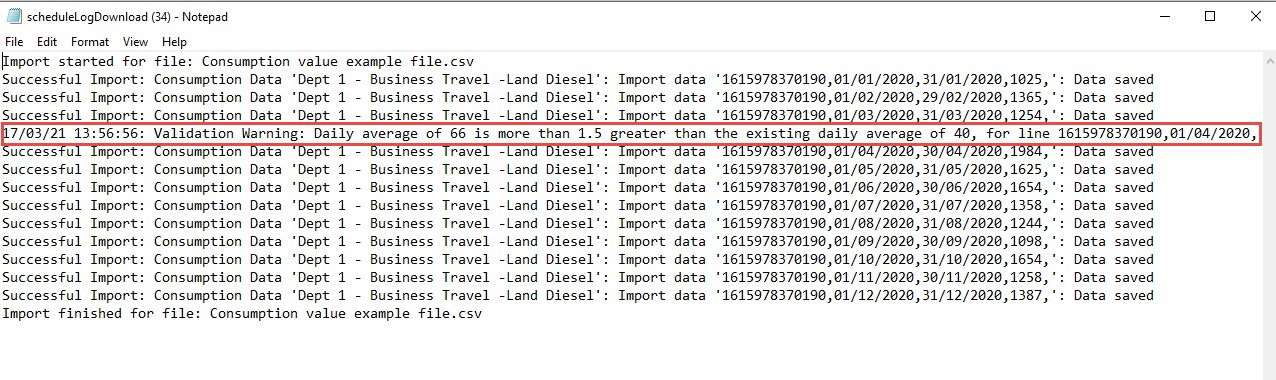
Example Validation Warning - Value will be imported
- An example Warning where the Value is greater than the existing daily average
- This Value will be saved into the Consumption Channel
Example Validation Failed - Value will not be imported
- An example Failure where the date of the Value is in the future
- This Value will NOT be saved into the Consumption Channel

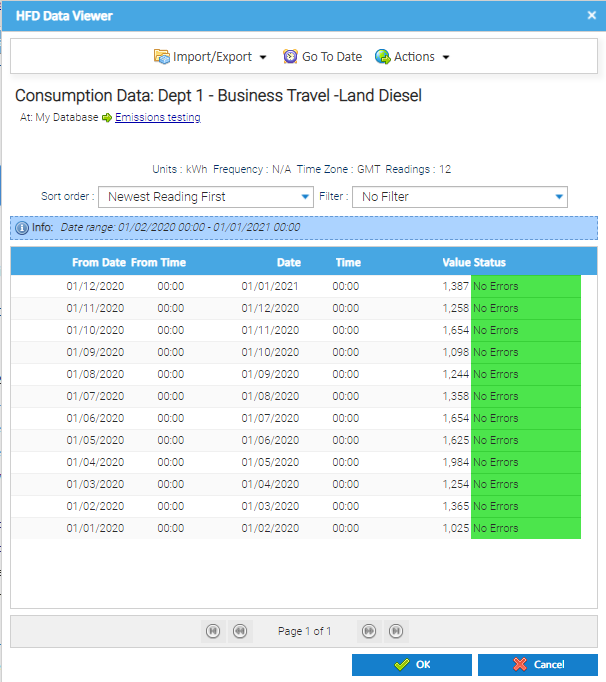
Viewing the Data
Once the data has been imported it can be viewed in the Consumption Data Channel
- Right click on the Consumption Data Channel and click Edit
- Click Show Data
- The Data Viewer will show all existing Values and the new Values that you have imported