Introduction
...
In this section:
| Table of Contents |
|---|
Creating the Degree Day Channel
The Channel is created at the Root level and then copied to each relevant Site.
Set up a Degree Day Channel for each of the areas your business covers.
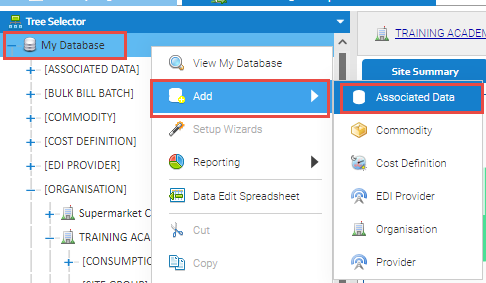
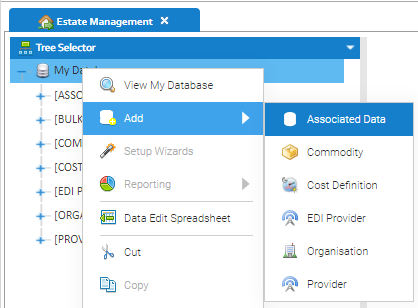
- Open the Estate Management Activity
- Change the Data Selector from Item Finder to Tree Selector
- Right click on My Database
- Click Add
- Click Associated Data
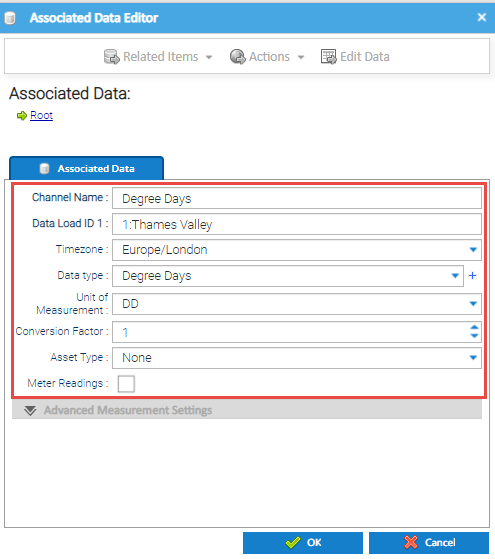
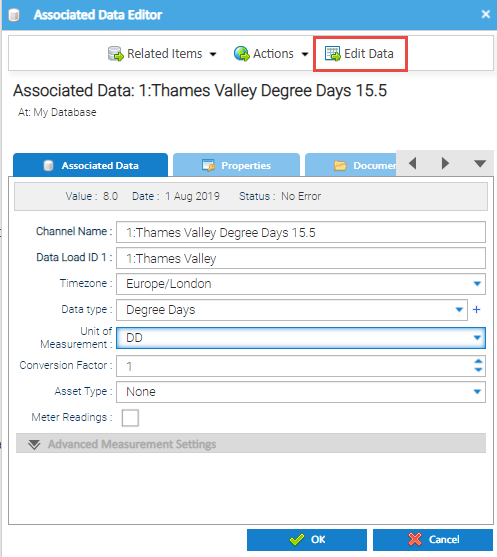
The Associated Data Editor pop up appears:
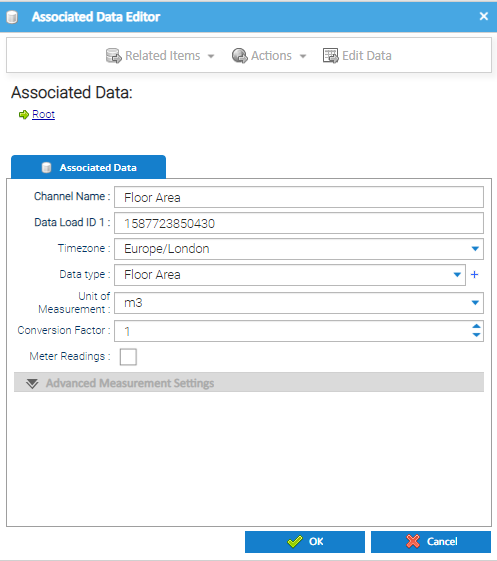
Complete as follows:
| Field | Suggested Value |
|---|---|
| Channel Name | Note: Complete this after you have chosen the Data type as it will default to whichever Data Type you have chosen Best Practice: Enter the Degree Day area, followed by 'Degree Day', for example Thames Valley 15.5 Degree Days |
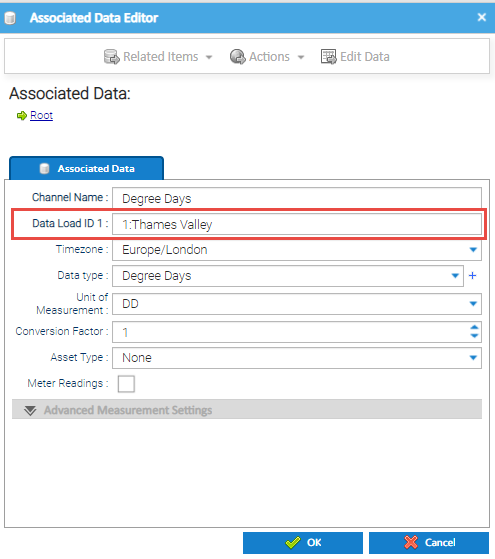
| Data Load ID 1 | Automatically generated. but if you are updating monthly with the figures produced by Team, change to, for example 1:Thames Valley (see below for more details) |
| Timezone | Defaults to GMT |
| Data type | Choose the Degree Days (this will pre-fill the Channel Name |
| Unit of Measurement | Choose DD |
| Conversion Factor | Defaults to 1 |
| Asset Type | Choose from the dropdown or leave blank |
| Meter Readings | Do not tick for the purpose of this validation |
...
| tick |
- Click OK to create the Degree Day
...
- 1:Thames Valley
- 2:South Eastern
- 3:Southern
- 4:South Western
- 5:Severn Valley
- 6:Midland
- 7:West Pennines
- 8:North Western
- 9:Borders
- 10:North Eastern
- 11:East Pennines
- 12:East Anglia
- 13:West Scotland
- 14:East Scotland
- 15:North East Scotland
- 16:Wales
- 17:Northern Ireland
- 18:North West Scotland

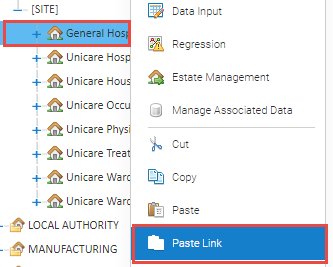
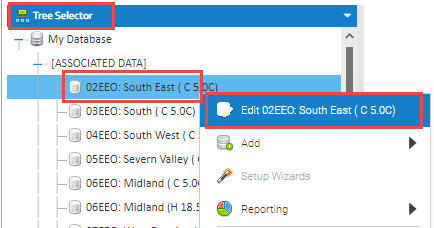
Copying to Sites
...
- From the Tree Selector, right click on the Degree Day Channel
- Click Copy
- Scroll down to the Site
- Right Click
- Click Paste Link (NOT Paste)
Manually adding the value to the Degree Day Channel
Generally, this would be done updated monthly.
If you have multiple Degree Day areas, it maybe easier to use the download to update (see below).
However, if you only have 1 or 2 you may want to manually add the value each month. You do not need to add a value to each Site if you use the Copy and Paste Link option. Updating at the Root level will update all Sites with the same Data Load ID.
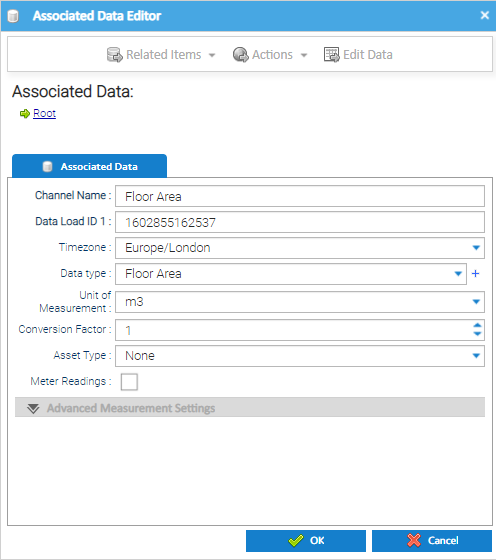
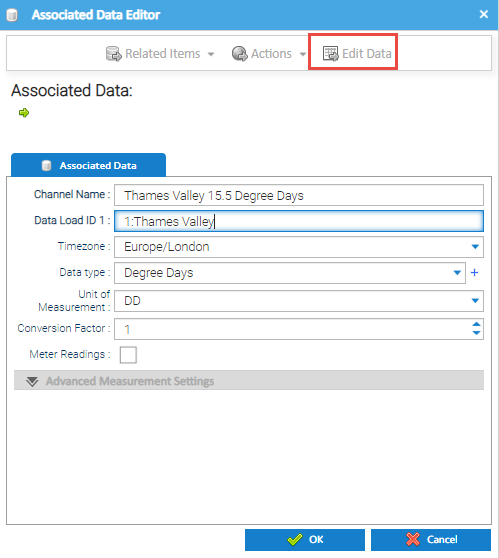
- Highlight the Degree Day Channel in the Tree Selector
- Right click > Edit to open the Associated Data Editor
...
- Click Edit Data to enter the value
- Click Edit Data to open the HFD Data Viewer popup
- Click Actions
- Click Add reading
- Click At end
...
- Open Importing Activity
- Following the instructions in the Importing help files to import the file, using the Non-Periodic Importer
Viewing the Data
The data will be imported into all the Degree Day Channels.
To view at Root Level
- Open the Estate Management Activity
- Change the Data Selector from Item Finder to Tree Selector
- Expand Associated Data
- Right click on the Channel you want to view
- Click Edit
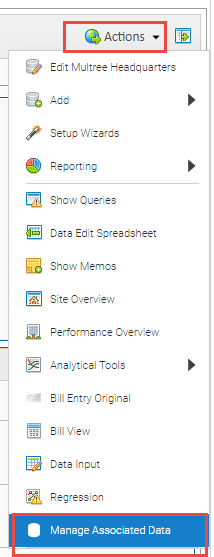
To view at Site Level
- Open the Estate Management Activity
- From the Data Selector, click on the Site
- Click Actions
- Click Manage Associated Data
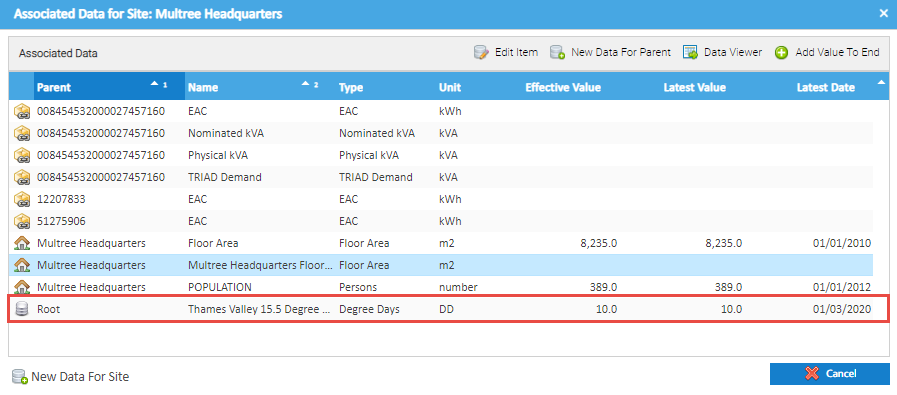
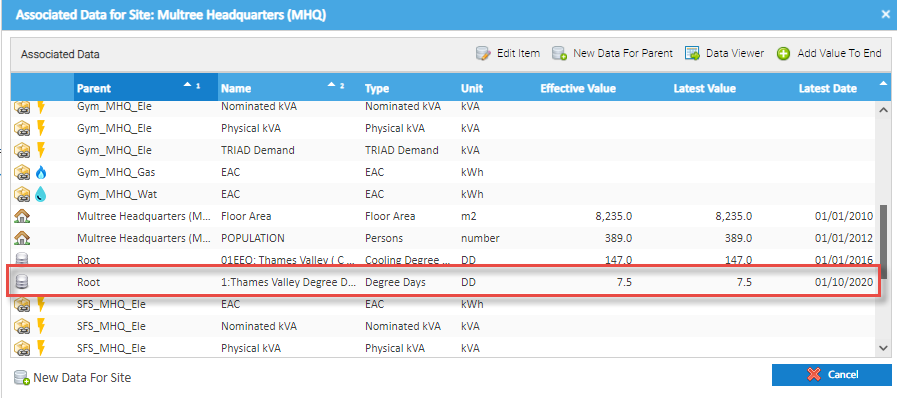
The Associated Data pop up appears, showing the Degree Day is at Root Level (but has been copied and paste linked to this Site)
Click here for more information on the Estate Management Associated Data option
...