...
Once the file has been loaded, you can then managed the Batch, working through the Bills checking those that have failed Validation.
For more information on how to load a batch, click Loading EDI Files.
Opening EDI Batch Management
...
Note: If you chose to automatically accept the Batch when loading the File in EDI Batch Load, and it has passed the Passed Bill Threshold, this will automatically have been be done
![]()
- Click
to Accept the Batch
- Click Accept
- Click Yes
- Click X to close the pop up
...
The header gives details regarding the Batch:

| Field | Description |
|---|---|
| Batch ID | A unique ID |
| Original File | Name of the file |
| File created | Date file was created |
| Interchange ref | Defaults to 1 |
| Loaded by | Shows who loaded the File |
| Batch number | The Batch number created for this file |
| Provider | The Provider chosen when loaded the file |
| Contract ref | A reference in the EDI file |
| File version | Defaults to 1 |
| Loaded date | The date the file was loaded |
| Save to Document Library | Yes/No (dependent on the choice made when in the Batch Load Activity) |
| Automatically Accept | Yes/No (dependent on the choice made when in the Batch Load Activity) |
| Passed Bill Threshold | The % figured added when in the Batch Load Activity |
| Load Passed Bills to Account | Yes/No (dependent on the choice made when in the Batch Load Activity) |
| Notifications Enabled | Will show Error, Completion or both (dependent on the choice made in the Batch Load Activity) |
| Batch has been accepted | Shows either Batch has been accepted or Batch has NOT been accepted |
...
Exporting and Filtering
![]()
Filtering
- Click
 to filter
Exporting
- Click
 to export the data
Working through the Queries and the Failed Bills
Filtering
Use the Filter option if required.
Export to Excel if required.
- Right click on the Bill > View Status Notes to see what the bill has failed on
- Use Bill Entry to investigate Sigma on previous consumption, costs, etc.
...
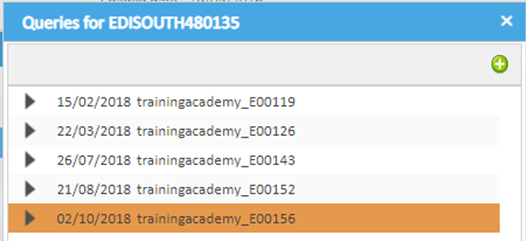
Queries in orange are open, Queries in white are closed.
...
Appending a Query
- Right click on the Bill > Edit Queries > Edit Account Queries
- Right click on the Query > Append Query
This will open the Query Editor and show the appended date and User appending the Query
- Append the Query
- Click OK to close
...
- Right click on the Bill > Generate Queries > Generate Account Queries
- Tick to append the details of the failed valuation
- Choose the Originator
- Choose the Category
- Add the Query value (following the guidelines).
- Add your own information to the Query Summary (following the guidelines). The Batch number and the Invoice number will show in the
- Click OK
- Right click on the Bill > Toggle Status
Changing from Query or Credit to Passed (no action required)
...
The Validation Results Popup appears to show what validation the Bill has failed on:
- Click Save to show the Choose Option pop up. You can either choose Query or Override
Overriding Validation
- Click Override
- Choose the User
- Enter the Password
- Enter the reason for the override
- Click OK to close and the bill will change to show as Passed
Querying a Validator
...
- Click Load passed Bills to target Accounts
All will change to
...
- Right click on the Batch name > Edit
- Rename the Batch in line with the previous batches
- Click OK
Top Tool Bar Options
...
- Right click on the Bill
- Choose View in Account Context
- Click
...
- Bill Entry Original
- Bill Entry
- EDI Account History
- Validation Management
- EDI Batch Management
- Reporting
- Analysis
Alternatively, click on one of the Tabs to view data at a Site Level:
- Site Summary
- Supply Point
- Acocunts
- Meter & Channels
- Click here for more information on the Estate Management Activity
...
- Highlight the Batch in the Item Finder
- Click on the Column Header > Columns, then add/delete as required
Viewing the EDI file in the Document Library Activity
...
- Open the EDI Files Folder on the right hand side to see Year, Month and Date files to see any EDI Files that have been saved
- Right click and Open to download the File if required