Sigma Online User Manual
Meters and Channels- Creating both Periodic or Non Periodic
When a Site and a Supply Point already exist, the Meter can be created and then connected to the Supply Point.
To add Meter Readings or Consumption values, you will also need to create a Non Periodic or Periodic Channel.
Important Information
Note: If you want to use Reports from the Best Available Data View, you will need Supply Points with the following: If you do not have any of the Items set up, click here for details on how to: Or if you have partially set up the Items:
Creating the Meter
- Open the Estate Management Activity

- Highlight the Site in the Data Selector
- Search for and highlight the Site in the Data Selector
- Click New Meter
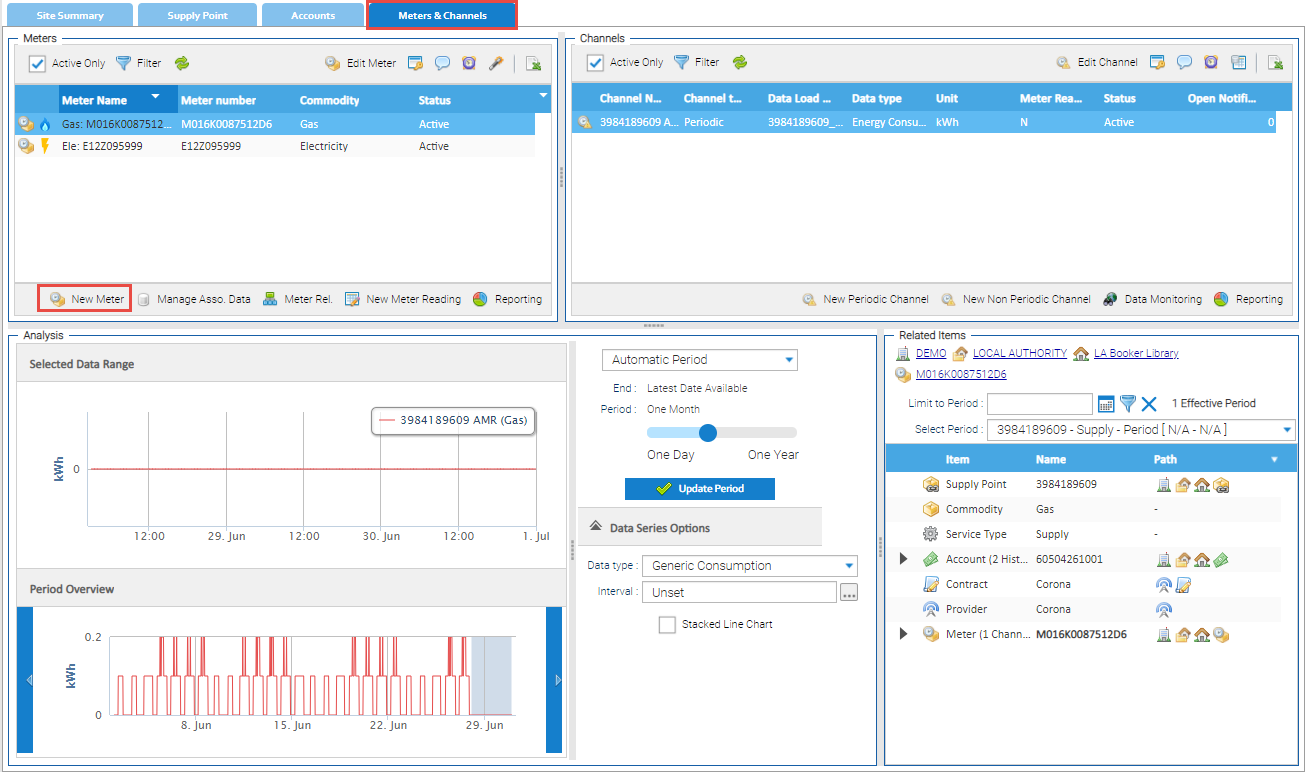
From the popup, select from:
- Meter
- Sub Meter
- Virtual Meter
- Click OK to open the Meter Editor popup
- Complete as follows
- Enter the Meter Name
- Enter the Number (usually the same as the Meter Name)
- Enter the Identifier (usually the same as the Meter Name)
- Enter the Location (if known)
- Choose the Commodity
- Choose the Meter Type
- Choose the Asset Type (defaults to None)
- Or choose from Assets such as Fiscal Grid Import, External Lighting, Small Power, Heating/Cooling Pumps
- Choose the Parent Meter (defaults to None)
- Choose from the Dropdown or use the Magnifying Glass to search for the Parent
- Tick Use installation date (if required)
- Enter the installation date
Note: For more information on Asset Type and Parent Meter, click here to view the Glossary of Terms & Conditions
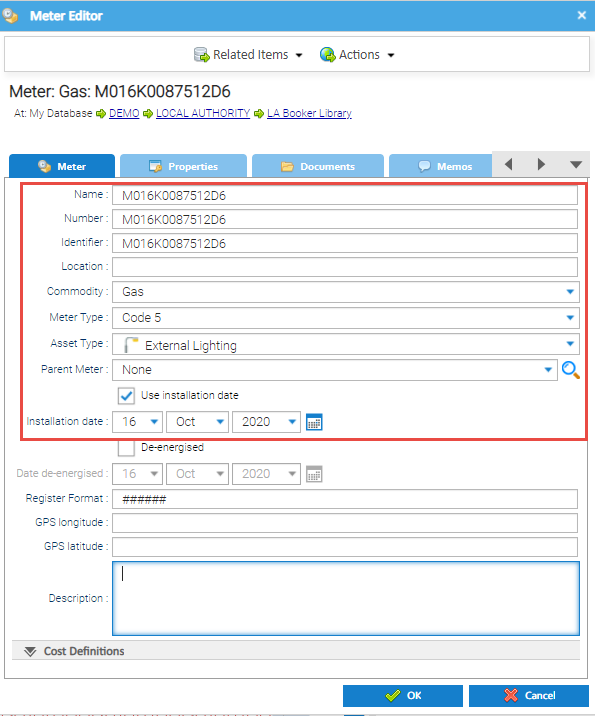
- Click OK to save the Meter
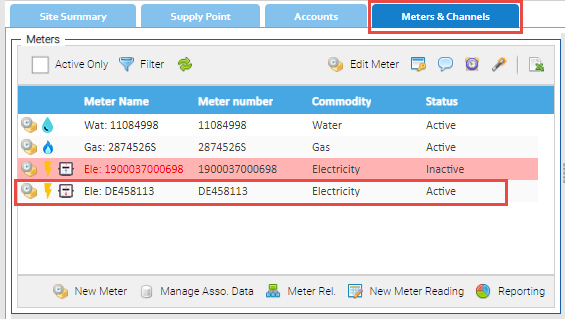
The Meters & Channels Tab will refresh to show the newly added Meter
Adding a Periodic or Non Periodic Channel
To be enable you to add Meter Readings or Consumption values, you need to add a Channel.
A Non-Periodic Channel is used for ad hoc meter readings, for example where the meter is read as and when required.
A Periodic Channel is used for regular readings or consumption values such as Half Hourly Data.
From the Meters & Channels Tab in the Estate Management Activity:
- Highlight the new Meter in the Meters section
- Click New Periodic Channel (or New Non Periodic Channel)

The Channel Editor pop up appears. Enter the following:
- Name - usually the Supply Point Number, or the Meter Number
- Data Load ID 1 - used when importing data automatically (no need to change if you aren't importing automatically)
- Data type - defaults to the common one for the commodity, choose from the dropdown if this is not correct
- Time Zone - Best practice is either GMT or Europe/London, depending on whether your data includes the clock change data or not (ie 1 hour extra in October, 1 hour less in March)
- If you data does NOT include the clock change data, use GMT
- if your data DOES include the clock change data, use Europe/London
- Unit of Measurement - defaults to the common one for the commodity, choose from the dropdown if this is not correct
- Channel Data Quality - leave as Primary, or choose from the dropdown
- Data Source - choose from the dropdown.
- Meter Readings - tick the box if you are recording Meter Readings (unticked will record as consumption values)
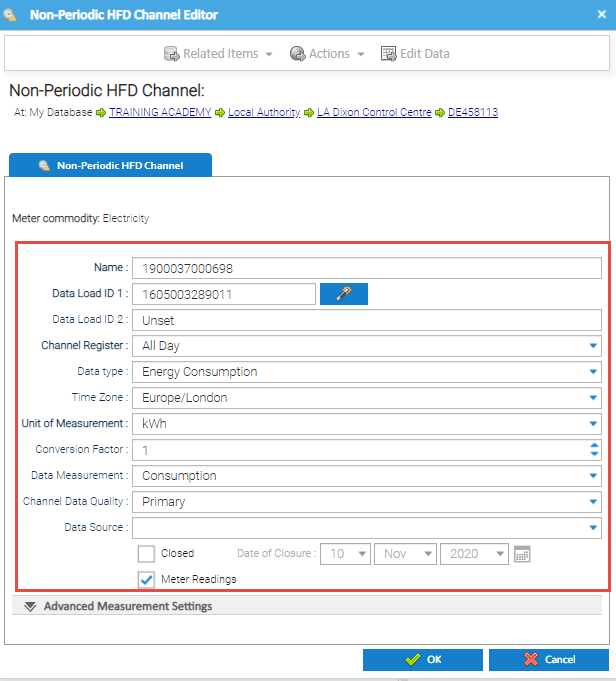
- Click OK to save
Validation Failures
Once you have clicked OK, you may get a Validation failure message. For example, if the same Data Load ID is used.
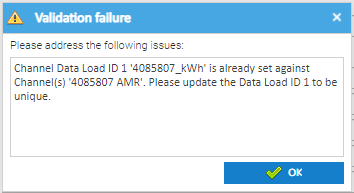
- Click OK to return to the Channel Editor
- Amend the data and click OK again to save
Refreshing the Data
To see the newly created Channel in the Meters & Channels Tab:
- Click
 Refresh in the Channel section
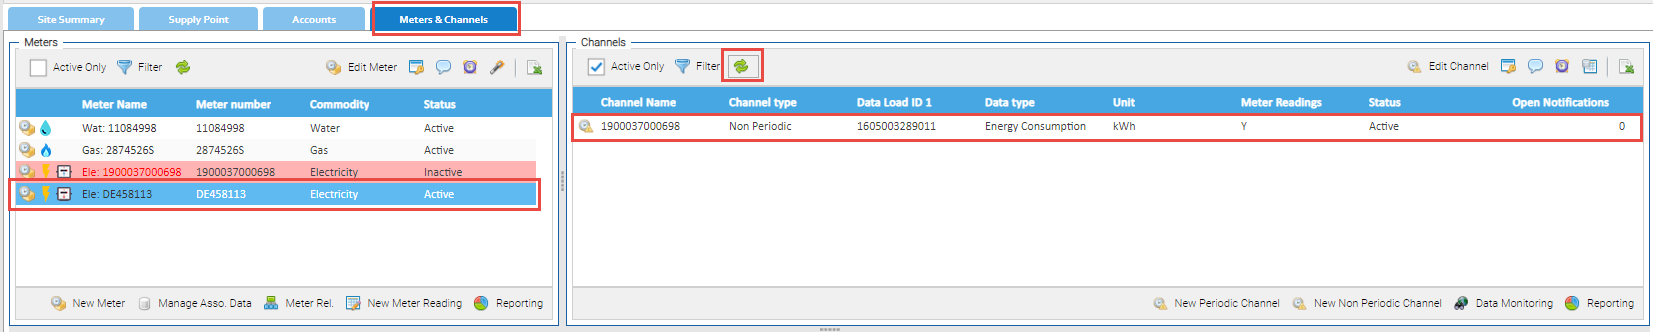
The newly created Channel (Periodic or Non Periodic) is now connected to the Meter
Adding the Meter to the Supply Point
Now that you have created the Meter (and Channel), it will need to be connected to the Supply Point.
From Estate Management Activity:
- Click on the Supply Point Tab
- Highlight the Supply Point
- Click Manage Contracts For Supply

The Manage Contract for Supply popup appears:
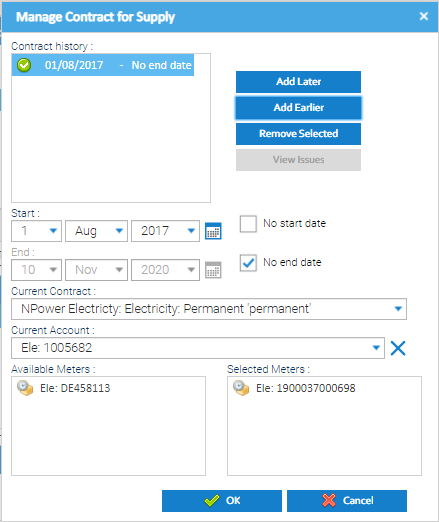
- Drag and drop the new Meter from the Available Meters section to the Selected Meters section
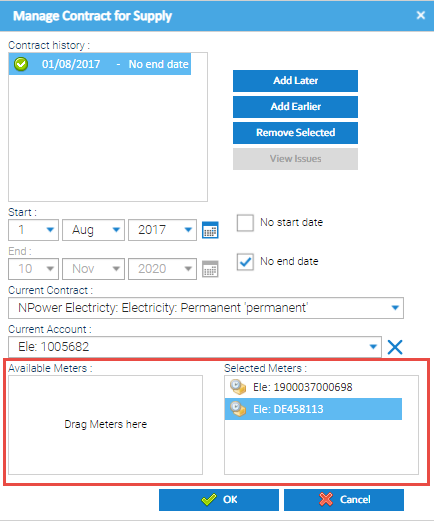
- Click OK to save
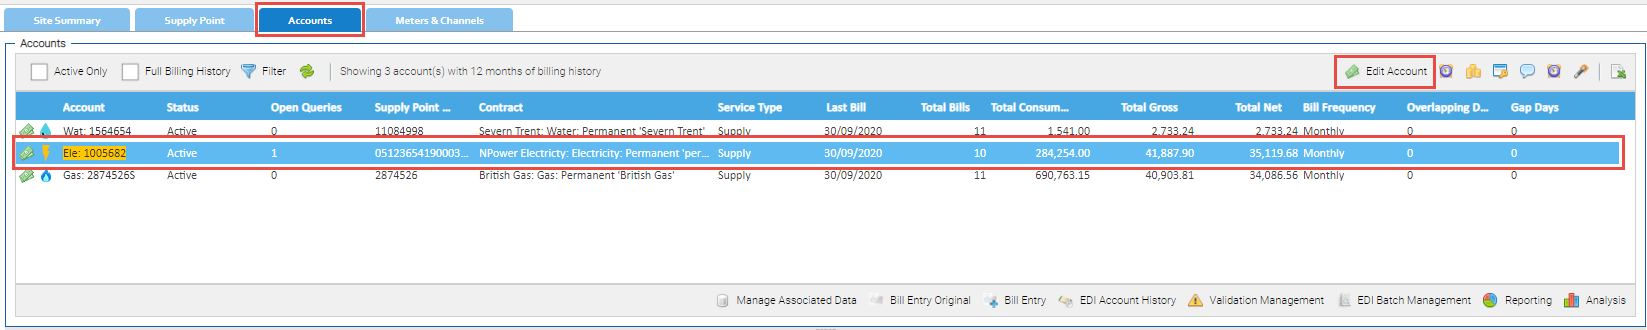
Adding the Meter number to the Account
If the Account exists, the Meter number can be added into the Account Editor. This is required for certain Validators.
From Estate Management Activity:
- Click on the Accounts Tab
- Highlight the Account
- Click Edit Account to open the Account Editor
- Add the Meter number in the Meter number field
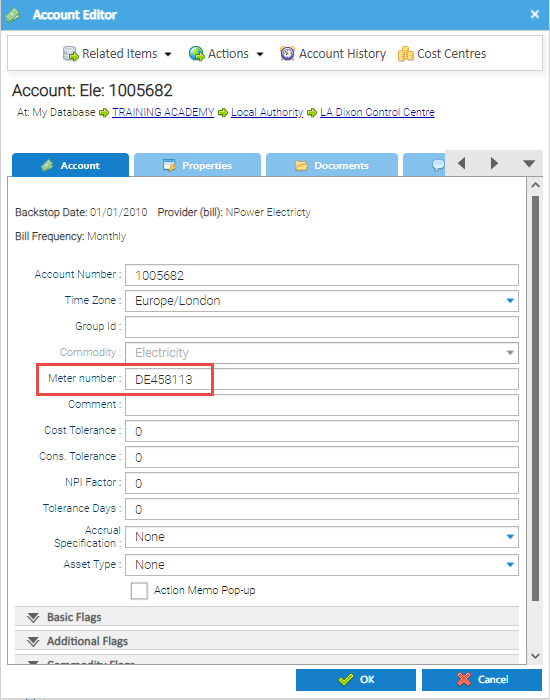
- Click OK to save
If the Account doesn't exist, and you want to add it, click here for more details on Creating Accounts.
@ Copyright TEAM - Energy Auditing Agency Limited Registered Number 1916768 Website: www.teamenergy.com Telephone: +44 (0)1908 690018